This is a guest contribution by Seattle-based sound designer Chris Burgess. Chris has been working principally in game audio for the last several years to support his “healthy” addiction to synths. Recently he’s worked on Guild Wars 2, Middle-earth: Shadow of War and République.
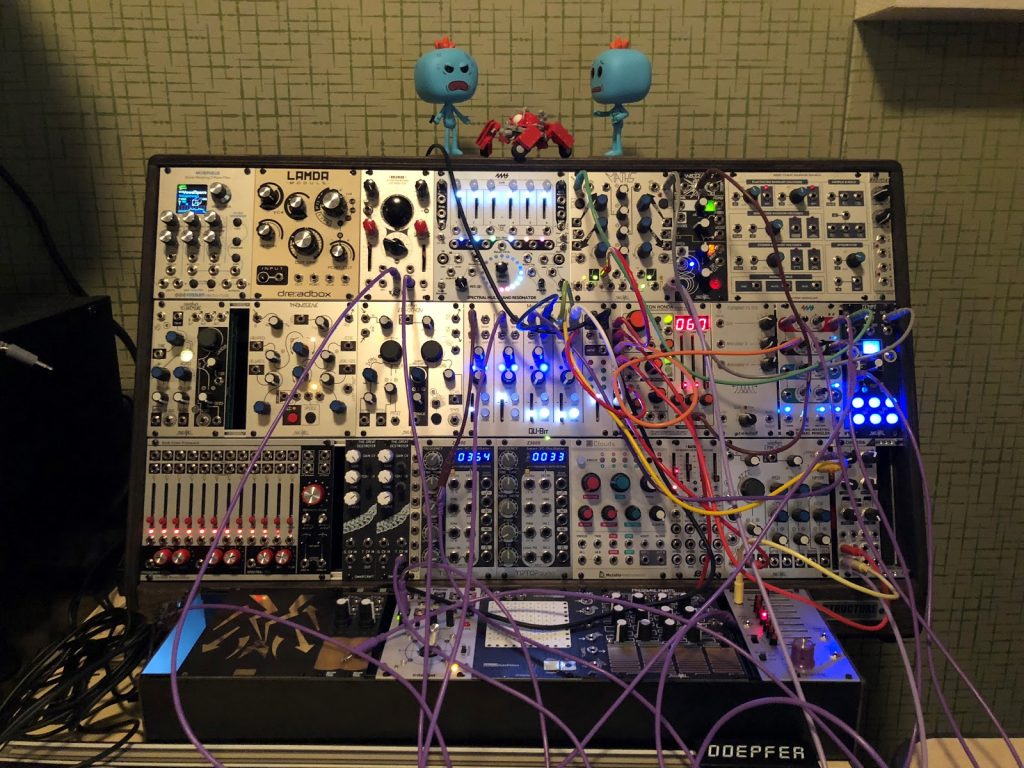
I built my first modular system about seven months ago and dove in with an understanding of synthesis and signal flow, but not a lot of knowledge about modular synthesis. Specifically in regards to what kind of modules exist and what utilities are required to run them.
Having promised others I would document my lessons learned, this month’s theme seemed the perfect motivator to take a moment and put into words the pros and cons of my modular system. Some things I wish I’d known when initially choosing which modules to purchase.
Also a shout out to Jerry Schroeder, a fellow sound designer at ArenaNet, who collaborated on writing and editing this article.
First, what is it for?
I did not know to ask this question when I started. I simply knew I wanted a modular system.
But stating that you want a modular system is too broad and too dangerous for your disposable income (or worse yet, rent money!) because there are near infinite combinations and directions in the kinds of modules available for purchase.
So, ask yourself, what do you want to do with a modular system?
Do you want your modular system to function as a source of creation or modification. In other words synthesis or effects processing or a combination of both.
It’s worth seriously considering this question to help focus what modules you want to purchase, rather than buying random units and ending up with something that, while fun to noodle with, may not grant you the depth and flexibility you want down the road. That is, assuming this modular unit will be integrated into a commercial workflow and not just a novelty. Toys are great (and I would argue necessary!) but I learned some hard lessons about buying only modules that seemed the “coolest” and not knowing about the less-sexy utility modules needed to run everything (which ended up costing much more money in the long run).
So let’s look at some fundamental modules needed to get started.
POWER
Each module requires a certain amount of power to run it with the exception of some passive modules. Some modular synth cases have built in power supplies and those that don’t, can be equipped with power supplies utilizing an outlet adapter and a ribbon cable to plug in/power other modules for the case.
I chose to buy a large case with a built in power supply, hopeful that I could fill the case with modules and not have to worry about measuring the required power for each module. Some of my carefree attitude was due to the fact that I found it difficult to find documentation on how much power my case would actually provide. So I just started plugging things in and hoped for the best.
The cautionary tale here is that underpowered modules can start to behave in odd ways. So far, I have only experienced one power-related issue with a TipTop Audio z3000 digital oscillator, which started drifting in tuning after I installed a power-hungry Verbos Bark Filter on the same power rail. Moving the oscillator to a different rail of the case fixed the issue.
For those of you who wish to take a more measured approach, I suggest using modulargrid.net which allows you to select a case and insert retail modules to calculate how much rack space and power will be required to run your modular system.
I have also created my rack there as a reference.
I/O
Modules typically have an output, and sometimes an input depending on their function, which will be routed to some sort or input/output unit or array (like a mixer).
The reason not to go straight from the modular’s output to an audio interface input is: modular signal level.
Modular level is a 10Vpp (volts peak to peak) signal which supports CV (control voltage) which operates on a +5V/-5V scale.
Line level, the signal level an audio interface will be expecting, is 2Vpp. The level difference, if my math is correct, is roughly 10dBu. The point is, to have an output module that will translate the modular level from 10Vpp down to 2Vpp for an audio interface. Conversely, if we want to run external audio into the modular, we need an audio input with an amplifier that can boost the line level signal up to modular level.
These I/O modules can take the shape of a simple stereo in and out with volume attenuators, or a large mixer with multi channels summed to stereo with panning and send capabilities.
A simple stereo out module is fine if you see yourself wanting to record one sound at a time and being able to route your audio path in series to the final audio output.
However, having the flexibility to mix signals in parallel and sum before going out to an audio interface, as well as routing the mixer’s output back into other modules becomes very valuable in the long run (and to state the obvious, if you are using your mixer’s output to route back into other modules make sure you have another means of I/O to your recording device).
All this to say, giving yourself room to creatively path your signal will be useful in the long run. Typically the more time I spend creating patches the more complex (or convoluted) the routing becomes.
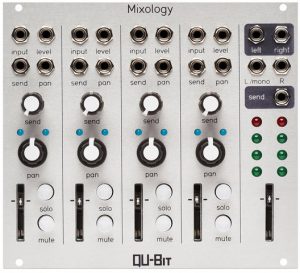
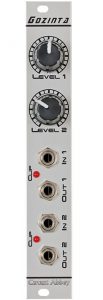
Currently I use a Qu-Bit Mixology four channel mixer and a Circuit Abbey Gozinta amplifier to bring incoming line level signals to modular level.
MULTIPLES![]()
Speaking of convoluted, you will need multiples or mults. Mults are small modules that let you duplicate an input audio or CV signal multiple times. The next section will cover modules that output control voltage signals, which are my primary use case for mults.
GATES, ENVELOPES, AND LFOs
One of the reasons modular systems are so appealing to sound designers is their tremendous routing flexibility. Creatively modulating parameters of a module allows for truly interesting results that can be difficult to achieve within a DAW . But in order to do this effectively, we need modules that spit out CV signals. Common examples of modules that do this are ADSR Envelopes, Gates, and LFOs.
Without some of these tools at your disposal, you will most likely be relying on your hands to turn knobs and effect the sound. These CV modulators offload some of the manual work of turning a modules volume, pitch or pan up and down and free your hands for expressing something else.
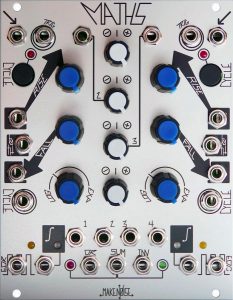
My main envelope generator is Make Noise Maths, which can self cycle envelopes (in other words, it does not need a gate signal to trigger an envelope cycle) and it outputs attack and release as well as gate signals. It has been a flexible all in one envelope generator with deep functionality allowing me to attenuate outgoing voltages and internally route envelopes to create interesting patterns.
RANDOM
Beyond modulating or triggering modules with a good old periodic waveform, every now and then we like to get random and there are plenty of modules out there to fit the bill. I don’t have a ton to say here except that some modules sound great when they’re allowed the room to wiggle a little and random sources are usually a great way to bring out that lively/organic character in many modules.
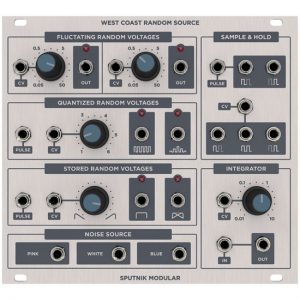
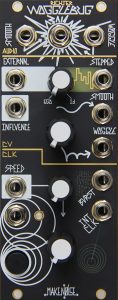
My two go to random sources are the Make Noise Wogglebug and the Sputnk Modular West Coast Random Source. Initially I assumed one random source was as good as another, but diving into the previously listed modules, I have to admit there are multiple shades of freaky. While the Wogglebug feels out of control most times (probably from my lack of user knowledge) the WCRS feels more controlled and lived in. WCRS’ randomness drunkenly stumbles upon a predictable trajectory while the Wogglebug is more erratic and unpredictable. Random food for thought!
CV SCALER/ATTENUATOR
Remember that +5/-5 Volt scale I mentioned earlier? Modules that output these 5 Volt CV signals often send out the full 5 Volts, meaning the modulation that will occur to the source will be quite dramatic.
Some modules (Make Noise for example) supply a scaler for the outgoing CV signal and an attenuator on the CV input at the receiving end, allowing greater flexibility to finesse the depth of modulation without any additional processing.
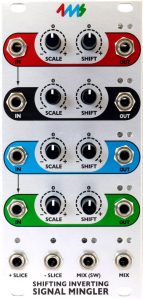
When this feature is not present, you will be sending the full CV signal and this is when it is very handy to have a dedicated CV scaler. Referring to my random section and the idea of “wiggling” I often find my favorite sounds and texture come from a lot of very subtle random modulation over time.
My go to is a 4ms Shifting Inverting Signal Mingler (SISM):
CONTROL SURFACES
If you were holding out for the fun, this is it. For performing sound in an expressive manner I have found that a variety of touch controllers are great.
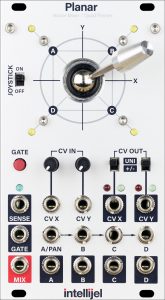
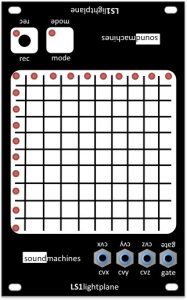
First, I chose the Mutable Instruments Ears module, which is a contact mic with a built in envelope generator. It outputs a CV envelope of the signal received by the contact mic, allowing for interesting gestural control of other modules. An Intellijel Planar joystick and a Sound Machines LP1lightplane touch control module round out my control surface options. Having these zero latency, tactile interfaces has been pure gold for translating interesting and expressive gestures into control signals.
![]()
DESIGN ADVICE
Try to avoid recreating gear you already own. I happen to already be a synth nut and have several traditional synths of the east coast school. So it does not make sense for me to keep purchasing traditional sounding synths in the eurorack format.
For me it has been great to try and keep purchases as abstract and effects focused as possible. As much as I want to live out my Tangerine Dream wanna be fantasies, I find the modules I buy for nostalgia’s sake are usually the ones that end up collecting dust the fastest.
WORKFLOW
Once you initialize (unplug all patch cables) the sound is gone. It’s good to understand the ramifications this will have on your workflow. I end up sampling for hours building a library and trying to account for whatever variations I will need in the future. Though as I become more familiar with routing tricks and possibilities, I find myself plugging in for one off sound opportunities where I need some speaker ripping sound performed to picture.
KNOW THYSELF
And by that I refer to your patience level with programming synths. I know I personally hate menu diving on hardware, so that is where I draw the line in my purchasing. I try to avoid setting myself up for failure and wasting money on something even if it sounds really really cool, but I am realistic about knowing I will hate it for the way I have to interact with it.
WHY HARDWARE
I got to hear Randy Jones from Madrona Labs showing off his Sound Plane and one thing he said that stuck with me is that we are using office gestures in a creative medium (referring to the marriage of a computer typing keyboard with a mix console).
I’ve found that my modular synth and hardware in general is an escape from this that I personally love. It’s not always the right tool for the job or the scope of a project, but making opportunities to record and be fully engaged with a physical embodiment of your sound is extremely fulfilling.
If anyone is looking to get started in this mad world of modular synthesis, my condolences to your bank account and I hope I’ve provided some enlightening nuggets to help you with your quest.
GO TO MOVES
Envelope Followers: If you’re looking to process external audio through effects modules, I’ve found having an envelope follower to be invaluable. Using car bys and sounds with interesting amplitude envelopes, that would be difficult to recreate with a simple ADSR envelope generator, is a great tool for pushing effects modules to their limits.
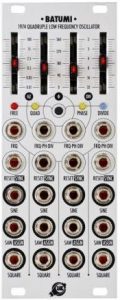
LFO with frequency Divider: (See Batumi LFO pictured under Gates, Envelopes, and LFOs). This is my modular recreation of automating a tremolo plug-in’s rate (ala mondomod). If you run an envelope into the LFO’s frequency divider you end up changing the LFO’s rate with the rising/falling of the attack/release of the envelope.
Wavetable oscillator/external audio processor: If you’re looking for the gateway to speaker ripping, can opener, garbage disposal sounding nonsense, then I would recommend a wavetable unit. The Harvestman Piston Honda MkII has been able to trash some sounds with it’s aggressive set of wavetables and it has an external audio in.
PURCHASING
I wish I had a sweet answer for this one, but unless I’m close to a synth shop, I’ve mostly found myself trolling youtube demos for hours trying to weigh the benefit of a module’s sonic possibilities. The best advice I can offer is to be willing to sell modules you’re not satisfied with. I have been a bit of a gear hoarder, but have known people who maintain a small rack and efficient rack by unabashedly letting go of gear they realize they don’t need.
CATALOGING
Once I find a patch I am happy with, I record a set of variations with variable length, pitch, and effects. The same way I would record objects in the real world if I’m performing an asset recording session (metal impacts, cloth movements, etc) getting variations of different intensities/gestures and then moving on.
Ideally, if I stick to this organization style, I can snip out these regions and bounce them tagged with metadata and in the library they go.
I don’t spend a lot of time editing these assets down because I don’t want to spend all day cataloging. I grab just related sounding files and trying to keep the file length under two minutes (for the sake of scrubbing through it later). It’s not the most granular cataloging, but it is the compromise I’ve made with myself to make sure I don’t drag my feet cataloging a session at the end of the day. Avoiding the backlog at all costs.
HAPPY PATCHING
Thanks for reading and I hope there are some useful tidbits in here for anyone looking to jump into the modular world. Feel free to hit me up if further questions arise or you’re just looking to nerd out on some wacky synths.
A big thank you to Chris Burgess for taking the time to pen this piece. For more on this subject, check out this episode of Tonebenders.