Games and other interactive media put us in faraway worlds with unique characters, let us touch them, and delight us by showing us they know we’re there. In addition to visuals, sound effects, and gameplay, we have the unique opportunity to let people interact with the music. In this five-part, weekly tutorial series, we’ll go step by step through the process of making an interactive music system in Unity. All source code is included, and permissively licensed (MIT license, which basically means do what you want with it!).
Oh, and speaking of code, you can find it here.
Lesson 0 – Designing an Interactive Music System
In many cases, it’s appropriate and desirable to approach scoring an interactive project as you might approach a film–composing a linear score and synchronizing it with beats in the timeline of the experience. Game audio middleware gives you great tools for this approach, and some additional goodies for mixing and matching stems, playing stingers, and crossfading between cues on musical beats.
On the other hand, taking a non-linear, interactive approach to music can bring an experience to a new level of life, responding immediately to simulation or player input, and even presenting emergent musical ideas the composer didn’t plan. The behavior of the music–in addition to the sound–can be expressive and lifelike. But in order to achieve this kind of music, you’ll need to write a little code.
Anatomy of a Music System
There are countless ways to do interactive music. But it’s helpful to simplify things and make some assumptions. So let’s say that an interactive music system can:
- Play back infinitely
- Respond to user input
- Respond to game or simulation state
Using this definition, this means no matter how long the player hangs around in one area, the music doesn’t end. Additionally, if the user presses a button, the game state changes, or a character does something interesting, the music system can respond to it immediately and sound natural doing it.
One way to make this happen is to work at the level of individual notes and sequences in the game at runtime. This means taking the concepts of the sequencer and synthesis tools in a digital audio workstation and making them work in real time in your game. With this approach, it’s seamless to swap out note sequences and sounds without the need for crossfading. Synchronization is handled by running all of the sounds from one metronome, and lining up individual sequences by bars or sections if desired.
Game Plan
With that approach in mind, let’s break down the components we would need in order to make a music sequencing system. For starters, every sequencer has some kind of clock driving it. From there, some number of tracks define what pitches play and when they should start and stop. Then something needs to respond to those tracks and make some sound. And to make it interactive, we need something to tell the system how to respond to input and simulation state.
So the list of components looks something like this:
- Metronome
- Sequencers
- Sound Generators
- Parameter Mapping
Caveats
This tutorial assumes some knowledge of the Unity3d game engine and coding in C#. The programming techniques employed are intentionally kept simple, and as much explanation as possible will be provided, but teaching Unity and programming basics are beyond the scope of this tutorial. Links to documentation will be provided when possible, and if you’d like a primer on Unity and C#, check out Unity’s excellent scripting tutorials.
For the sake of simplicity, and to offer as gentle a learning curve as possible, we’ll skip some performance optimizations and leave out a few features. The astute reader will notice that things like sample-accurate sequencing, music-synced visual effects, and all manner of interesting synthesis and sequencing techniques are possible by expanding on this framework.
Lesson 1 – Sampler
Let’s get started with our first sound generator. There are many ways to synthesize sound with Unity’s audio system, and each could make up its own tutorial series. To keep it simple, we’ll be making a sampler using some built-in audio components in Unity.
The AudioSource Component
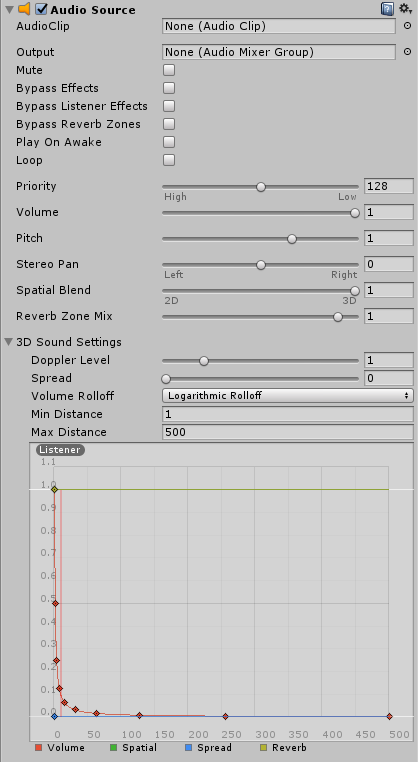
We get a sound generator for free with Unity: the AudioSource component. Its job is simple. It plays an audio file, and has parameters that can be used to play the file at variable speed, direction, and start and end points. There are also options for routing the sound through an AudioMixer, and applying panning and attenuation based on position relative to the AudioListener.

Sampler Voices
The simplest way to use the AudioSource component to make a sampler would be to add one to a GameObject and call the Play() function. But since this is a music system, each of our samplers will likely have multiple notes playing at a time, or at least some overlapping sounds. If we used just one AudioSource, then every time a note overlapped with another, the previous note would stop abruptly and usually cause an audible click (a.k.a. voice stealing). In order to avoid this, we need multiple voices.
Because the AudioSource component takes care of the sound loading and playback, our sampler voice component will be straightforward. Every time we call Play() on the sampler voice, we assign the provided sample to the attached AudioSource and call Play() on the AudioSource.
/// <summary>
/// Plays the provided AudioClip on this voice's AudioSource
/// </summary>
/// <param name="audioClip">The AudioClip we want to play</param>
public void Play(AudioClip audioClip)
{
  _audioSource.clip = audioClip;
  _audioSource.Play();
}
Playing Sampler Voices
Now we just need a way to play the voices. Our Sampler component will create a number of sampler voices, and every time Play() is called on the Sampler, it will pick a voice and play the sound on it. In order to avoid the voice stealing problem we mentioned above, we cycle through voices to give them time to finish playing.
/// <summary>
/// Pick a voice and play the sound
/// </summary>
private void Play()
{
  // Play the sound on the next voice
  _samplerVoices[_nextVoiceIndex].Play(_audioClip);
  // Increment the next voice and wrap it around if necessary
  _nextVoiceIndex = (_nextVoiceIndex + 1) % _samplerVoices.Length;
}
In the code above, we’re tracking the index of the next voice, playing the sound on it, and then incrementing and wrapping the index.
Make it Go!
Now that we have the code we need, let’s drop our sampler in a Unity scene and play some sound.
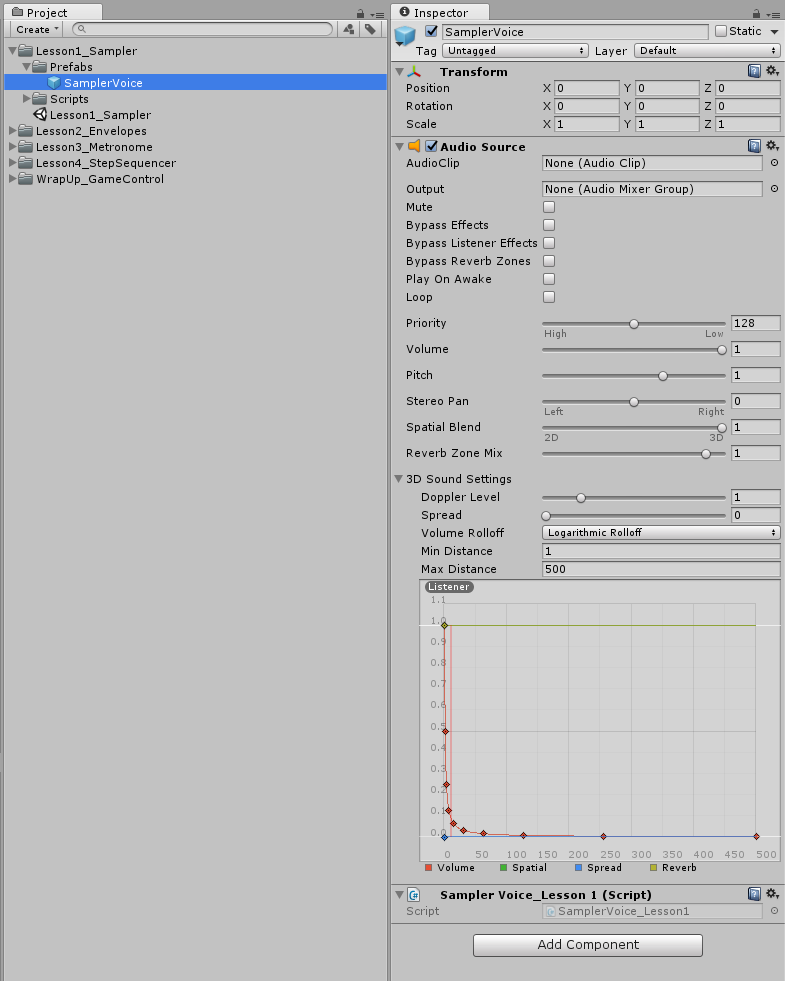
First, create an empty GameObject and attach our SamplerVoice_Lesson1 script to it. You’ll notice that because we used the RequireComponent attribute, it automatically adds an AudioSource component as well. If you want positional sound, you can move the Spatial Blend slider in the AudioSource toward the right. To save this as a prefab, just drag the object into the project pane. You can delete the object from the scene, because it will be instantiated at runtime by the Sampler.

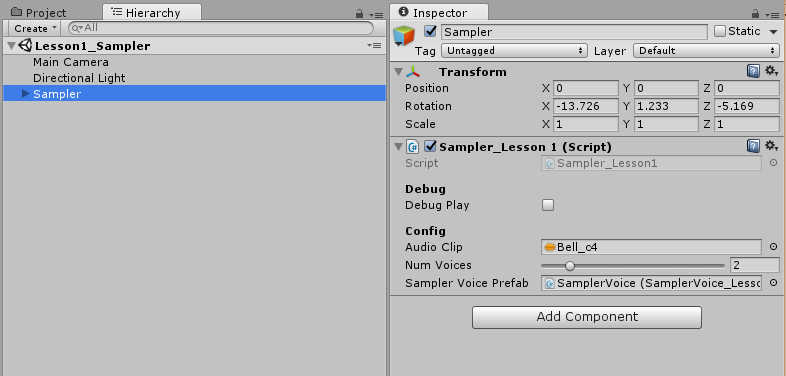
Next, create another empty GameObject and attach the Sampler_Lesson1 script to it. Drag an audio file from the project view into the Audio Clip field, set the number of voices, and drag the sampler voice prefab you just created into the Sampler Voice Prefab field.

Hit play, select the sampler object in the scene hierarchy, and tap the Debug Play toggle a few times. If all went well, you should hear some sound!
Thanks for tuning in! Next week, we’ll cover shaping the sound with volume envelopes.