This is a guest article written by Justin Spasevski, a freelance sound designer and mixer based in Sydney, who is currently editing and mixing “The Celebrity Apprentice Australia”. You can view his credits and portfolio on his website Braided Audio.
When looking into the creative aspects of sound design, I’ve always found it interesting how certain workflows can influence the end result. Sure, most of us have developed methods that work well, but sometimes we need to approach things differently in order to achieve something unique. So in light of this, I’ve decided to focus on an area that is of particular interest to me - the use of touch and motion controls for sound design.
Given recent technological advancements in capacitive touchscreens and consumer-level motion sensors, I have found the tech to be increasingly useful for sound design applications. What makes them so interesting is their unique approach to user input, often adding extra dimensions to the standard ‘click’ and ‘type’ interactions we’re all accustomed to.
In this article, I will demonstrate sound design techniques that utilise touch and motion controls and discuss why they can be a valuable asset to any sound designers’ toolkit. Let’s start with the most popular piece of hardware - the iPad.
iPad
With an ever growing list of 3rd party apps, the iPad’s potential seems to know no bounds. Let’s have a look at some of the more interesting apps and how they can be used for sound design.
Lemur Controller App
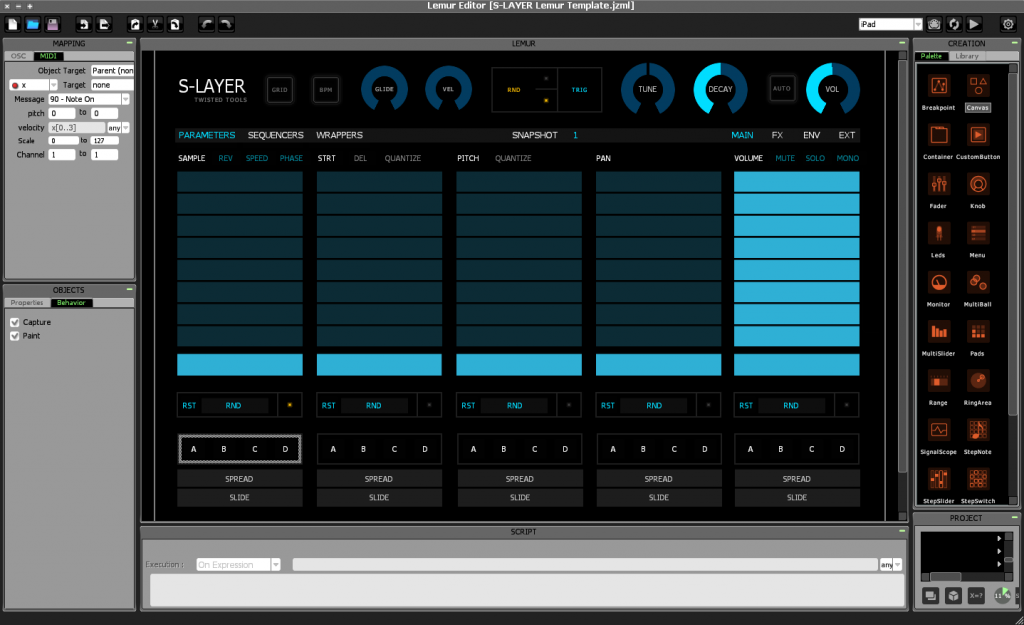
The Lemur App for iPad is essentially an OSC and MIDI controller. What makes Lemur unique is its “Lemur Editor”, a stand alone app for your computer that allows you to build your own custom ‘controller’ interfaces and send them directly to your iPad.
While the editor includes faders, knobs and pads (all of which are pretty standard for your typical MIDI controller), there is also support for HTML5 Canvas. This means that you can design almost anything, from complex shapes to animations, and assign them to MIDI/OSC controls with full multi-touch support. Try doing that on your hardware controller! But how can we utilise this for sound design? Let’s take a look.
By using the Lemur iPad app, I discovered an interesting method of sound design, which I call “subtractive layering”. It first began when I loaded a Lemur template called “Hexapads”. This template (see below) essentially triggers MIDI notes, but unlike the conventional system of piano keys, the buttons are hexagonal and tiled together in a grid-like system.
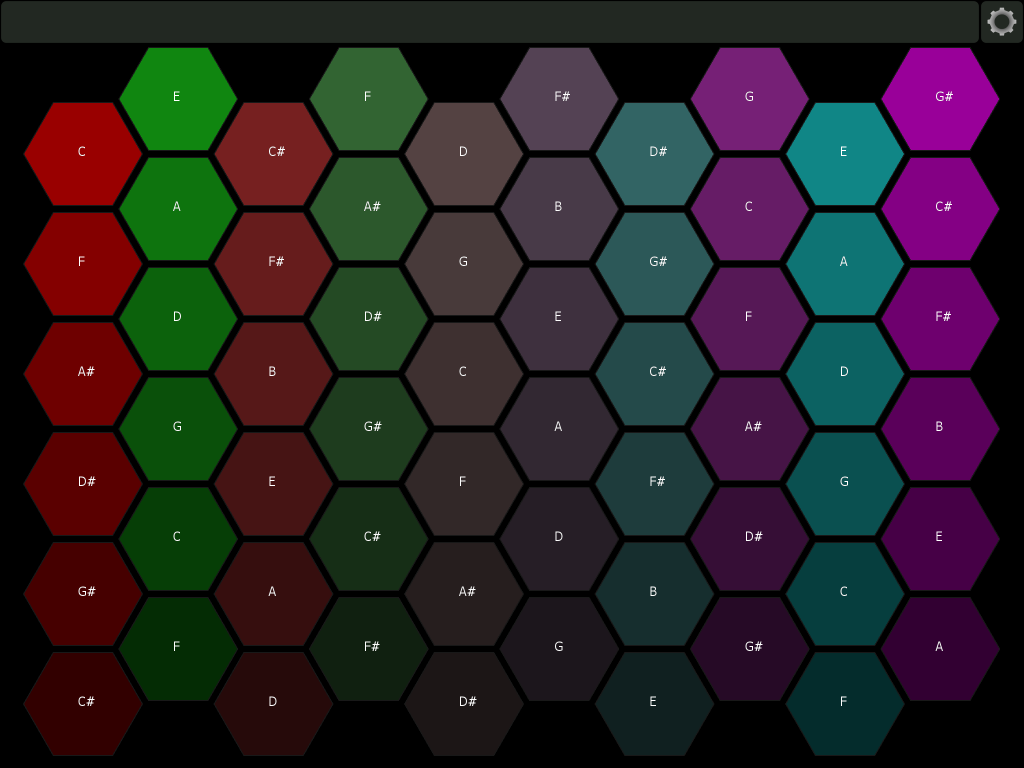
The beauty of this template on iPad is that I can slide my fingers around the grid and trigger a large series of MIDI notes in a short space of time (something which is very difficult to achieve on a MIDI keyboard).
So using this, I decided to try and create the sound of a creature devouring something. I started by grabbing a random selection of around 50 vegetable sounds (crunched, chopped, etc.) and loaded them into a sampler (in this case Kontakt) in no particular order.
I then used the Lemur Hexapads, sliding my finger this way and that, to get a feel for the layered sounds. If I came across a particular element I didn’t like, I would identify the offending sample and simply remove it from Kontakt. I continued to remove elements until I was happy with the overall sound. Hence the phrase “subtractive” layering.
Here is a video of me triggering the Hexapads in real time over some creature vocalisations:
I believe there are several advantages to using this method:
- For one, it gives the user a ‘playability’ to the sound design as you respond to incoming audio elements in real time. In the video, you’ll notice I was more elaborate with a particular chew as I could see the upcoming waveform was bigger.
- Another advantage is that it embraces randomness. You can load any eclectic mix of samples and have fun sliding around the hexagonal grid system to come up with all kinds of sounds.
- But importantly, this randomness is recorded as MIDI data so you’ll have no problem re-tracing / re-working your previous steps.
I could go on about the other capabilities of the Lemur iPad app, from the physics-based X/Y pads to the vast library of user-created templates, but there are still other apps to cover. All in all, I definitely regard it as a powerful tool in my arsenal.
Let’s move on to another interesting iPad app - Samplr.
Samplr
As you might guess from the title, Samplr is indeed a sampling instrument, but unlike other digital samplers on the market, it is built specifically for touchscreens. It is one of the first apps I have seen to truly embrace the potential of a multi-touch input system, allowing the user to manipulate samples in ways that would be impossible with just a mouse and keyboard.
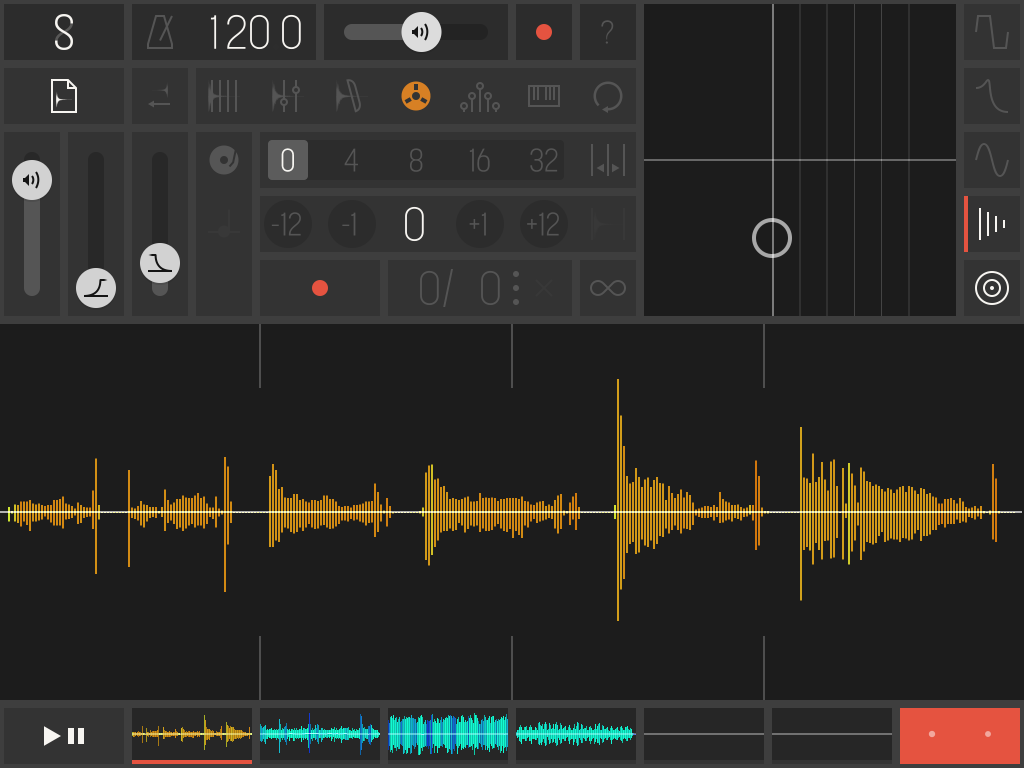
For a brief overview of the interface, Samplr allows up to 6 separate samples of any length to be imported or recorded. Along with all the traditional envelope, pitch and FX controls you’d expect from a sampler, you can also have your sample triggers recorded as automations, and then have them all summed to a final output. But where its strength really lies is in its 8 different play modes, allowing you to interact with the samples in wildly different ways and with 8 voices each (essentially allowing you to use up to 8 of your fingers to trigger a single sample in different areas!).
Let’s take a look at Samplr in action:
For this example, I am utilising Samplr’s “Tape” mode. This mode essentially allows your fingers to control the sample’s playback speed. Dragging to the right plays the sample faster, and dragging to left plays it slower and eventually in reverse. Again, the beauty of multi-touch support means that you can have multiple fingers playing back the sample at different speeds simultaneously.
So, I’ve taken a couple of ambience drones / idling engine sounds and am using Samplr’s Tape mode to create a dynamic spaceship engine, where I can easily control both the acceleration and deceleration with my fingers.
The video will first play the original samples, and then show the Tape mode in action:
The cool thing about this technique is the ease of real-time control. Instead of painstakingly writing automation curves in my DAW, I’ve simply loaded a sample and used my fingers to immediately ‘perform’ the sound to what I would see on screen. Essentially, you could capture multiple ‘performances’, each with their own nuances. Keep in mind this is just one of the 8 play modes that Samplr has to offer, so you really can lose track of time just loading samples and manipulating them in interesting ways.
Note: Just a couple of tips when using Samplr: I’d recommend installing iFunbox on your computer, which is a free file management tool for iPad. It allows you to drag sound files from your computer directly into Samplr, or any app for that matter - a much better alternative than dealing with iTunes.
Also, the iPad’s built-in audio output isn’t the greatest, but you can buy iPad-specific audio interfaces that take the iPad’s digital output and use high quality converters to give you a cleaner signal into your DAW.
Overall, I regard the iPad as a true sound design tool. There are countless other apps out there, and more are being developed every day. I’ll be very interested to see how touch can be further utilised in the future.
Moving on now to another interesting technology - motion sensors.
Leap Motion Controller:
While motion sensing technology has been around for some time, the guys at Leap Motion were among the first to develop an affordable computer peripheral with 3D motion sensing capabilities. The Leap Motion Controller utilises two monochromatic IR cameras and three infrared LEDs to capture movement in a hemispherical plane. Basically, the device can track hand movements in fine detail, right down to specific finger movements.
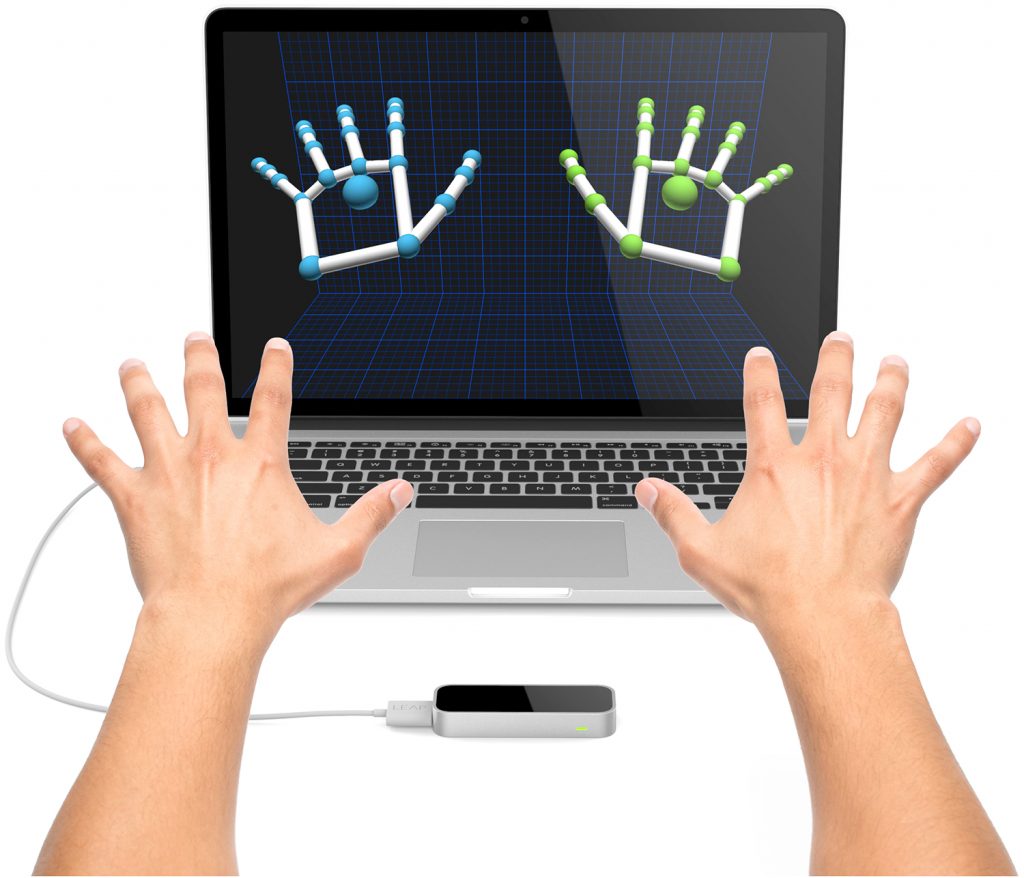
But how can the Leap Motion be utilised for sound design? Well, through the use of 3rd party apps, it is possible for the Leap Motion to analyse your hand gestures and send them to your DAW as MIDI messages.
GECO MIDI is one such program. It works by allowing the user to map CC values to specific hand gestures. The gestures can include things like left-right movement, up-down movement, hand twists, etc. In fact, there are a total of 40 gestures that can be recognised and sent as MIDI data simultaneously. That’s a lot of control streams!
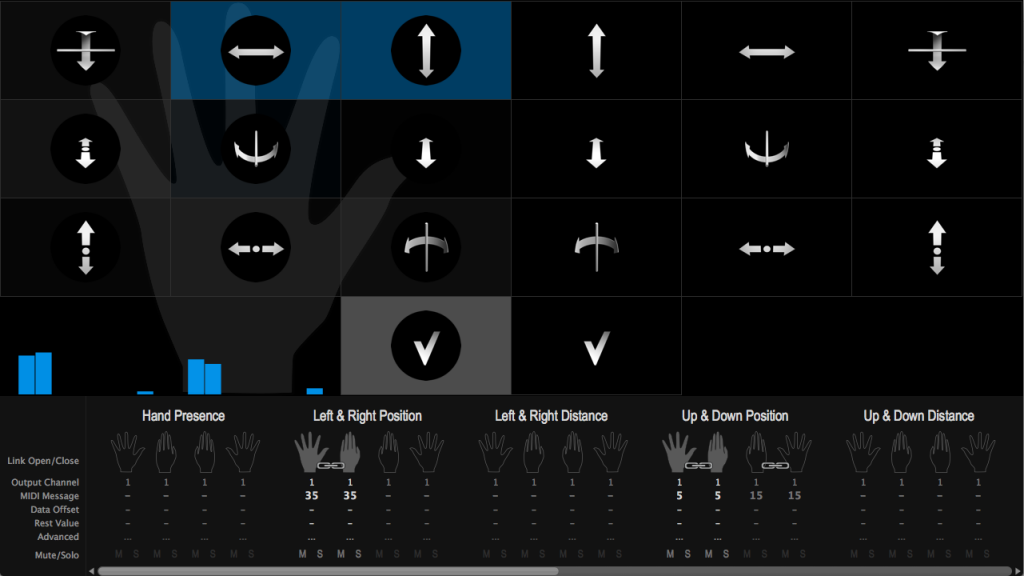
In this demonstration video, I’ve taken a glitch interface SFX and loaded it into Kontakt. I’ve then used GECO MIDI to map hand gestures to a few Kontakt parameters. These were:
Up and Down Position -mapped to-> Volume slider
Left and Right Position -mapped to-> Pitch
Roll Inclination (Twist) -mapped to-> “Drive” parameter of a distortion effect
Once this was set up, I was able to move my hand in different ways to create unique sounds:
Overall, I really like the feel of the Leap Motion. There’s something very natural about creating new sounds with your hands, and I like the amount of variation you can achieve whilst automating only a few parameters. However, I don’t believe the technology is in full flight at this stage. In the future, I’d like to see hardware with even more accurate sensors, as well as further development in the software to bridge the gap between sound and motion.
So there you have it, I hope I’ve been able to shed light on a few alternative methods for sound design. Of course, I don’t believe these techniques will ever replace the tried and tested traditional methods, but I am a firm believer in exploring different workflows and pushing your own boundaries. Any additional tools you have as a sound designer is always a plus and can often give you that fresh perspective on a difficult sound project.
Has anyone else had positive experiences with touch / motion controls? Please feel free to share in the comments section.
great article, love the tip about hex pads. The Leap Motion controller is something I have wanted to try for some time.
You can use Audiomux to record audio digitally from the iPad, no need to buy third party hardware.
Hi James,
Thank you, yeah the Hexapads can be a lot of fun :)
Also, nice tip with Audiomux. Definitely a cheaper alternative, cheers.
Great article! I haven’t played with touch screens much myself (yet). Leap Motion also looks really useful for creative applications. Reading through I remembered this guy. He had project using processing for visualization and a touch screen to create some sort of performance setup (I honestly don’t know how to describe it ^^, but it’s really cool). Check it out:
https://vimeo.com/32096487
Thanks Michael, nice link!
Yeah definitely seeing more and more of this kind of stuff now, it will be interesting to see how it evolves, and how we as sound designers can use it.
I would add the Roli Seaboard. They just announced a 25 key version of their controller and I definitely want to try one.
Yeah the Seaboard looks very cool! Would love to try one as well.
Just saw this on synthtopia – using light via Mac camera to send MIDI.
http://t.co/HC3THqeB54
Cool, yet another interesting app. Thanks for sharing.
Great article Justin, thanks for writing it and sharing with the community. I’m curious how often you find yourself using these tools on real-world projects. Looks like a lot of fun but have you found them to be efficient in getting the results you’re looking for?
I imagine some are more ‘play’ oriented and require quite a lot of time, but from the look of it, others might actually be a faster workflow than the more traditional alternatives. Not having experimented with these tools as much as you have, I’m curious to hear your opinions on this. Thanks again!
Hi Richard,
Thank you!
In terms of real world projects, I’d have to say that I usually default to the more traditional methods of track-laying when time constraints are an issue.
Having said that, I actually find that the ‘Hexapads’ method is quite fast at building a dense soundscape of sounds. I also find it works as an initial ‘broad brushstroke’ that you can fine tune later. It’s also good as a ‘lucky dip’ technique as you can mix all sorts of random sounds and see what you get.
I’ll use Samplr more when I have a specific idea in mind that needs a bit of life. The ‘tape mode’ is quite good for that.
For me, Leap motion is probably the hardest to find an efficient workflow. Would still have a go if time permitted and I needed a bit of inspiration.
Cheers.
Usine Hollychock shouldn’t be left out of this though :)
It is probably the first if not only touch surface daw