Guest Post by Leonard J. Paul
Introduction
To fit in with May’s theme of “destruction” at DesigningSound.org, I wanted to create a patch that demonstrated how Pd (Pure Data) could be used to create interesting sounds of “digital destruction” with a fairly minimal amount of implementation. Hopefully this patch will be helpful for those wanting to learn a bit about Pd.
Just to dive into things, I made a few illustrative recordings of me playing around with the patch to try to get some entertaining samples:
[soundcloud url=”https://api.soundcloud.com/playlists/112103747″ params=”auto_play=false&hide_related=false&show_comments=true&show_user=true&show_reposts=false&visual=true” width=”100%” height=”166″ iframe=”true” /]
I found that using Pd patches worked pretty well for the index file and that switching index files while the patch was running helped to keep things interesting. The recordings are unprocessed to give a good idea of what the patch is capable of. With a bit of mastering and effects they could be used for building blocks for different types of sound design and music as well.
Getting Started
To get things up and running on your own computer, you’ll need to download Pd from Miller Puckette’s site. Extended Pd will also work but it isn’t necessary for this patch. The advantage of making patches with “vanilla” Pd is that they can more easily be used with LibPd in case you want to use them in a game or app in the future.
If you’re new to Pd, there’s a great resource that helps with installation details and basics here: http://en.flossmanuals.net/pure-data/.
Once you’re up and running, you’ll be able to download the entire patch from here: (Download Zip File)
To get any sound out of the patch you’ll need to load in a sound file using the green “Open_sound” button or any other file using the “Open_file” button in the top right, plus you’ll need to load in a file using the “Open_index” button in the bottom right. Hopefully you’ll hear some audio and you’ll be able to start tweaking the sliders, load in new data on the fly and draw into the audio regions. If you happen to load a sound that is mono, just click the purple “Mono” toggle at the top right and you’ll hear the sound out of both speakers. Once you hear a sound you like, you can record it using the red “Record” toggle in the top right. When you’re done recording, click the toggle again and the patch will have created an “output.wav” in the same folder as the Pd patch. If you want to save it for future reference then you’ll need to change the name of the file outside of Pd.

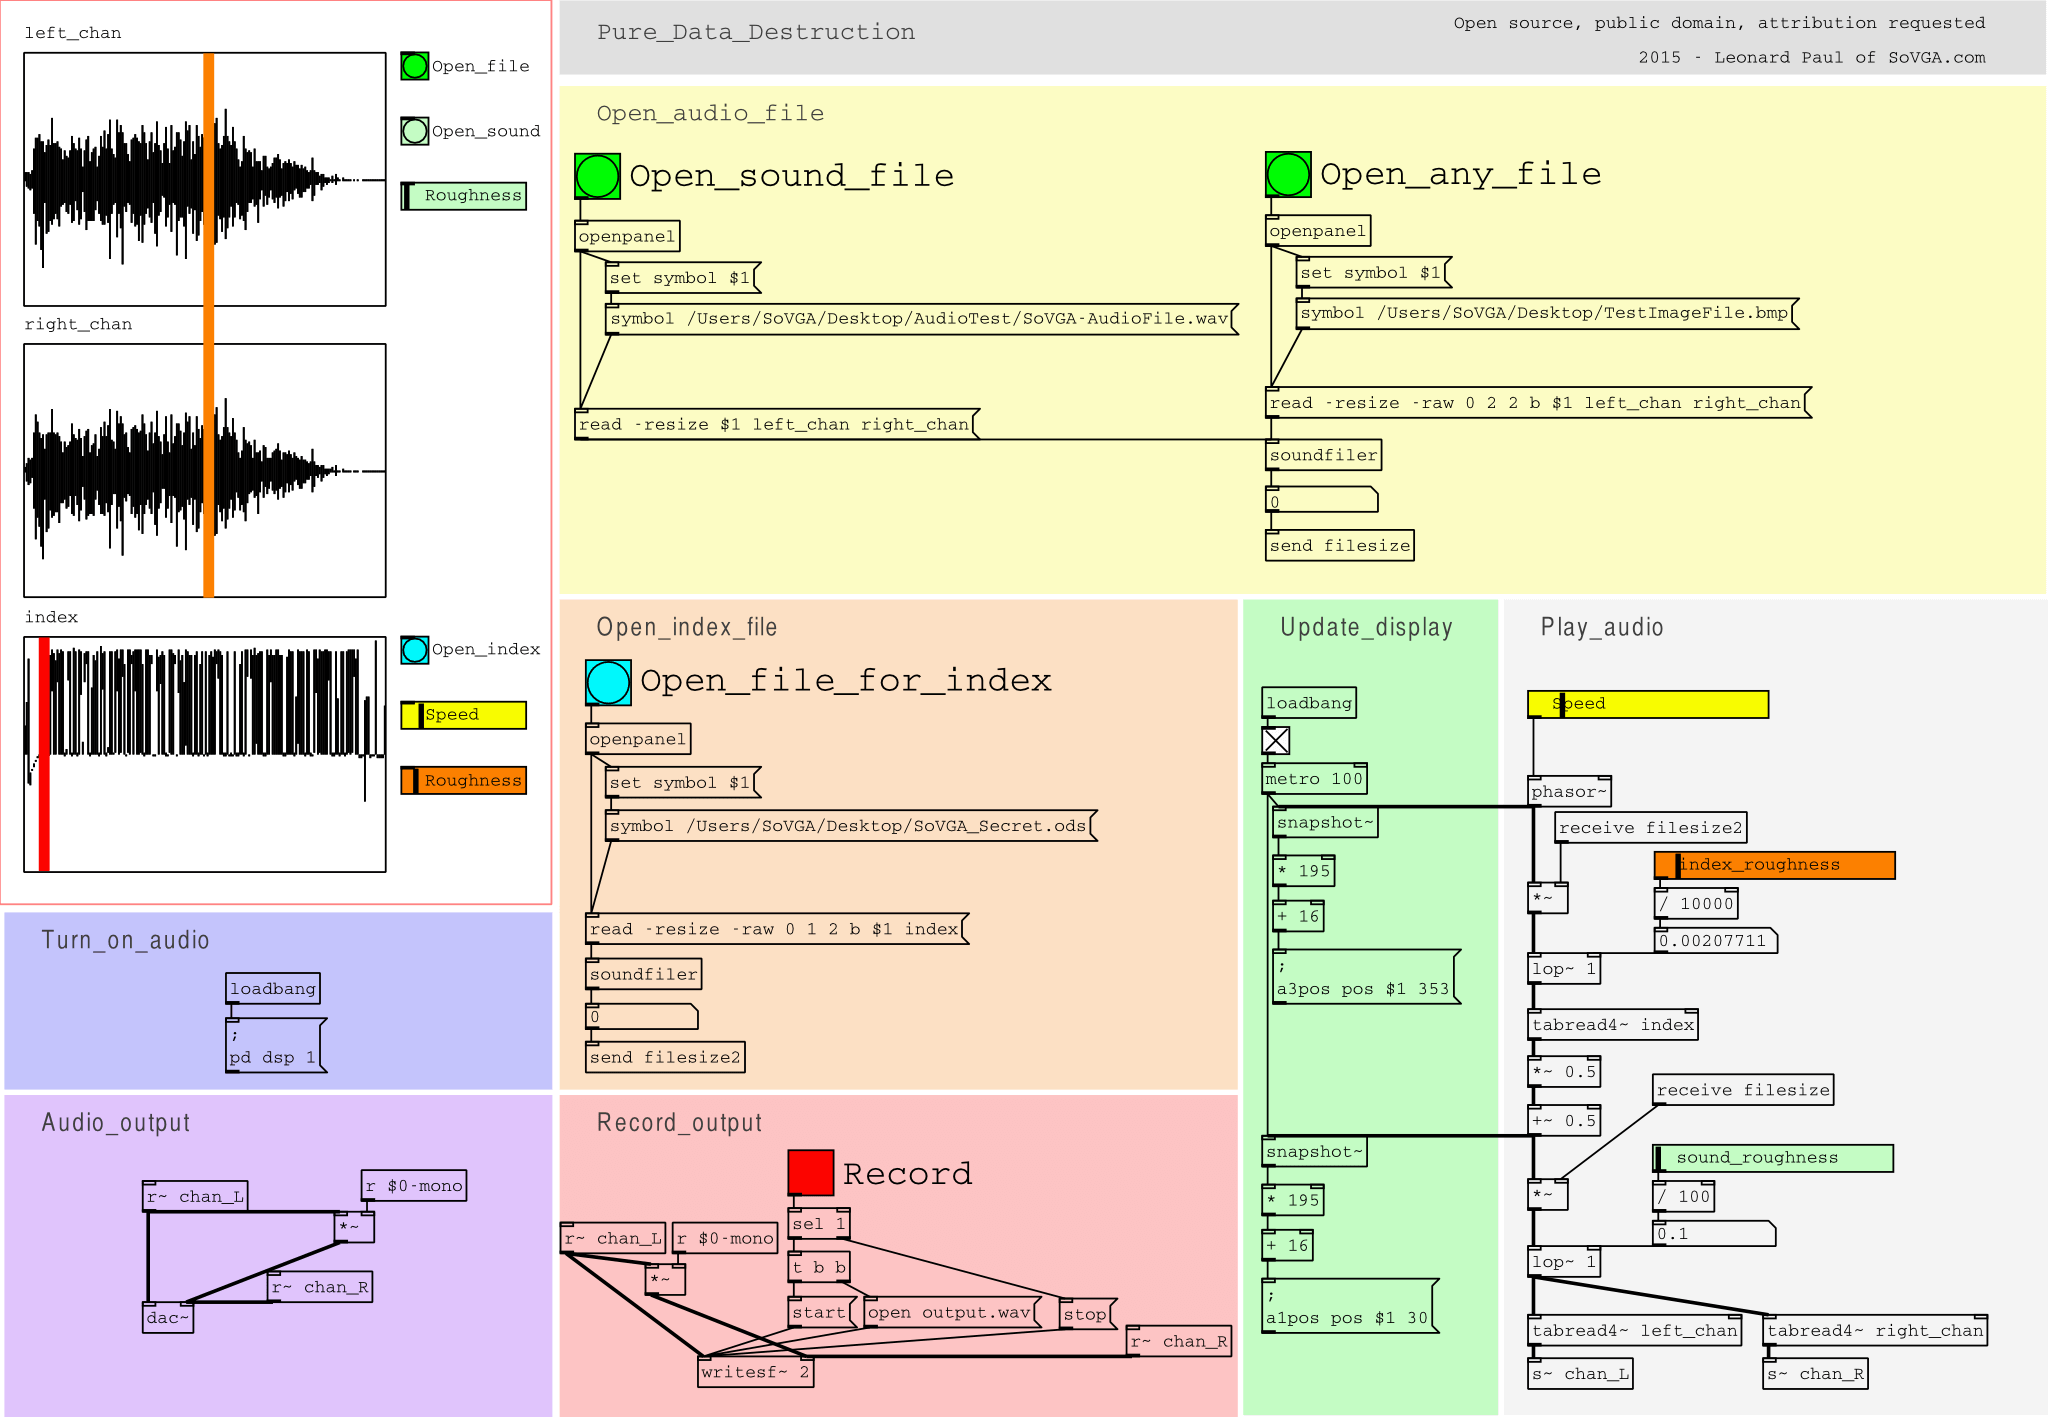
Note that when you first open the patch it will look like the image above since we’re viewing the GUI layer for the patch. If you right-click inside the black box encompassing 90% of the patch and select “open” then you’ll see the main patch. This is a standard technique of hiding the inner workings of the patch implementation so the user isn’t distracted by unnecessary details.
This patch takes an audio file (or any file, including images, spreadsheets or whatever you’d like) and plays them back as audio while the audio playback pointer is dynamically changed by a second data file. So, instead of nicely playing the audio as it was sampled, the position pointer will jump around as defined by the second file which introduces many surprising modulations and sharp discontinuities in the original file.
The patch can be split up into several different subsections (as shown by different background colours) which include updating the display, opening the audio and index files, recording the output, playing the audio, audio output and the overall user interface. The patch is arranged such that the top left section appears as the user interface and the rest is commonly hidden to the user. This helps keeps the visual density and interface more minimal for the user.
Audio Playback Implementation
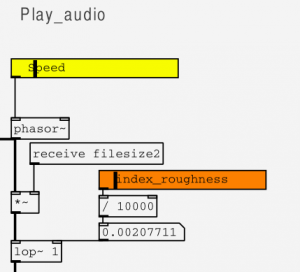
The most interesting part of the patch is the Play_audio section which implements the main audio playback for the patch. Let’s examine this section of the patch from top to bottom and give an overview of what is happening at each stage.

At the top of the Play_audio section, there’s a yellow horizontal slider called “Speed” that varies from 0.02 to 2 on a log scale. The log scale just means that there’s more resolution in the difference of values on the smaller end to give more accurate control over the smaller values. This sets the frequency of the [phasor~] object which follows. The [phasor~] object cycles from 0 to 1 (as a sawtooth waveform) at the input frequency in hertz. So, if the frequency is 2, then the [phasor~] object ramps smoothly from 0 to 1 twice every one second. If the input frequency is 1 then it takes one second to ramp from 0 to 1 and an input frequency of 0.5 would take two seconds to ramp from 0 to 1. In the [*~] object which follows, we multiply the audio output value from the [phasor~] by the filesize2 which corresponds to the index file. This means that we will cycle through all of the values in the index file over the speed that we’ve put into the slider.

The next object, [lop~], is a low pass filter that was put in to allow for a bit of control over how the playback pointer in the index file goes between values from the [phasor~]. This has the effect of smoothing out jumps in the playback pointer for the index file. There’s control over the amount of this smoothing out of the possible roughness using another log slider that varies from 0.001 to 10. The higher the value, the more “rough” the possible jumps can be for the index file’s position pointer.

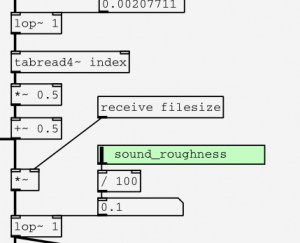
The smoothed value is passed to the [tabread4~] object that grabs the value of the data at the position pointer in the index array and then outputs the value. The data in the index file varies from -1 to 1, so I multiply the value by 0.5 to make the range -0.5 to 0.5 and then adding 0.5 to make the output value 0 to 1. This has the effect of normalizing the data to range between 0 and 1 so I can multiply it by the size of the audio file index in order to be able to play all of the samples in the audio data file.
At this stage we are varying the playback position pointer for the audio file to span the entire file based on the different values coming out of the index file. Sometimes the data is quite jumpy which causes many discontinuities and usually results in many clicks and pops in the output which isn’t always what we want. I inserted another low pass filter on the position pointer here to vary between 0.1 and 1000 hertz. It often ends up sounding like it is adding additional inertia to a turntable scratch so that the changes in speed are slower or faster.

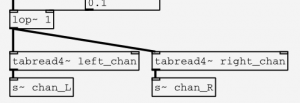
In the final [tabread4~] objects for the left and right channel of the audio array we input our position pointer so that it knows where to select the data from. To keep things clean, the resulting audio samples are sent to both the dac~ as well as for possible recording of the output in the record section.
Just as an overview, we’re basically just using the index file as a list of different positions that we want to play the audio file at. This tends to produce some fun, glitchy madness and is very open to being modulated in real-time.
Rest of Patch
The open audio file section just opens either a data file or an audio file to be used as the audio playback data. There’s two methods of opening files since it needs to know if it should try to open the file as audio and parse the format correctly to load into one or two channels or if it should just load the raw data from the file into the two channel arrays.
In a similar manner, the index file is loaded just as raw data. It would be possible to also load audio files here but I found that it was usually more fun to load in spreadsheets, other Pd files and uncompressed bitmaps into the index file. Compressed file formats such as .zip, .mp3, .jpg and similar files usually result in a fairly noisy file as they’re trying to optimize and fill up the use of the bits in the file so they often don’t work very well as audio data. Regular text files, uncompressed audio and uncompressed bitmaps tend to give a nice quality of sound for processing and playback.
Real-time Playback
Basically I made a system where I find it fun to tweak the “knobs”. I tried to make the system reasonably expressive yet minimal. Good results can be found by loading in new index files on the fly, hand-drawing waveforms into the index array and tweaking the controls.
Conclusion
This patch is capable of a fairly wide range of sounds, especially when sampled files are loaded in and processed and the controls are performed for an interesting result. It can even be fun to record the output and then load it back as audio for additional processing. Future improvements could include adding real-time effects (such as delay and reverb), implementing audio data feedback from the output back into the data buffers, adding an additional index file to modulate the current index array, additional controls for adjusting more parameters, adding table playback and recording to sliders for recall and automation, among many other possibilities.
Since the patch runs in “vanilla” Pd, it should be possible to port it to the web using WebPd. It could also be made into an audio plugin using the Heavy compiler which could compile it to C code.
The goal of the patch was to make some entertaining sounds using a patch that could help others learn more about Pd. I hope that you find it interesting enough to modify and tweak for your own purposes. The patch is released to the public domain so feel free to modify it as you wish. Feel free to attribute me if you’d like but it isn’t necessary.
If you have any questions about the details of the patch, feel free to email Leonard at the School of Video Game Audio website (SoVGA.com). Leonard J. Paul has worked in the video game audio industry since 1994 and has been playing around with Pd for “a while”. He enjoys teaching students online at the School of Video Game Audio.
Amazing info here Leonard, and your clear explanations of PD is much appreciated. Besides compiling in the Heavy compiler, are there any other ways to utilize PD patches via current middleware like WWISE, FMOD or Fabric? If not now, do you know if this is a planned feature in the future?
Hey Dale I think it has successfully been implemented into Wwise and Unity, exciting stuff. I can’t wait to research more about Heavy
Hi Dale & David,
You can use Pd on Mac/PC + Unity using LibPd4Unity: https://github.com/patricksebastien/libpd4unity or https://github.com/Magicolo/uPD
Heavy allows direct compilation of Pd into Wwise Plugins (plus JavaScript & C) already in their beta: https://enzienaudio.com/
You should also be able to compile to FMOD Studio (and other plugins such as VST) from Pd using Heavy via C as well. If you wrap the C code in your game then you could conceivably even use Pd as your entire audio engine/middleware. I hinted a bit about this when talking about game audio middleware recently: http://youtu.be/3DotAeaa7wg
If you just want to run Pd separately from the game then you can always use OSC messages. This isn’t really a commercial game audio solution but it can work fine for education & prototyping. I’ve spoken about this a while ago: https://vimeo.com/7122167
If you have any Pd / game audio questions, just let me know.
Thanks a lot for the Github links Leonard! Looking forward to doing some tests.
Thanks for your video links too, interesting thoughts on middleware, I wish I had you to convince some local devs here on the advantages. I love that Andy Farnell book, it is pretty heavy in parts though.
I’ve been planning on hitting up one of your FMOD courses since recently completing the Berklee Wwise one, hopefully be in touch soon.
I just stumbled upon this page. I actually have the signal from this project running through freeverb~ and a ladder filter abstraction I built, and it sounds wicked! Thank you for the inspiration.