I thought it would be boring to go the obvious route and talk about breaking a real world object for this month’s destruction theme. Don’t get me wrong, breaking stuff is a ton of fun…even more so when you can justify it as part of your job. Instead, I thought I’d try to go a little more creative and tangential. Let’s take a look at some of the fun that can be had by messing with a sound’s harmonic structure. This type of exercise would have been much harder a few years ago, but is now incredibly easy with tools like Izotope RX and Iris.
Let’s start out with the sound pictured above: a metal impact. This is a sound Steve Urban and I recorded after raiding a yard sale a few years ago. We found this small metal table, and it had this awesome ring-out when you lifted one end and dropped it. Here’s the raw sound:
[soundcloud url=”https://api.soundcloud.com/tracks/203790783″ params=”color=ff5500&auto_play=false&hide_related=false&show_comments=true&show_user=true&show_reposts=false” width=”100%” height=”166″ iframe=”true” /]
It has a bell like sound. If you know anything about bells, you know they have an extremely complex harmonic in-harmonic structure. [ed. Thanks to community member JW for pointing out my misstatement in the comments below!] So how do we choose which harmonics to grab without it turning into an overly tedious filtering process. Well, if you saw my Psychoacoustics for Sound Designers presentation (either at AES or through the web presentation here), then you may remember that only the first five to seven harmonics are the most critical to our perception of timbre. But looking at that picture above, even picking out the first five to seven isn’t a simple thing. It’s a very dense structure, so we’ll cheat and go for the strongest ones. I used Izotope Iris for this. Here’s a look at the raw file, with no selections made in that tool:
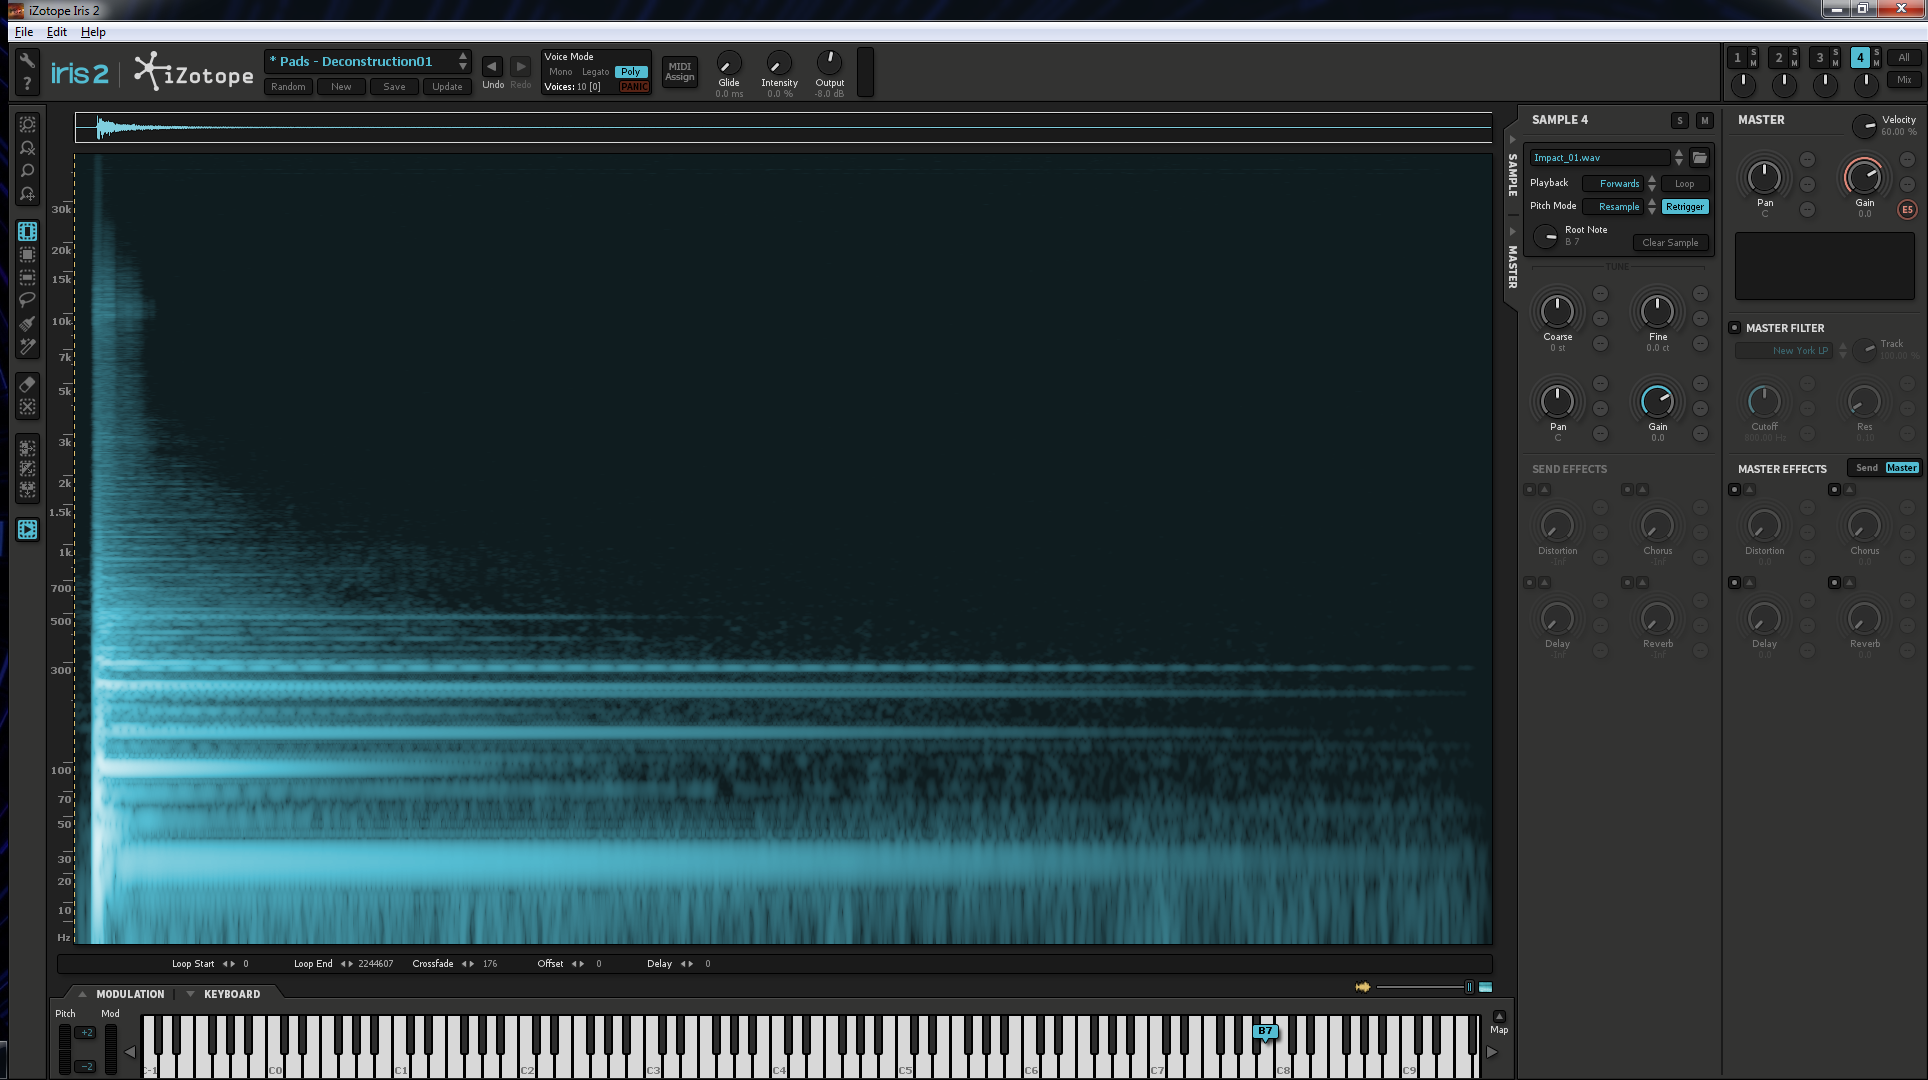
I also only separated out six harmonics, and then blanket selected everything from the seventh and above. Have a look at my selections below (click the images to expand):
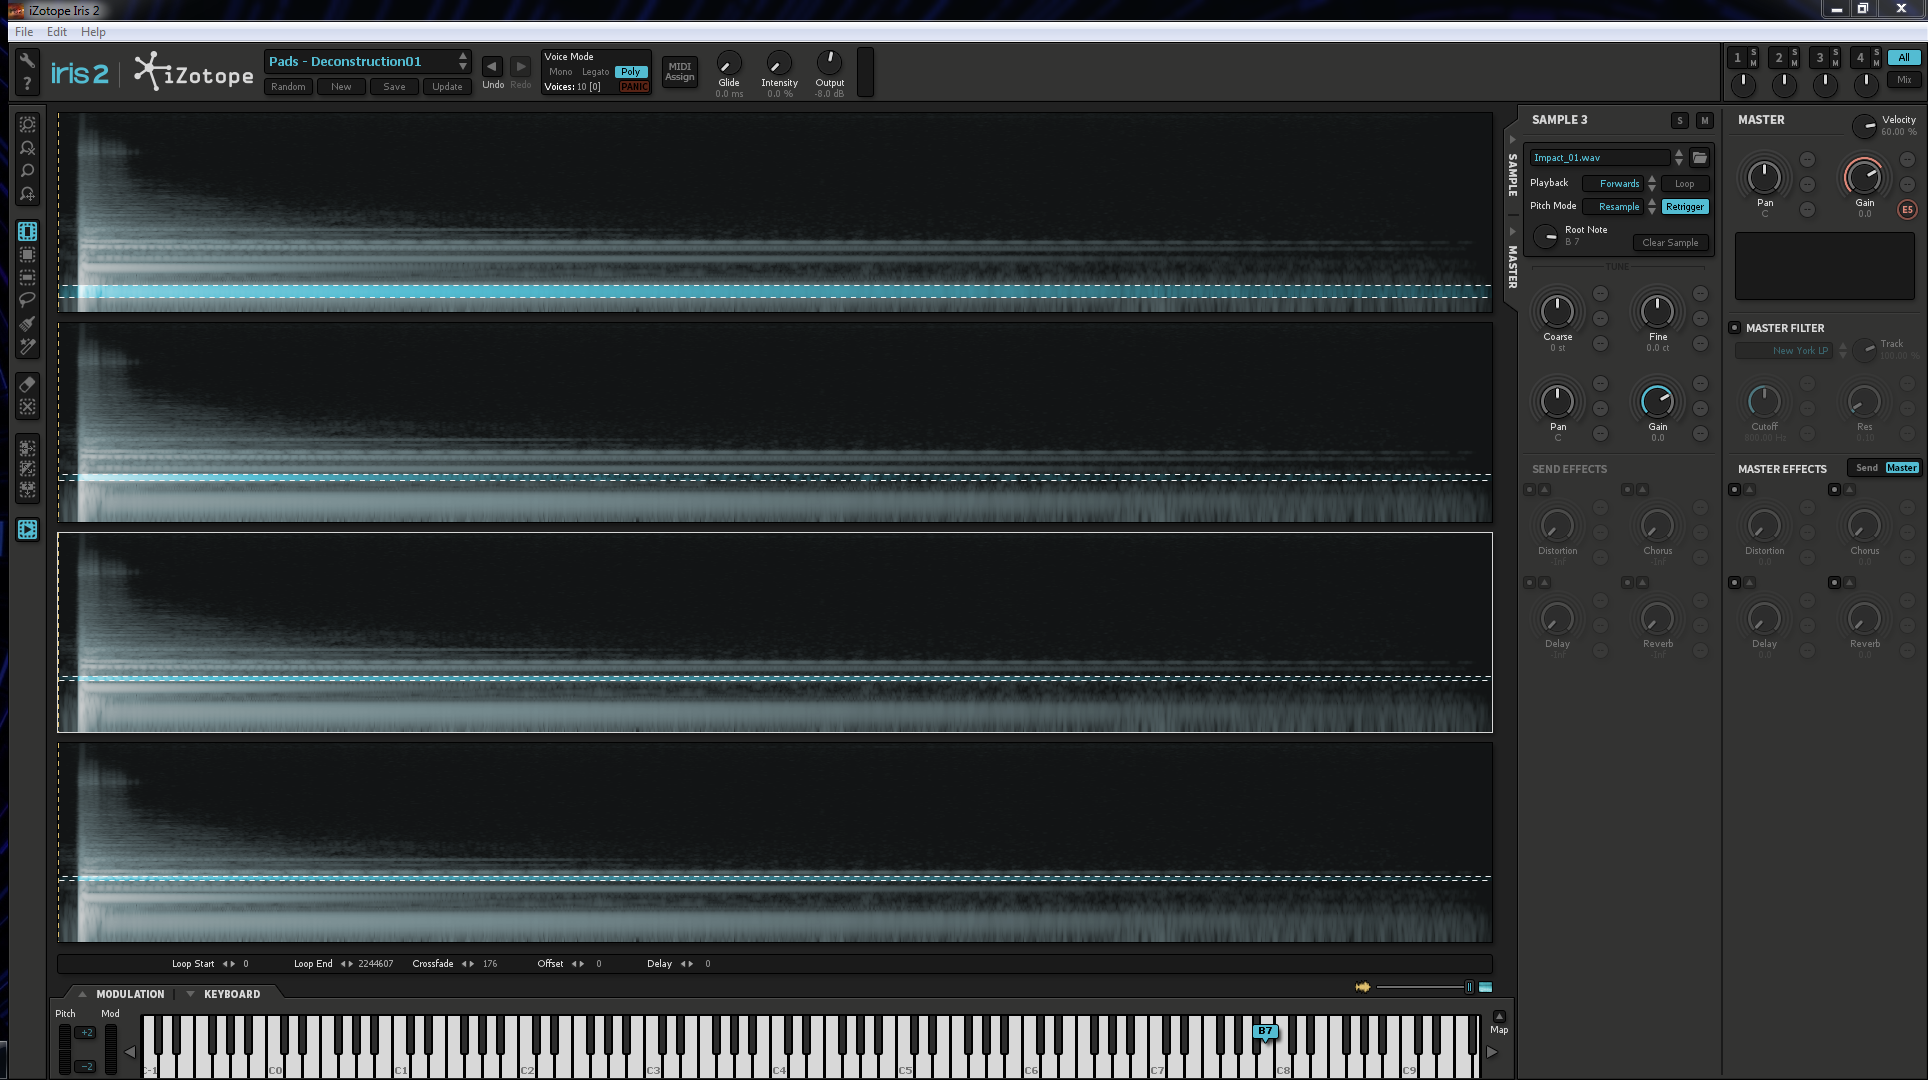
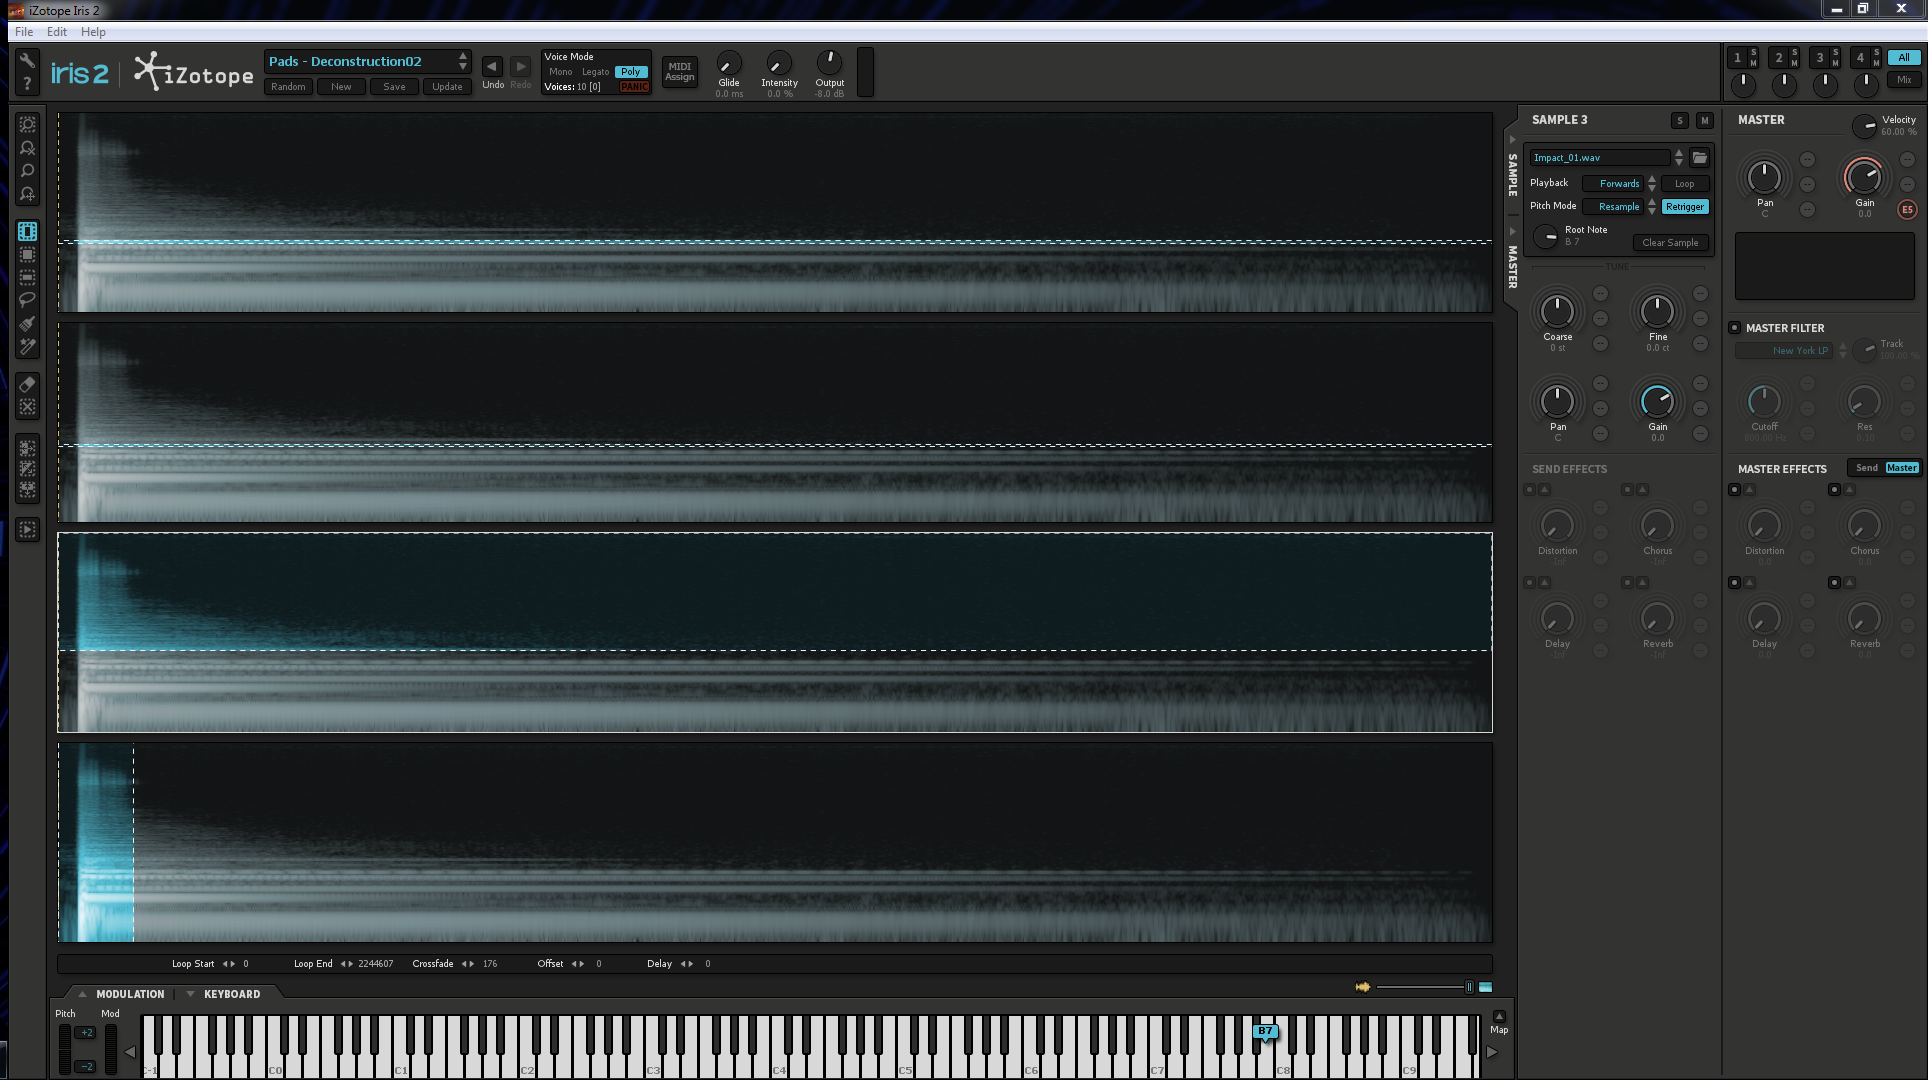
Each sample layer is set to play only once, not loop. I loaded Iris up in Pro Tools on an instrument track, and wrote a MIDI note (at the natural frequency/note of the sample) slightly longer than the length of the sample itself. This made sure I captured everything I needed from the file, and I just stepped through soloing and recording each layer to a separate track in Pro Tools. Which in turn gave me this:
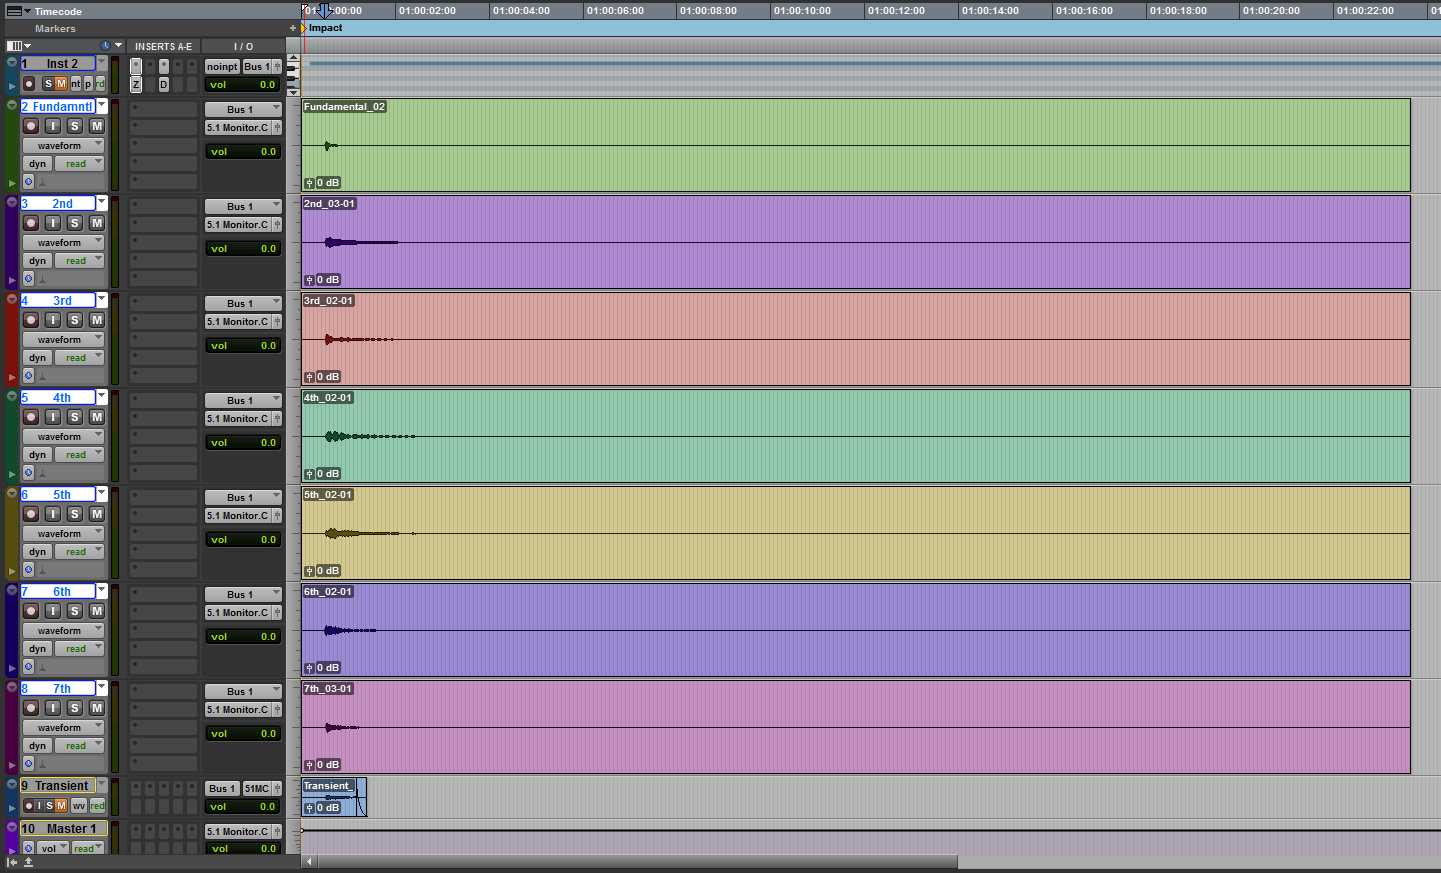
You’ll also notice that I have a clip labeled “Transient.” We’ll come back to how I derived that a little later in the article.
That ends the tedious part, now we’re free to experiment with the individual harmonic layers…which can lead to cleaner processing than attempting to apply specific ideas to a full complex sound. I started by altering the volume of each individual harmonic. Those who are familiar with synthesis techniques know how important the volume ratios of harmonics are to the overall timbre of a sound. I made my base adjustments with clip gain…
- Fundamental – no change
- 2nd – +4.5dB
- 3rd – +3dB
- 4th – +6dB
- 5th – +10dB
- 6th – +6dB
- 7th and up – muted
I also muted the transient clip, because I didn’t want the hit to be too hard, and killing that and the 7th+ harmonics allowed me to eliminate the little bit of rattle that is in the raw recording. But why stop there…?
The attack was strongest in the 3rd harmonic, so I removed it by adding a fade in. I used Avid Space (formerly TL Space) reverb to create a preverb build-up on the 2nd and 4th harmonics. I added MondoMod to the 5th harmonic, and Rectifi to the 4th, 5th and 6th harmonics with automation to have the distortion come in slowly. This lets these elements emerge from the initial sound, giving it a smooth morphing transition. Here are the base settings I used:

And the wet/dry mix automation for Rectifi:
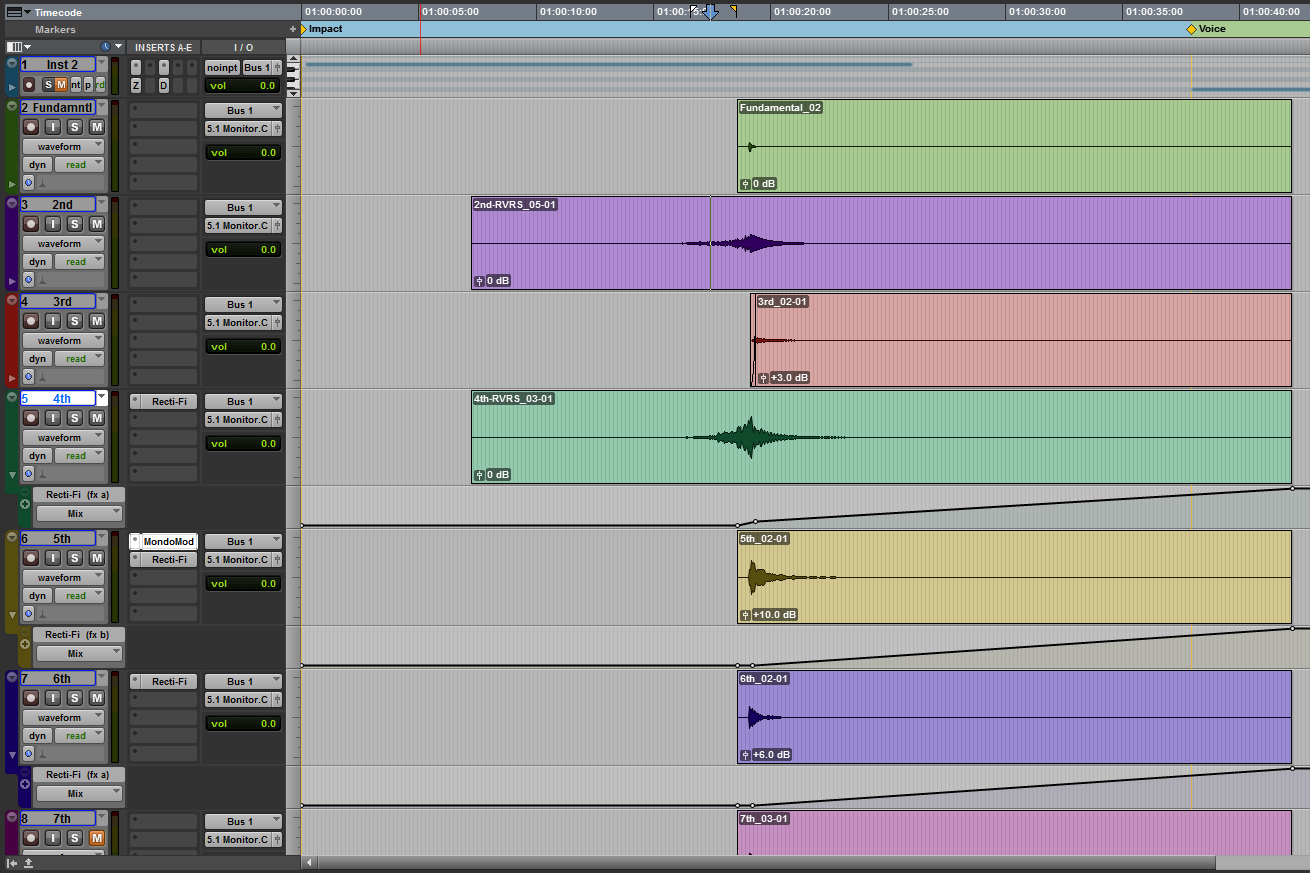
I then added a little bit of volume automation on top my clip gain work:
And here’s the final result:
[soundcloud url=”https://api.soundcloud.com/tracks/203790786″ params=”color=ff5500&auto_play=false&hide_related=false&show_comments=true&show_user=true&show_reposts=false” width=”100%” height=”166″ iframe=”true” /]
So that’s the basic idea. I chose something with a stable harmonic structure to introduce the idea, but what about something that’s a little more fluid, like dialog for example? Let’s take a look at it.
For this, I’ll be using a recording of an old friend and co-worker of mine from a production we were working on many years ago. He was the DP on a doc we were filming. Here’s the sound:
[soundcloud url=”https://api.soundcloud.com/tracks/203790804″ params=”color=ff5500&auto_play=false&hide_related=false&show_comments=true&show_user=true&show_reposts=false” width=”100%” height=”166″ iframe=”true” /]
And here’s an image of the harmonic structure in Iris:
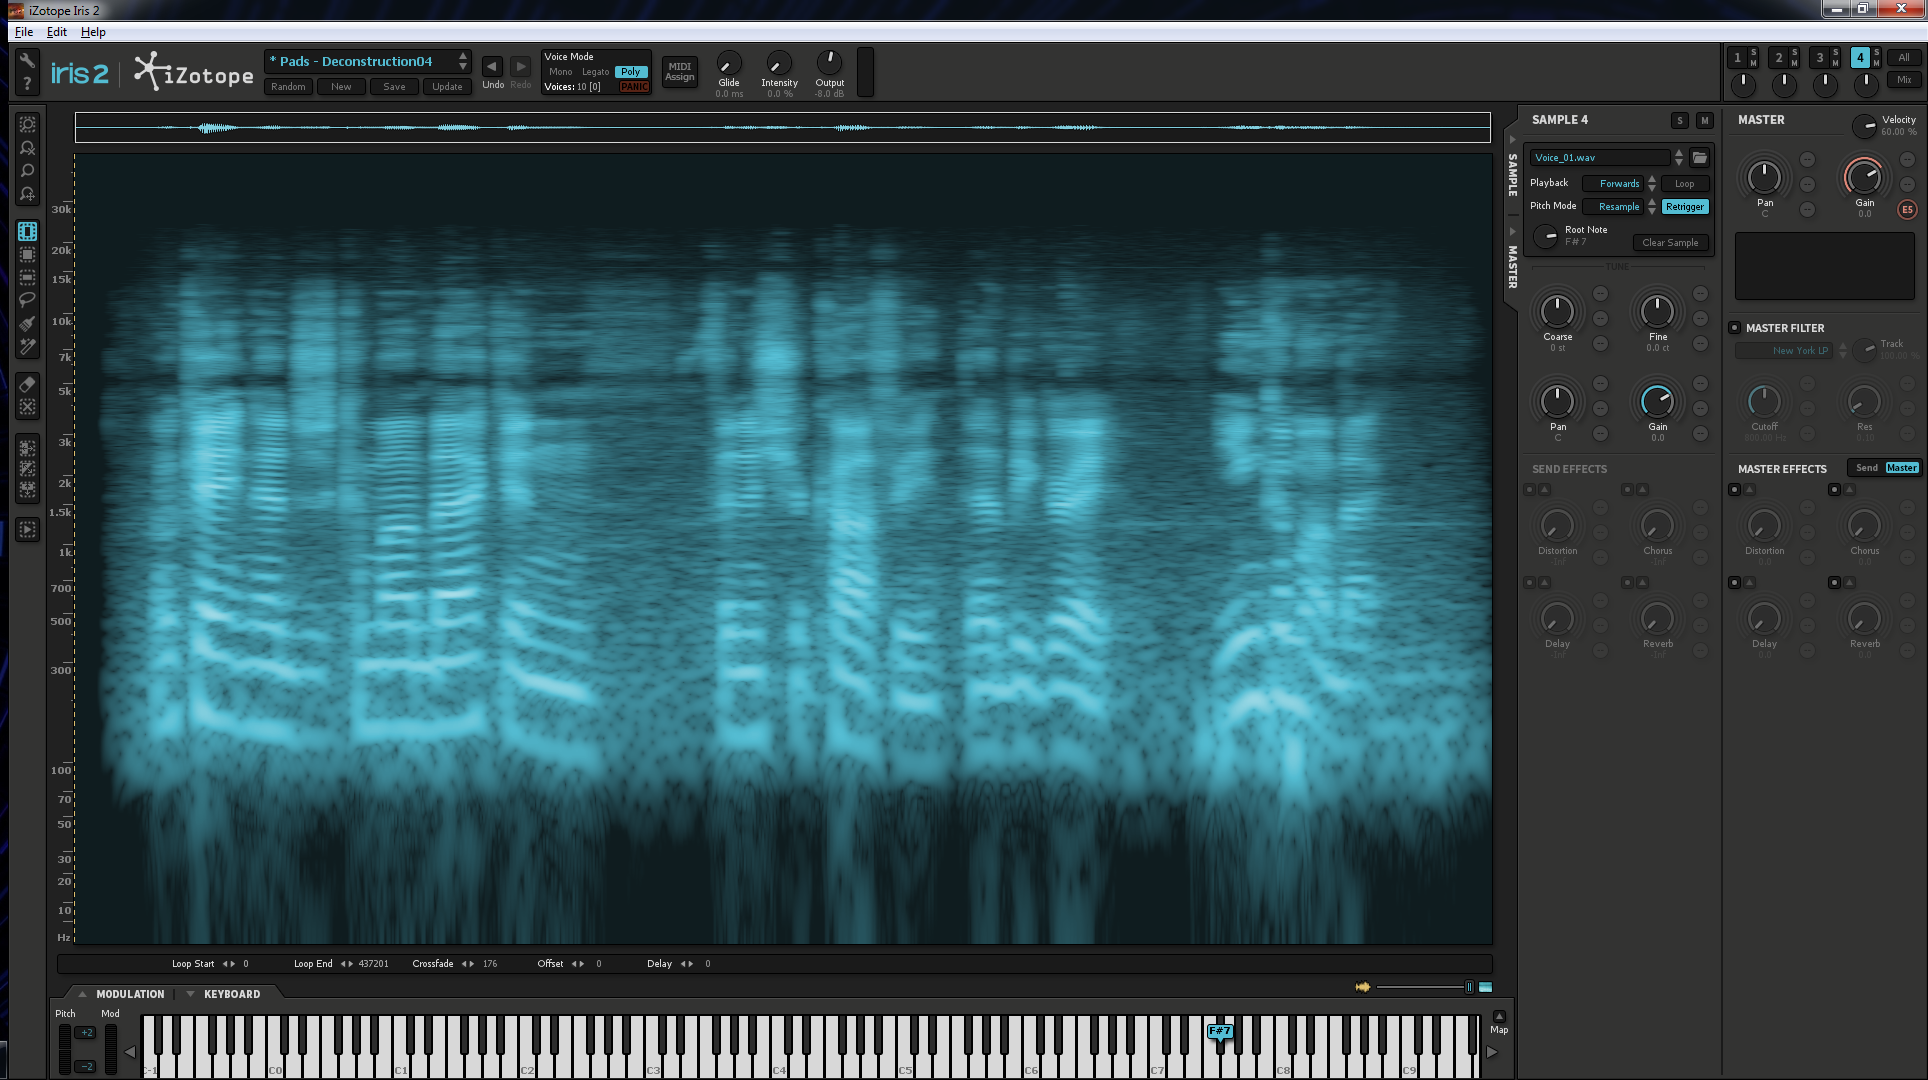
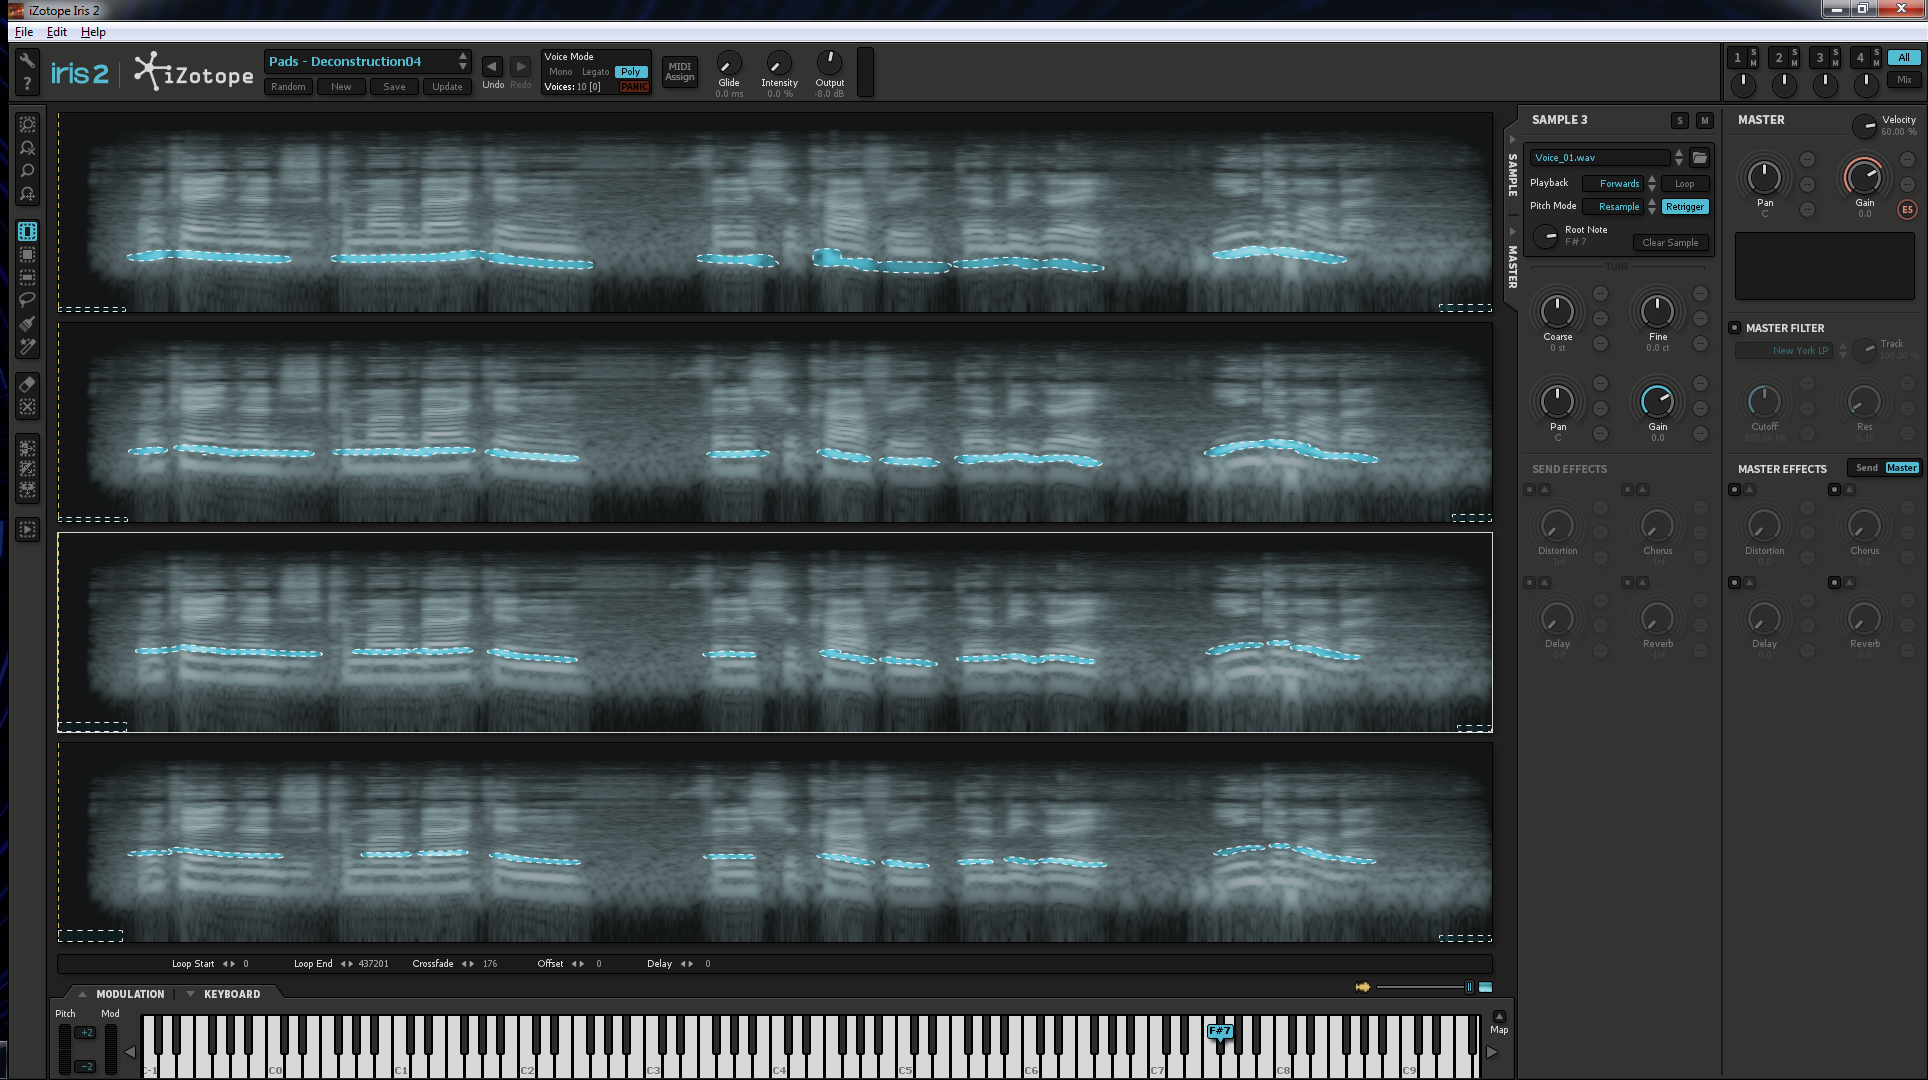
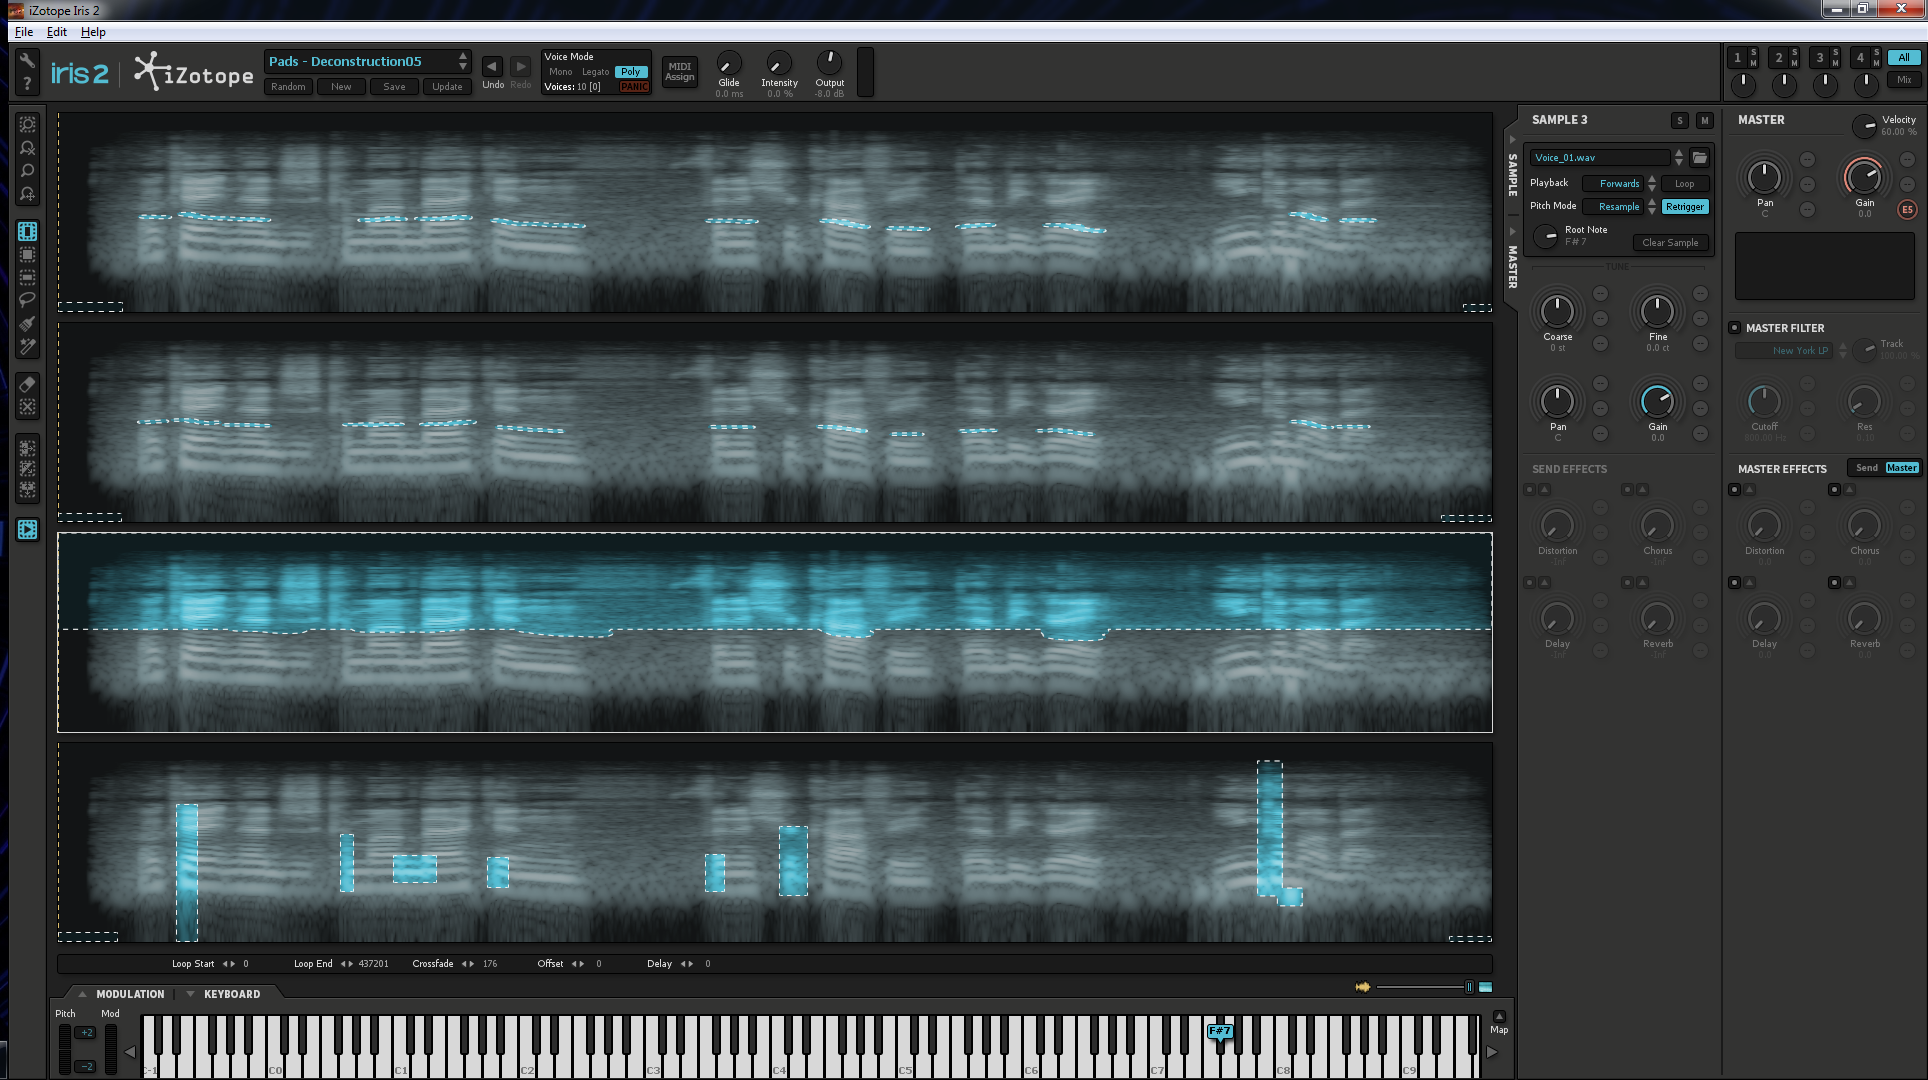
My selection process was purely predicated on that five to seven harmonic rule I mentioned earlier. Obviously, drawing in the filtering took a little longer on this one. My output procedure was exactly the same, so no need to cover it again. Let’s go back to that idea of transients though.
For the most part, transient sounds are broadband in nature. And you can make them out in the spectrogram relatively easily. Any highlights that are vertical in nature are transients. In the case of speech here, they’re contributing heavily to the short consonants (/b/, /t/, /k/, etc). It would be good to pull those out as well, just in case we decide we need them. If you’re having trouble picking out the transients that I’m talking about above, the selections I made to create the transient file should help you identify them:

Notice also the small rectangular selections at the head and tail of the file in the low frequency regions. I put these selections in on every layer of the samples for this voice recording, in the same space, to ensure that Iris would play through the full file. This way I could be sure that everything would stay in sync when I output the various layers. Here are all of the selections I made:
I already mentioned that the output process was the same. Because the filters “move” in this we’re going to hear artifacts in the rebuilt sound. That’s fine in this case. Remember, the theme this month is destruction, and I’m doing all this so that I can break the sound in unique ways. The artifacts don’t bother me; in fact, they’re what I’m looking for. Take a listen to the sound as it is reconstructed after all of this filtering:
[soundcloud url=”https://api.soundcloud.com/tracks/203790788″ params=”color=ff5500&auto_play=false&hide_related=false&show_comments=true&show_user=true&show_reposts=false” width=”100%” height=”166″ iframe=”true” /]
The most artifacts appear towards the end, where he starts to shift further off mic. This is also a good point to call attention to the difference between timbre and clarity. While it’s true that the first five to seven harmonics are what we rely on most for identifying timbre, that doesn’t mean that the overall sound will be maintained. With voice in particular, the 7th harmonics and above contribute tremendously to the clarity of the sound. Listen to the sound immediately above this paragraph again, then listen to this version:
[soundcloud url=”https://api.soundcloud.com/tracks/203790792″ params=”color=ff5500&auto_play=false&hide_related=false&show_comments=true&show_user=true&show_reposts=false” width=”100%” height=”166″ iframe=”true” /]
The only difference between these two sounds, is that I’ve muted the 7th harmonic and above file. There’s enough information in this that we can identify the voice as the same person, but there’s a stark contrast in the way we actually hear it. So, don’t be caught off guard if you’re going to try to use this harmonic destructuring technique in the future.
So what can we do differently this time? Let’s start by shifting the harmonics in time. The next three files are all shifted by the same amount:
- Fundamental – left alone
- 2nd – shifted 2 frames (23.976 fps) early
- 3rd – 2 frames late
- 4th – 5 frames early
- 5th – 5 frames late
- 6th – 7 frames early
- 7th and up – left alone
- Transients muted
Here’s what that sounds like:
[soundcloud url=”https://api.soundcloud.com/tracks/203790809″ params=”color=ff5500&auto_play=false&hide_related=false&show_comments=true&show_user=true&show_reposts=false” width=”100%” height=”166″ iframe=”true” /]
Let’s turn off the file for the 7th harmonic and above now:
[soundcloud url=”https://api.soundcloud.com/tracks/203790817″ params=”color=ff5500&auto_play=false&hide_related=false&show_comments=true&show_user=true&show_reposts=false” width=”100%” height=”166″ iframe=”true” /]
…then go a little further . Turning off the fundamental and the 2nd harmonic, 7th and up still off, and throw on Flux’s Bittersweet (100% bitter, fast):
[soundcloud url=”https://api.soundcloud.com/tracks/203790836″ params=”color=ff5500&auto_play=false&hide_related=false&show_comments=true&show_user=true&show_reposts=false” width=”100%” height=”166″ iframe=”true” /]
 We’ve gotten to something computer sounding. We can go in a completely different direction too. These types of artifacts that we get from the filtering can be great for contributing to creating a distorted transmission. I messed with the harmonic structure by using some pitch shift this time around. Elastic audio in Pro Tools made things really simple in this regard. I turned it on for all of the tracks, and opened the “Elastic Properties” window for each clip. Then I threw the Air Lo-Fi plugin on the master bus. This was set for a very light wer/dry mix. I’d already created a fair bit of distortion simply through the filtering process. I just wanted a little bit of dirt in the sound now. Here are the changes I made to the individual harmonic components:
- Fundamental – up 2 semitones, -20dB
- 2nd – up 1 semitone, -20dB
- 3rd – down 3 semitones, -20dB
- 4th – up 2 semitones, -20dB
- 5th – down 4 semitones, -20dB
- 6th – up 5 semitones, -20dB
- 7th and up – no pitch change, +12dB
- Transients – muted
And here’s the sound that resulted:
[soundcloud url=”https://api.soundcloud.com/tracks/203790796″ params=”color=ff5500&auto_play=false&hide_related=false&show_comments=true&show_user=true&show_reposts=false” width=”100%” height=”166″ iframe=”true” /]
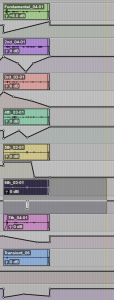
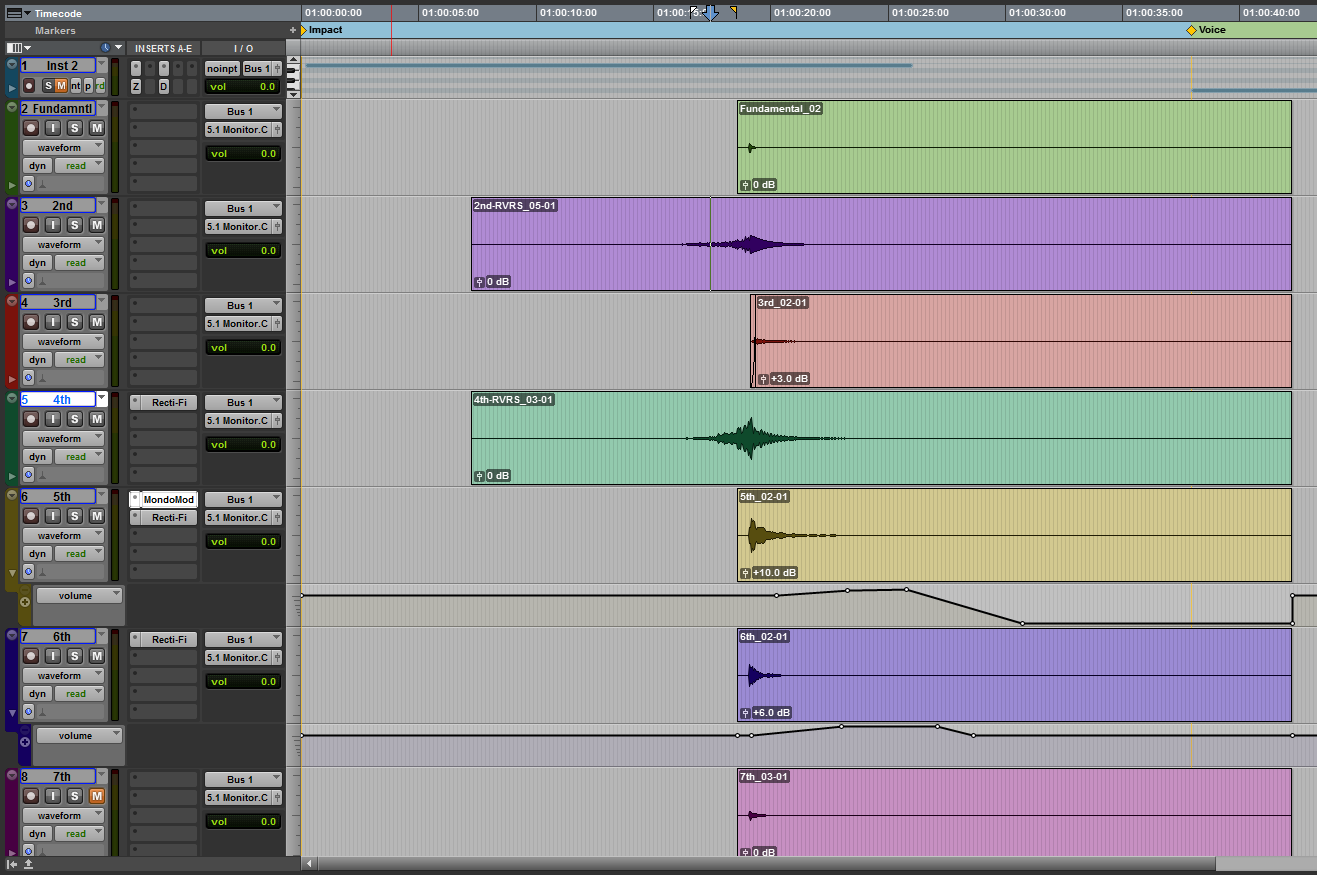
Another option is to produce a harmonic reverb. In this case, I just sent things out to Avd D-Verb. All components were left at their native pitch and timing. These were fed to a dry aux and a reverb aux to give me a little more control. The automation lanes you’re seeing under the clips in the image on the left are the reverb sends. The one exception is the 7th harmonic (and up) file. The 7th had only volume automation and no reverb send. The other components were the opposite; they had no volume automation to the dry aux. The two automation lanes you see on the bottom are the reverb aux and the dry aux (the transients component had no automation changes whatsoever, and so it doesn’t have an automation lane showing). This let’s you send harmonic components around the space and have them ghost in and out under the source sound. I kept things simple spatially, but this can be a fun technique in a surround environment.
Here’s a bounce of the results:
[soundcloud url=”https://api.soundcloud.com/tracks/203790801″ params=”color=ff5500&auto_play=false&hide_related=false&show_comments=true&show_user=true&show_reposts=false” width=”100%” height=”166″ iframe=”true” /]
Granted, some of these examples are a bit crude sounding. I intentionally didn’t spend a lot of time on each individual design; choosing to show what can be done quickly instead. [ed. Mostly because of how long I knew it was going to take me to put this article together after the fact.] Drawing in the filtering on the vocal example took the most time; in the neighborhood of 12-15 minutes. After recording out each of the component harmonics, I spent no more than three minutes on any of the subsequent designs. You get a lot of creative bang for the buck out of stripping the components from one another.
I prefer to use Iris for this, because it streamlines the process a little bit…allowing you to export out the sounds directly into your DAW of choice. You could strip apart the component harmonics in Izotope RX as well, though it would take a little longer to generate the files. It wouldn’t be major…just a minor efficiency issue. Most people now have RX sitting on their hard drives, and many have Iris…meaning this technique is available to a lot of people.
I love techniques like this, because they aren’t limiting. They open up possibilities, and I’d love to hear what some of you can do while experimenting with this! If you do try it out and make anything interesting, make sure to drop a listening link in the comments.
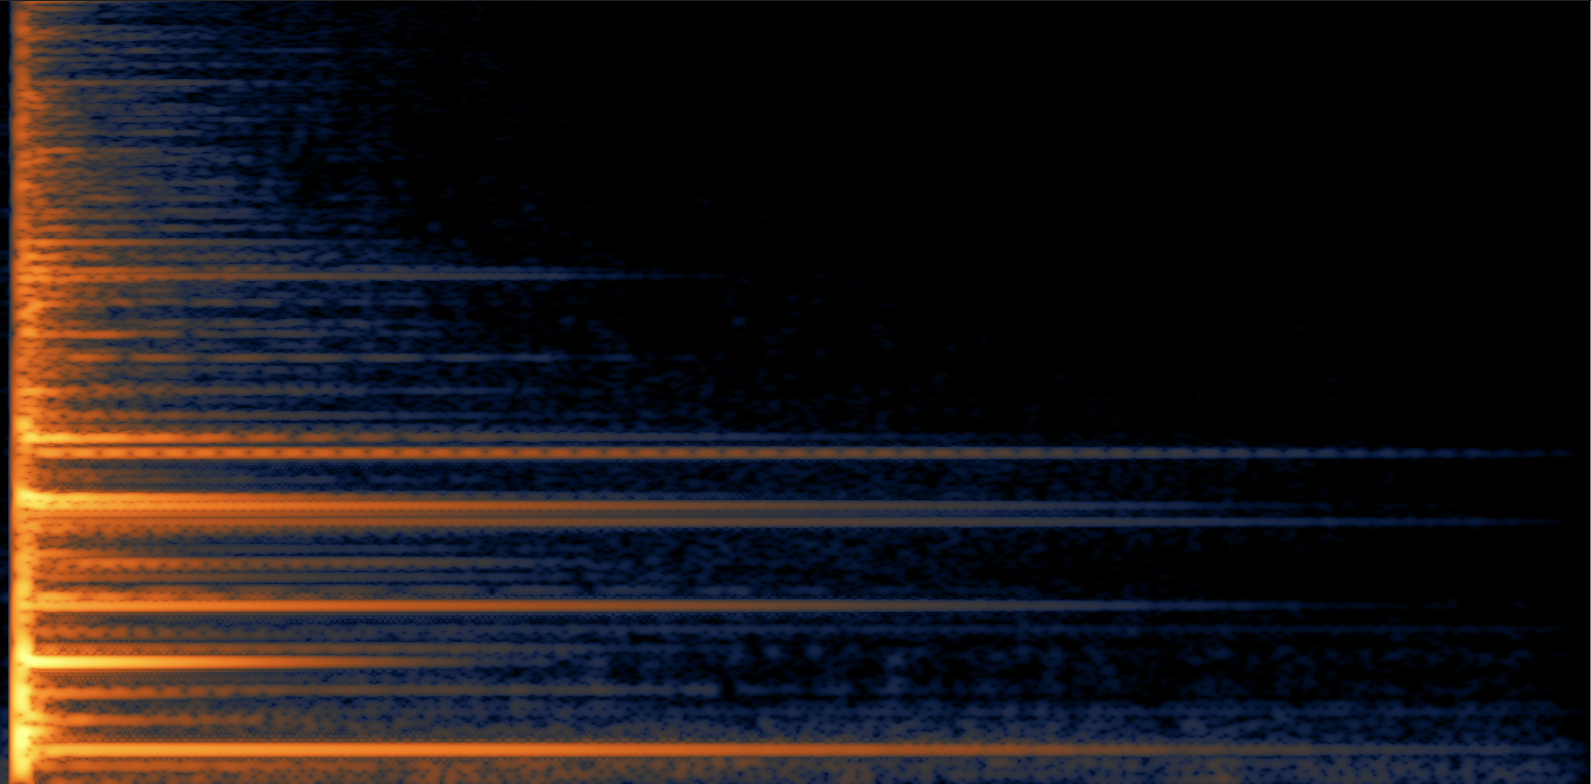
Some interesting techniques, but most bells and plates and other 2 or 3 dimensional resonators don’t have a ‘complex harmonic harmonic spectrum’ they have an inharmonic spectrum (or at least harmonic + inharmonic components, which strictly isn’t a harmonic spectrum). It sounds like that is the case with the found sound you use as a starting point too. I don’t think you’re dealing with harmonics in that sound but inharmonic partials. It’s hard to tell from the plots as the frequency axis isn’t clear enough. Do you know the exact frequencies of the partials?
You’re absolutely correct about them being inharmonic. That was a misstatement on my part, and I’ll correct it in the article sometime today. Thanks!
Really enjoyed this post! I have most of iZotope software and love using Iris for making cool effects and it’s streamline use. Lot of freedom, though easy to get lost in it.
Wonderful article, Shaun! Can’t wait to try some of these things out.