This article is going to be a little less template, and a little more workflow. We all have our favorite plug-ins. We probably also all have plug-ins we’d love to use, but run into limitations that keep us from pulling them out of the tool box. For instance, I have a couple of plug-ins from Waves that can add some really cool sonic character when I’m designing a sound, but also introduce more noise than I like when I start pushing them too hard. The problem is, I like pushing those plug-ins hard to get that character. Even when not pushing them too hard, I can still hear noise added by the algorithm. I’m not a fan of unwanted noise. So, I recently started experimenting with an old analog technique…
Companding
If you’ve ever worked on analog tape, then you probably already know what companding is. If you’re a little younger and have never worked outside of the digital domain, chances are you haven’t heard of it. The rest of this paragraph is for those latter people. If you’re comfortable with the concept of companding, feel free to skip to the next. So, companding is a process of paired compression and expansion designed to combat the noise introduced by analog tape. The simplest explanation possible…You compress an audio signal (WITH make-up gain) before recording to tape. This increases the signal to noise ratio of the material on your storage medium. On playback/output, you then use a matching expander to “undo” the compression. In the process of restoring the original dynamics, it pushes the noise floor of the analog tape down…preserving the signal to noise ratio. See? Simple concept.
I think you already see where I’m going with this. There’s nothing to stop us from companding in the digital domain. Granted, it’s going to be a little trickier to set up now than it was in the analog days. Back then, Dolby and dbx both sold matching hardware units that handled it for you. You put the first unit in line between mix output and the master tape, then used the second unit whenever duplicating from the master tape. No fuss, no muss. To my knowledge, there is no dedicated companding plug-in on the market. [If you know of one, please mention it in the comments below.] So, we have to dial it in the old fashioned way on a pair of dynamics plug-ins.
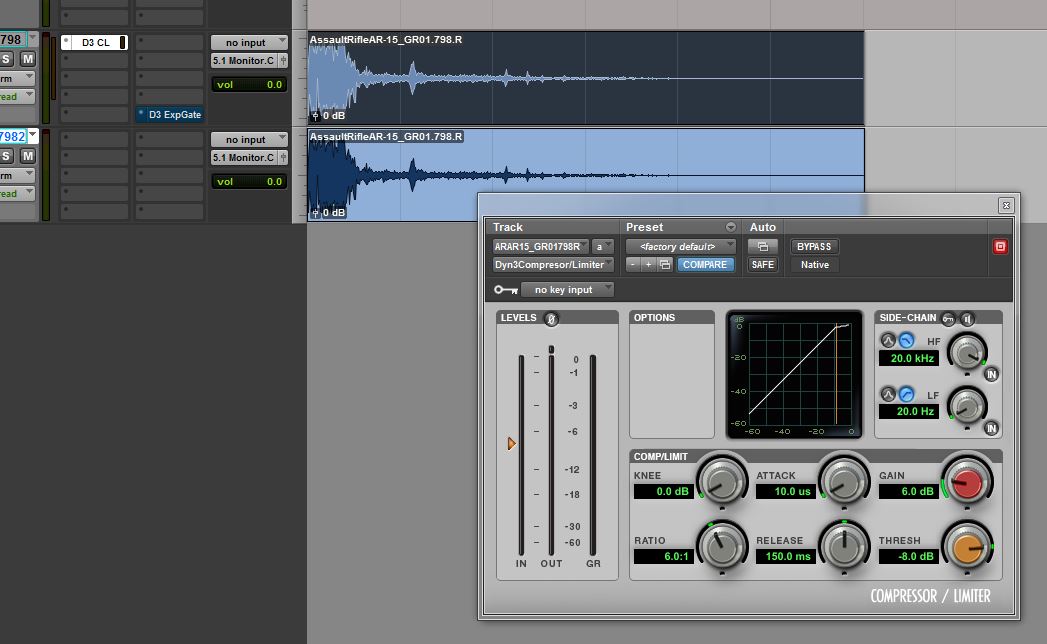
It’s best to select a pair of matching plug-ins. In my example, I’m using the Dynamics 3 plug-ins that are installed with Pro Tools. This way I know the pair will be using similar algorithms, and it will be much simpler generate a pair of settings that will pass the audio in a mostly transparent way. For my examples here, I’m using a gunshot from Blastwave FX’s Guns Reloaded Upgrade (which was included in the new Hyrbid Library Expansion). I’m going to duplicate my track, so that I have an unprocessed reference to A/B against later. My first step is to compress the signal. For this file, I’m just concerning myself with the attack of the gunshot. It’s much louder than the body and tail out, so I don’t want to alter those if I can help it. Moderately heavy ratio, fast attack, moderate release…we don’t want any “pumping.” Then we need make up gain to bring the sound back up. I’m trying to get it close to the original volume of the attack.
Here’s where I’m at…
[soundcloud url=”https://api.soundcloud.com/tracks/121258998″ width=”100%” height=”166″ iframe=”true” /]
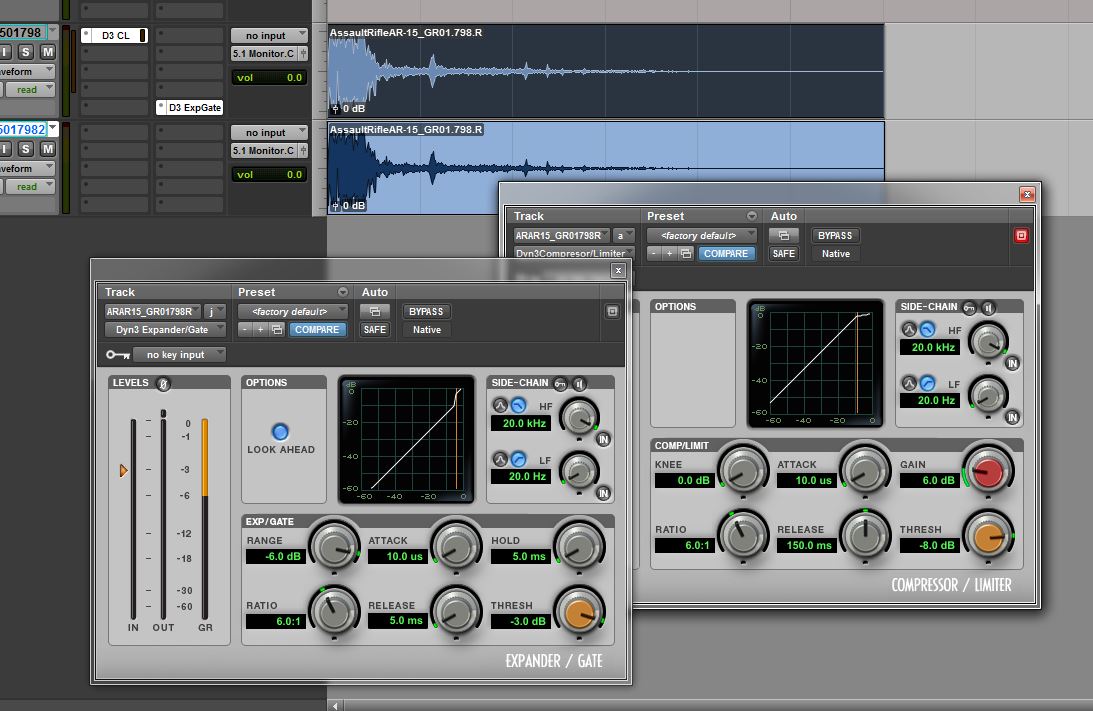
Next, I want to “undo” the compression. I set up my expander with a matching ratio, and set the range equal to my compressor’s make up gain. Then, it’s a matter of tweaking the other parameters to get the sound back to its original dynamics. This is where we start some very critical A/B comparisons with the original sound. Remember the level gap between the attack and the body of the gunshot in the original sound. Because of that, the threshold has to be set high. After fiddling with the attack and release (and “hold”) settings a bit, I settled on some very fast settings.
And here’s what things sound like right now. Original uncompressed, followed by my companding chain…
[soundcloud url=”https://api.soundcloud.com/tracks/121258977″ width=”100%” height=”166″ iframe=”true” /]
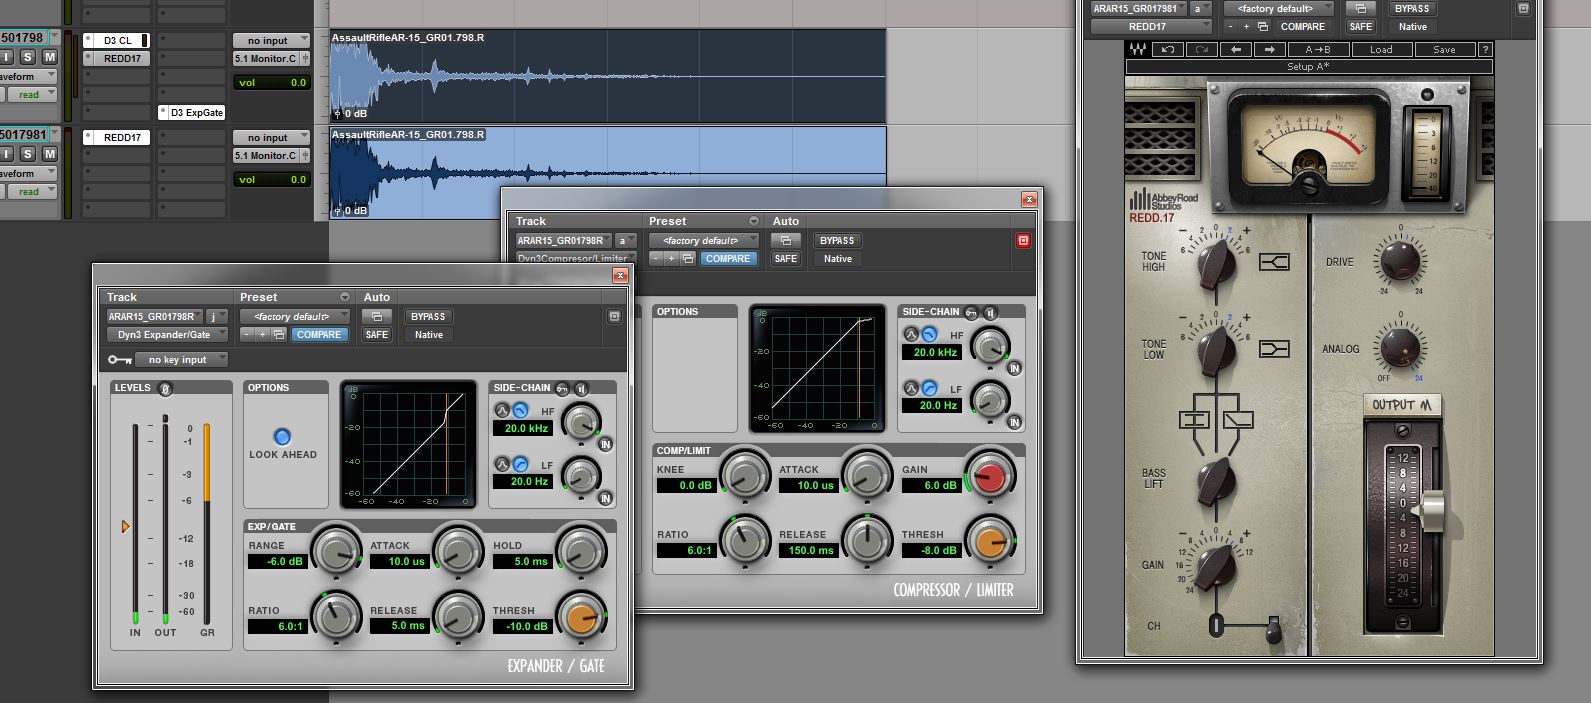
I had a hard time getting the dynamics between the two to match any closer, and I’m happy with those results. Now, I’m ready to put whatever processing chain I want between the two of these. I’m going to keep this example simple and just use the relatively new Waves REDD plug-in. I really do like what this plug-in can add to the sound, but it can get fairly noisy. I arrange it’s settings on the original, uncompressed track. Get them exactly where I want them, then option-click-drag the plug-in up to my companding chain. We’re going to need to A/B again momentarily, because my application of REDD here affects the dynamics of the sound.
The good thing is that only one parameter needs to be tweaked; the threshold. One adjustment to the threshold of my expander, and I’ve got my companded plug-in chain matching my “raw” plug-in chain.
Take a listen. Without companding, followed by with companding…
[soundcloud url=”https://api.soundcloud.com/tracks/121258972″ width=”100%” height=”166″ iframe=”true” /]
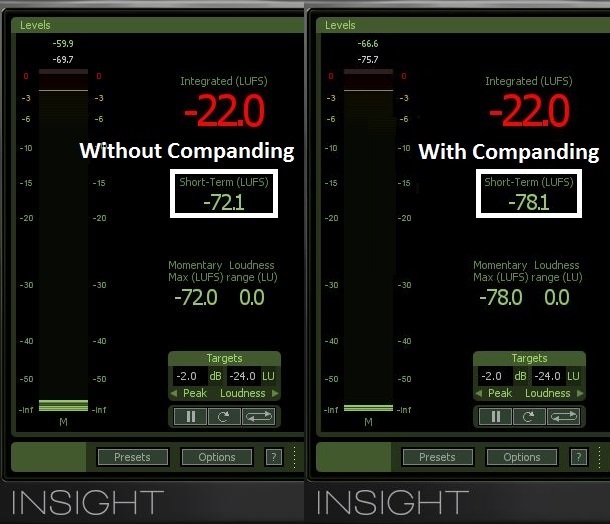
The only real difference between the two tracks is the noise floor. You’ve already heard it, so here are the loudness measurements of the tracks when there is no audio to playback.

It’s not really any more difficult to achieve greater noise reduction, you just need more make-up gain. Of course, that means you may have to adjust your threshold and ratio. I suggest finding the minimum settings necessary to be effective though. Better to be gentle with this kind of processing. It doesn’t take much to turn those few noisy plug-ins into something quieter. 6dB was plenty in my example.
So, if you’ve got a plug-in or two that you avoid using because of how noisy the algorithm is, give this a shot. It may give those plug-ins some new life in your workflow. After you’ve experimented a bit, come back and share some of your thoughts in the comments. As I mentioned, I’ve just started using this technique recently myself. Let’s see if we can’t all find a more efficient way to set this up!


smart stuff. best of all in 24 bit you’re really not losing a damn thing. this should improve ohmicide a bit :9
Technically, you’d be in higher than 24-bit. Nearly every DAW’s audio engine is at least 32-bit under the hood, many are now 64-bit floating point. It’s only on output that it’s converted back to 24 (or whatever your target actually is).