Guest Contribution by Ivo Ivanov – Lead Sound Designer & Project Manager
Noise, the final frontier. How can we explore such a vast and largely uncharted realm? More importantly, how do we approach recording this unusual sonic landscape and compile the results into a sound library specifically intended for the science fiction genre? How do we find the emotional undercurrent in what is arguably the least emotive type of sound? These are some of the questions that ultimately spawned the production of Microsphere, my new sample library released with Glitchmachines, in which the focus was on exploring a vast landscape of electromagnetic noise.
In this article, I will take you on a journey through the various stages of my technical and creative process of analyzing, capturing and processing this hidden sonic universe.
RESEARCH STAGE
Before approaching this type of project, I always do a considerable amount of research. Because a lot of my sound design work is stylized and conceptual, I have to stay mindful of not only the technical needs and restrictions of each project, but also retain a constant awareness of how the material will later fit into an aesthetic context. I find that the most effective approach is to strike a balance between having a detailed plan and leaving myself plenty of room for improvisation and experimentation.
The first step of the research stage of the production process always starts with a hard list of ideas. These ideas stem from ongoing brainstorming sessions that I document meticulously. Brainstorms usually occur spontaneously, so I’ve trained myself to always be prepared. I typically wind up emailing myself a list of thoughts on my mobile phone, so that I can later copy them to my database.
This is a highly effective method for me, as I usually find myself away from the studio when ideas strike. It’s never effective to simply try to remember them later on – almost always, my ideas are to obscure of elaborate to recall by memory. Many concepts may not necessarily fit the project I happen to be working on at that time, so I’ve learned to compartmentalize them in ways that allow me to adapt them to projects retroactively.
The first challenge I faced in this project was finding interesting ways of capturing new types of noise I had not previously worked with. Having recorded a lot of circuit bent hardware in the past, I have a lot of experience in recording noisy and unwieldy material. In the case of Microsphere, I knew I wanted to pursue new techniques that were dealing less with synth noise, and more with authentic electrical noise.
In the early stages of research, I entertained all sort of options ranging from things like tesla coils to television static. Keeping in mind that I had to accumulate enough material to comprise a library, it became clear that I needed to find sources that were more diverse and broader in scope than some of the one-off items I had on my checklist.
My research eventually lead me to a great article on Jean-Edouard Miclot’s blog, where he discusses Electromagnetism and the associated recording techniques. I found the info to be highly intriguing, which motivated me to continue my research in this direction. I recalled seeing some interesting induction coil pickup microphones on Jez Riley French’s blog where I had previously purchased some of his hydrophones. I wound up purchasing a stereo pair of the pickup mics, with a certain amount of confidence that they would yield at least some degree of successful results.
Obscured by vast corridors of consumer electronics and other electrical paraphernalia, I discovered that Radio Shack had the same pickup mics available in the U.S. for a fraction of the cost. This prompted me to pick up a pair as a potential backup set.
I learned that pickup mics are very sensitive to placement, so I knew that I wanted to be prepared to record nearly everything in stereo in order to capture the pseudo-stereo image produced as a result of picking up signal from separated points of contact.
The second and equally important step of the research stage is testing. This is where some of the initial ideas fall apart, evolve, astound and ultimately either materialize into a concrete direction or simply fail to execute in support of the concept. This is one of the most strenuous aspects of the production process for me, as things can often take unexpected twists and turns, sometimes derailing a project significantly.
Over time, I’ve learned from experience to safe guard my ideas to some extent by doing small “proof of concept” sessions whenever possible. This way I am able to spot check my list of ideas in order to eliminate things that don’t pan out, which effectively gives me some degree of insurance that my database of ideas will yield favorable results.
In the case of this project, I was struck by extreme fortune. Once the mics arrived and I ran some initial tests on items I had available in my home, I realized that the sonic potential was well beyond the scope of my expectations. I was completely blown away by what I heard. It was one of those moments that every sound designer knows; your jaw drops, your eyes open wide with a bewildered stare and you can’t stop smiling profusely.
These little pickup mics revealed an expansive sonic realm so provocative, intricate and mysterious that I was immediately convinced there would be enough diversity and range to comprise an entire library. The material was far better than what I had imagined and absolutely ideal for the type of sounds necessitated by the aesthetic style of this project.
It was at this incredibly triumphant turning point, that I deemed the research stage to be complete and I embarked on the next stage of my journey; the recording stage.

RECORDING STAGE
The first step in the recording stage is the recording prep. This usually involves sorting out everything from locations, equipment needs, props, assistants and everything else needed to execute the recording sessions as efficiently as possible. Organization and attention to detail are of supreme importance, as planning your sessions in advance can make them substantially more productive.
For me, a huge part of the prep is deciding on the naming conventions I will use to keep track of the recordings in a project spanning over multiple sessions. If you don’t address this at an early stage, it becomes extremely difficult to remember what you’ve captured in every recording, making file management and later organizational tasks an absolute nightmare. In my experience, you can never be too meticulous.
Considering that all of my planned destinations were indoors, the Microsphere recording sessions were unlike conventional field recording trips I plan involving outdoor locations. While I greatly enjoy field recording, this came as somewhat of a relief. It meant I could experience a higher degree of freedom without the need to pack the usual entourage of recorders, shotgun mics, stands and Pelican cases stuffed with all manner of elaborate accessories necessitated by remote field sessions.
In situations where stealth and/or convenience are a factor, I like to record with my Tascam DR-100MKII recorder. I really like working with this unit because it’s built like a tank, has decent built-in mics, is small enough to take everywhere and has a wealth of features that accommodate my needs in a variety of recording situations. Rycote make a portable recorder suspension kit I normally use to minimize handling and wind noise when using this little recorder, but the kit also wasn’t required for these sessions.

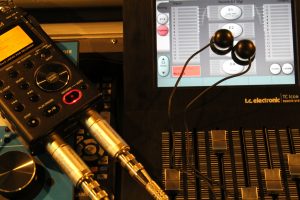
Together with my pickup mics and a set of impedance transformers, I used the DR-100 almost exclusively for the Microsphere electromagnetic recordings. Along with a few accessories, that was all I needed to bring along for my electromagnetic recording adventures.
To make matters even more convenient, I already had an extensive variety of subjects to record in my own home. With access to several family members’ homes, local thrift shops, a couple of Bay Area recording facilities and assorted offices, I knew I wouldn’t have to travel very far to acquire a broad range of my target source material.
It was such a rewarding experience to explore the sonic personalities of virtually every electronic device I could get my hands on. For me this is the best kind of experience, as it taps directly into the core of what motivates my creativity and curiosity as a sound designer. It’s such a childlike and visceral experience to embrace sounds in the first place. Always listening with my imagination, submerged in wonderment.
In the case of recording electromagnetic fields, this experience was compounded by the utter lack of reference I had for how any of the electronic devices should sound. This took me back to the same feelings that interested me in circuit bending many years earlier. The conquest of exploring uncharted sonic territory, overflowing with treasure. The adventure of discovery and unexplained mysteries.
Throughout my analysis, I was able to record a wild array of devices such as scanners, printers, shredders, cellphones, hair dryers, blenders, modems, routers, televisions, microwaves, toys, tablets, power outlets, AC adapters, servo motors, tools, computer peripherals, hard drives, cassette players, CD and DVD players, cameras, video game consoles, flashes, pro audio equipment and every other candidate that would emit a viable sound.
It’s important to note that I was not presented with favorable results by everything I attempted to record. In some cases, a device would simply make an uneventful low humming sound that was common to other devices and therefore redundant in the bigger body of recordings. Part of the fun, however, came from not knowing what I was going to encounter from device to device. As you can imagine, some of the most intense sounds came from the most unexpected sources.
For example, my iPhone made some evil and otherworldly sounds that have to be heard to be believed. It’s actually a somewhat frightening experience once you ponder how much time your phone spends next to your head and body. Foreboding as it may be, it was a thrill ride to hear all of the sonic mayhem the phone could generate while switching apps, loading email, visiting web pages and generally putting the device through its paces.
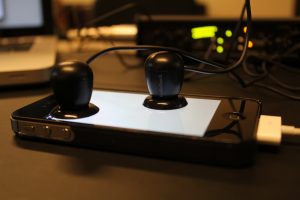
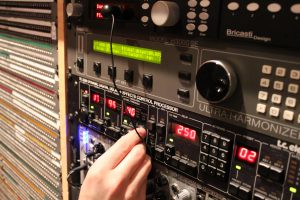
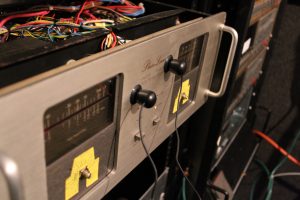
The same can be said for the variety of modems I recorded. Each one having its own sonic fingerprint with subtle and sometimes extreme nuances. I was also fortunate enough to gain access to Hyde Street Studios in San Francisco, where I spent an afternoon recording virtually every piece of equipment in the facility. Some highlights include an SSL 9000J console, various pieces of vintage outboard gear and surprisingly, the computer mouse in the control room inside Freq Lab Recording, one of the rooms inside the facility.
After roughly half a dozen sessions across multiple locations and weeks, it was time to wind down the recording stage. I had acquired a considerable quantity of recordings that I felt encompassed the source material extremely well. It was somewhat of a struggle knowing that there were more sounds out there just waiting to be discovered but, just like any other project, I had to stay mindful of the production deadline.
I wound up with roughly 30 GB of electromagnetic audio material at 24/96, which would prove to be no small editing feat. At that point I made the decision to conclude the exceptionally rewarding recording sessions and move on to the next stage.
EDITING STAGE
One of the most significant challenges in my entire process is the editing stage. This is primarily because of how incredibly time consuming and laborious it can be. This is self inflicted, however, as I edit down every useful portion of all my recordings before moving forward to anything else. While working through every millisecond of material, I pay close attention to every nuance, keeping everything with the slightest shred of potential.
The only material that gets thrown away is silence, clipping, or areas with significant sonic issues like extreme wind or handling noise. This workflow allows me to make more critical decisions later on, once my edits have already been executed and I have a clear picture of what I am working with as a whole.
I currently use Wavelab 8 on Mac for all of my editing jobs, and typically take my MacBook Pro Retina out to edit audio files at any location other than a studio. I find that a change of scenery really helps keep me centered and allows me to break up the monotony of this repetitive and tedious task. I use a Sound Devices USBPre2 and a set of JH Audio JH16 Pro inear monitors, making for a truly accurate and all around superb portable editing workstation that I can take nearly anywhere.

This project’s wide sonic range spanning from extreme subtlety to all out sonic aggression made the source material an editing challenge of unholy proportions. Admittedly, there were many fatigue-induced turns where I had to talk myself out of the comforting notion that I already had more than enough of a particular edit. I’ve learned to keep pressing forward, however, as I never regret having more options to work from in the end.
As any sound designer can attest, there comes a point where you get sucked so deep into the sonic vortex that everything starts to melt together in your head. You’ll know when you’ve hit this point once you walk away from the session with the sounds still echoing through your mind and everything around you starts to adopt the sonic attributes of the sounds you’ve been editing, leaving you relatively disoriented.
The antidote to slipping into this state is to keep the editing sessions as short and concise as possible, taking lots of quiet breaks along the way. I found that after about half a dozen hours of editing textures of electromagnetic noise, it was nearly impossible to maintain a clear perspective without stepping away to regroup.
Eventually, after numerous weeks of work, I managed to edit my way through all of the recordings. At that point, I entered what I like to call the “elimination process”. This process takes places some days after the final raw editing session is completed, and I’ve had a chance to step away from the material. The goal is to return to the project with a clear head, fresh set of ears and neutral perspective.

This process of elimination is equally demanding and crucial in that it leads me to the “final” selection of edits I bring into the processing stage. During this aspect of the project, I listen to somewhat abstract qualities of each edited sound I call “articulations”. I approach the edits as if they are sonic sculptures, analytically listening for minor imperfections in order to find the best performance in a set.
For example, a particular set of edits may initially entail 30 variations, while I may wind up with 5 after eliminating the material that doesn’t meet my requirements. Sometimes the nuances between edits are so minute that I just have to trust my instinct. In the end, I wind up with lots of rejects that get archived on an array of backup drives, along with all of the original recordings. What’s left are the edits with the most favorable qualities.
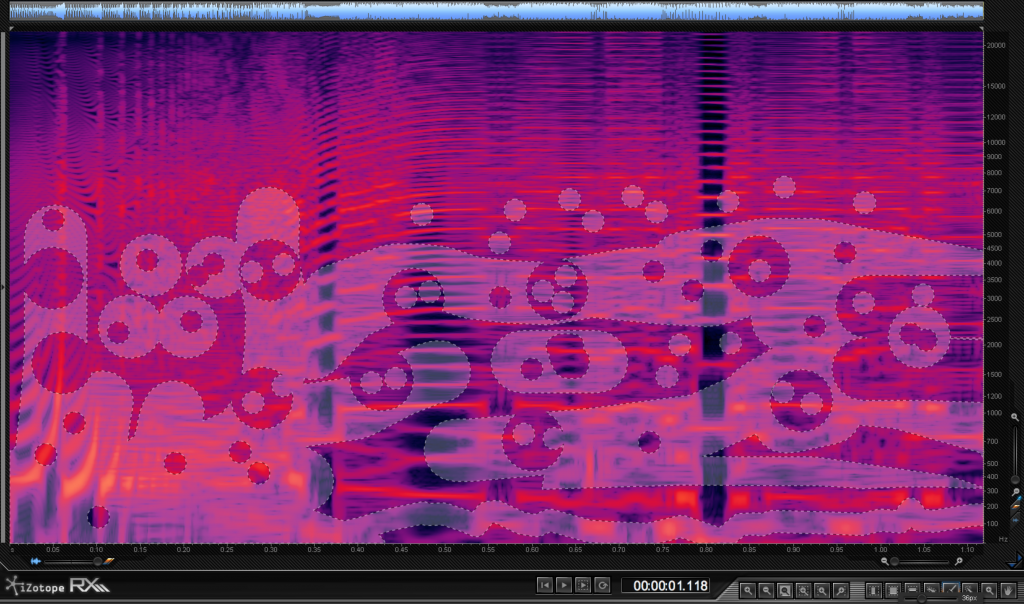
Aside from the typical heads/tails editing, I sometimes reach for iZotope’s RX2 when it’s time to deal with awkward sonic artifacts that could render a recording useless. I find that RX2 allows me to either correct the issue, or provides me with the option of using its superb spectral editing features in a more creative way that helps me sculpt an otherwise useless sound into something interesting and functional.
I used RX2 quite a bit to treat the Microsphere sounds, as there were a lot of instances where I had to attenuate high frequency content, unwanted noise and other artifacts in order to make the files useable. RX2 offers some innovative spectral editing tools which can quickly take you into sci-fi bliss. This became very useful with certain edits that needed more pronounced points of interest. I spent a lot of time experimenting with ways to add movement and depth to some of the less eventful material, with very satisfying results.
PROCESSING STAGE
When working on a sci-fi library, the processing stage of the project is usually where most of the creative ideas come together. It also happens to be the area where you’re most susceptible to falling into your own traps by taking the same approach you typically take to process your sounds. While every sound designer has their own workflow and tool kit of preference, I find that it’s very important to break out of old habits and leave your comfort zone in order to seek new results.
For me, this has to do with trying new tools and techniques I haven’t worked with. I also find it useful to simplify things where appropriate. Sometimes the best results come from the simplest, most minimal techniques. Other times, what seem to be a ludicrous number of steps that require a lot of tedious setup yield the most gratifying results. In short, I am never going to stop experimenting. I don’t want to keep making the same sounds over and over again, year after year.
For Microsphere, I used Ableton Live as the host for my processing chains. I’m a seasoned Pro Tools user, but lately I’ve been finding myself using Live more and more during the processing stage due to it’s modest interface, speedy workflow and ability to host certain plugins that are incompatible with Pro Tools.
I typically set up a session with two or three audio tracks active, each of which have a different plugin chain set up. I use a relatively substantial variety of software, among which are the Michael Norris Suite, GRM Tools, Twisted Tools Reaktor Ensembles, Soundhack plugins, Valhalla DSP plugins, Inear Display plugins and Sonic Charge plugins to name some of my favorite. Once I drop one of my edits onto the timeline, I start to experiment with difference parameter settings, automation and switching the order of plugins in a chain
During the processing stage of Microsphere, I found that I was able to bring some of the electromagnetic sound to life by adding only subtle amounts of time-based processing such as diffused reverb, modulated delays, phasing and chorus. The wonderful part of working with these types of sounds is that they already inherently possess “scientific” and “technical” attributes, which means that even minimal processing can go a long way in giving them a stylized sci-fi aesthetic.
While this library was focused on stylized sounds, I paid special attention to the range of effects I used in order to leave room for further processing where appropriate. This is something I try to keep in mind whenever I’m working on a project of this nature. My goal is to design the most appropriate special effects without rendering the files inflexible. Of course there are times when I deliberately use every possible resource to manipulate a sound beyond recognition to arrive at the most outrageous results.
When I am building a library, I typically don’t bring the final sounds through a mastering process, thereby leaving their dynamic range intact. I prefer this, as I find that it makes the sound effects vastly more pliable and adaptable, which are qualities I’m confident every end user can appreciate.
Once I finally made my way through processing the vast number of edits, I moved on to the last step of the processing stage; the elimination process. This time, I used the same methodology applied during the last step of the editing process.
Mentally submerging myself in the processed effects, listening for inconsistencies from every possible perspective. Hearing the sounds in their final form, effectively placing them into the right context. After making my final selections, I was ready to advance one step closer to completion.
BROADENING THE SPECTRUM
Once I completed the processing stage for all the electromagnetic material, I realized that I was close to achieving what I set out to accomplish. The final sounds were very unique, diverse and fit the aesthetic of the library perfectly. It was very satisfying to hear how well the overall sound set worked together.
At this point I took a slight detour after making the determination that something more could be added to contribute to the library’s depth. I made the decision to supplement the electromagnetic sounds with a synthetic counterpart in order to maximize the tonal palette of the library and ultimately broaden its scope and flexibility.
There was already more than enough material to comprise a full library, so this meant eliminating further material in order to make room for the synthetic effects. At this stage, the elimination process became very difficult. I had already become somewhat attached to my final selections and found I had to be very aggressive in order to eliminate sounds that were originally included as final selections.
Prior to moving into the production process of Microsphere’s synthetic sound effects, I allocated a few sessions to testing and experimentation. I wasn’t interested in simply adding irrelevant electronic sounds to the library for fluff. It was very important to me to integrate sounds that were complimentary and suitable for the overall aesthetic and theme of the library.
I always enjoy working with Reaktor, which yields interesting results by means of some of their flagship synthesizer ensembles including Razor, Skanner XT, Prism and Spark. I also recorded several hardware synths, knowing that the sounds would compliment the material I had generated using software. I recorded things like a Make Noise modular system, Shruthi-1, BitBlobJr and several circuit bent instruments.
Once I captured what felt like a diverse collection of sounds, I once again worked through all of the stages and steps I described earlier in this article. I wound up rejecting a lot of the material from these sessions because there were just too many sounds that didn’t quite fit the unusual characteristics I wanted to harness.
I was focused on achieving effects that had similar qualities to the electromagnetic sounds, but possessed unique characteristics that would underscore the overall soundscape of the library. This process cost me a couple of additional weeks that turned out to be well worth the extra work. I finally felt like I had developed enough material to proceed.
PUTTING IT ALL INTO CONTEXT
When approaching naming the content of a sci-fi library, one is faced with a daunting task. Many needs must be considered, which are determined by the style of the library and the requirements of the developer. Keeping the end user in mind, you have to find some way to make sense of it all, however abstract it may ultimately be. After all, the sound effects must be accessible and the library useable.
My solution to organizing this type of material is to compartmentalize things as much as possible. This may not always simplify the task of applying meaningful naming conventions, but at the very least I find that it minimizes the task of “learning” the material for the end user. The most logical approach for me has been to assign each sound effect to groups and subgroups.
In Microsphere’s case, I decided to begin by splitting up the material into two obvious master groups; Electromagnetic and Synthetic. While there is nothing surprising about this, the subgroups inside each of these master groups were less obvious and had to be handled quite differently, each with their own set of challenges.
Fortunately, the Electromagnetic subgroups facilitated somewhat traditional naming conventions:
ARTICULATIONS: Main subgroup containing the majority of SFX
BURSTS: Faster & shorter SFX
SEGMENTS: Tonal sequences & elaborate passages
TEXTURES: Long drones & textures
As illustrated, the contents of each subgroup were not exactly straight forward, making it a significant challenge and time consuming process to categorize the sounds logically. The result had to be a balance between logical and eccentric organization. Keeping in mind that the sound effects are all abstract, I leaned more toward the eccentric.
To clean things up even more, I split each subgroup into manageable folders called “clusters”. These folders make it much easier to navigate the library and potentially recall the location of a sound due to the fewer amount of sounds per folder.
The synthetic category was organized in a similar way, with only two master groups comprised of abstract synthesizer sounds:
AZIMUTH: Sounds derived from hardware synthesizers
ZENITH: Sounds derived from software synthesizers
Each group was once again split into manageable folders called clusters. I used very specific language in the user guide to not only teach the end user the logic behind the naming conventions and organization of the library, but also encourage an exploratory approach to getting to know the contents of each folder.
As the Project Manager with Glitchmachines, I become very involved in the final steps in bringing everything together. These steps include tasks like building sampler kits and authoring documentation such as the product’s user guide, web content and press release. I am also involved in enriching all of the sound effects in the library with Soundminer Meta Data; a process I will not address in detail, as it has been covered thoroughly in other articles you can read on this website.
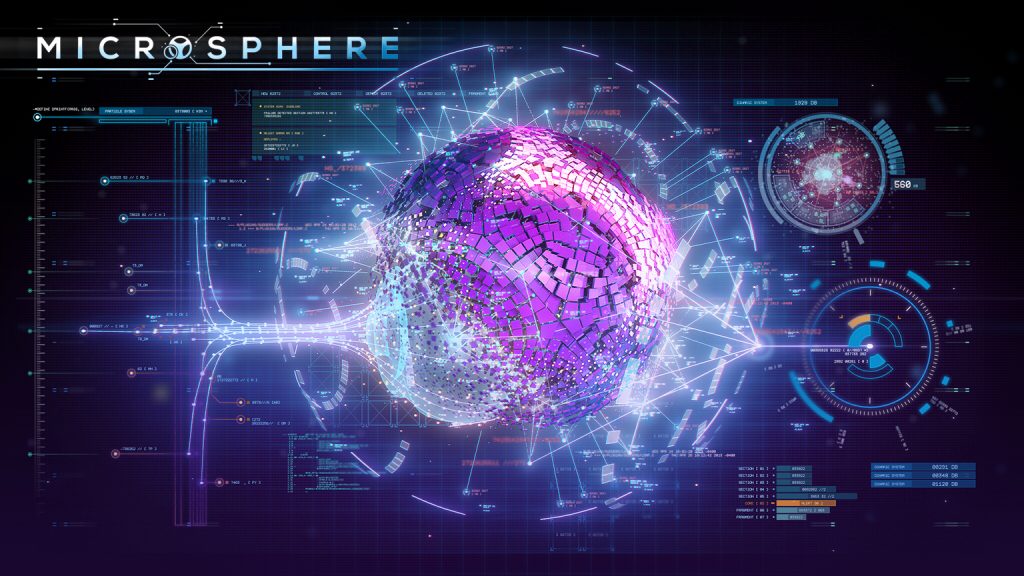
I work closely with our graphic designer in parallel to the audio production process in order to ensure that the aesthetic of the library is visualized accordingly. We are very fortunate to have a superb graphic artist on our team who is perfectly in tune with the nuances of the Glitchmachines aesthetic, as illustrated by the phenomenal artwork he designed for Microsphere. I find it very helpful to be involved in this process because it helps me visualize the sounds in the context which they will be presented in the final product.
COMING TO FRUITION
After all of the trials and tribulations, the challenges and triumphs, the blood sweat tears and the remarkable learning experience I gained from the production of this library, I am glad to say that I am very proud of the results of this project.
Looking back, it’s always astounding how many things have to come together in order for a library to come to fruition. If my future projects yield even half of the challenge and sheer satisfaction I got out of working on Microsphere, then I can honestly say that I have the best job I could ever wish for.
Special thanks to Ivo for putting together this article for Noise Month. We are always looking for more guest contributions. Please contact shaun at designingsound dot org
You can view more pictures from the Microsphere recording sessions here.

Amazing! Thank you for sharing so inspiring experience :)
i have some questions: the radioshak telephone pickup is the same as the Jez’s one? is it good enough? and how you connect it to the Tascam? thanks )
Hi Anton,
Thank you for your interest!
Technically, Jez’s mics are supposed to be more sensitive, as he modifies them a bit. He speaks about this somewhere on his site.
I couldn’t tell enough of a difference though, so it’s hard to say whether they are necessarily going to give you anything that the Radio Shack ones won’t. Be that as it may, I have a lot of respect for Jez and have purchased several of his mics, all of which work exceptionally well.
To connect to the Tascam, I use a pair of simple transformers:
http://www.sweetwater.com/store/detail/MIT129/
Hope this helps!
Ivo
Thanks, Ivo :)
I keep coming back to this article.I recently moved out of the states but the last thing I bought were two pickup microphones from radioshack and I’ve been trying to find the right kind of adaptors! I’m going to order them ASAP. ^__^ Thank you for the inspirational words and sounds!
Ivo,
This is a delightfully informative chronicle of the modern sound design process. Just as your jaw-dropped from experiencing new, unimaginable sounds, I type with mouth agape at this extremely well-written essay. In a sea of horribly strung together words, it is rare that I find a rich, pragmatic, and soulful sequence of words as you have offered. Thank you, I am excited to listen to this library. Where can I find some snippets?
Respectfully,
DJMXF
Thanks for your kind words! You can hear the sounds here: https://soundcloud.com/glitchmachines/sets/glitchmachines-microsphere_demos
re: the difference between JrF coils & radioshack ones – there is a difference but with hand held recorders with lower spec pre-amps such as the tascam these differences are perhaps harder to spot. Even then though the JrF ones have their limiters removed & here in Europe (& lots of other countries) these restrict the range of frequencies they pick up. As we don’t have radio shack here in the UK I can’t tell exactly which coils they sell but lots of folks in the US for example have JrF coils & others from r-shack & notice the difference. It could be possible that you managed to get some that were shipped to r-shack without the limiters though, as they’re only installed for shipment outside of the far east.
thanks Jez, just ordered one yesterday :)
thanks for your input Jez!
Very insightful and inspiring — Found some interesting techniques I’m going to try out myself! Great work as always
Thanks for that – I’m glad to hear you got something out of it! Your support is greatly appreciated!
Ivo, it looks like that there is so much hard work and of course, plenty of fun involved in the whole process! Your sound libraries are my next buy! Cheers & thanks for sharing this!
Thanks for the comment! A pleasure to share this – thanks for reading!
Great Article – very inpiring – there are some great experiments in noise in the same vein (i.e. finding noises) as Nicolas Collins – Hardware Hacking book – the original free manual before this book can be found here:
http://www.nicolascollins.com/texts/originalhackingmanual.pdf
Thanks for reading, Christian!
I look forward to reading up on Nicolas Collins’ work.
Cheers
Great Read! I’ve always wanted to pick your brain Ivo on how you work, now I don’t have to! :)
Thanks for reading, Colin! I’m happy to elaborate any time – just get in touch if you want to chat.