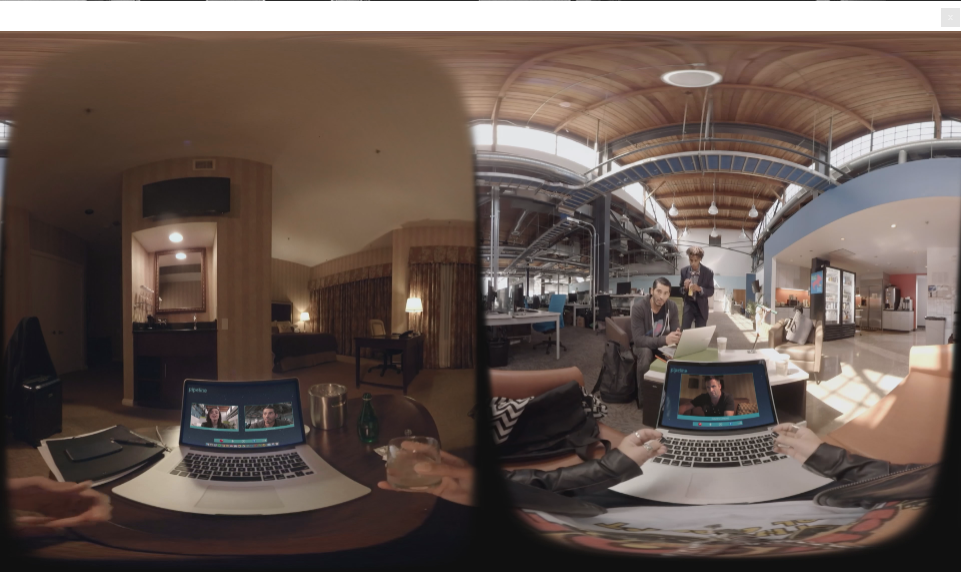
In the fall of 2016, I was asked to sound design and mix a VR/360 short called UTURN. While there’s a lot of discussion surrounding immersive/3D sound for games, I don’t see a lot of conversation on the linear side. I’ve been meaning to get something written up regarding the approach we took, and my schedule finally lightened up enough to for me to follow through on that.
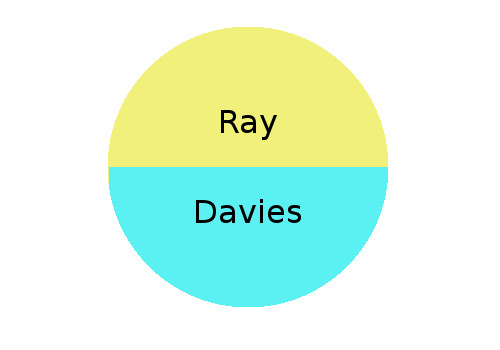 UTURN is a VR film created by Nathalie Mathé and Justin Chin, written and directed by Ryan Lynch and produced by NativeVR. It follows the stories of Ray and Davies, a female coder and a male CTO in the Bay Area tech world respectively. The story is told in first person perspective, and split between two hemispheres. In one hemisphere, you inhabit the body of Ray and view events from her perspective. In the opposing hemisphere, you’re in Davies’ perspective. The stories happen simultaneously in these parallel spaces, whether the viewer is watching or not, and actually interact with each other to some degree through video chat and cell phones. So there are some active links between the two halves of the narrative. The viewer can choose which character to follow throughout the story simply by turning from one side to the other. The viewer has complete control of which perspective they inhabit at any time.
In my initial conversations with Nathalie and Justin, they made it clear that they had a strong idea of how they wanted the sound to behave in playback but weren’t sure of which final format they were going to deliver for (Youtube, Oculus, Samsung Gear, Vive…you know how many devices and formats there are these days). The primary focus of our early discussions was the idea of a reactive mix. To put it simply, if the viewer was watching from Ray’s perspective, they didn’t want to hear Davies’ (or at the very least, it should be MUCH quieter). The viewer needed to be aware that the other half of the story was happening, but not be distracted by it. Again, the viewer chooses which story to follow and when, and we didn’t want to actively interfere with that decision making process…or make it hard to pay attention to the stream they chose at any given moment. Based on this, and other factors surrounding budget and schedule, I suggested that we work in the quad-binaural format for Samsung Gear VR.
I’ve found that not a lot of people are familiar with this format, despite its usefulness in linear projects. It probably also doesn’t help that outside of Gear VR, which natively supports the format, it requires special implementation…you can read that as “custom made playback application.” So while it has its drawbacks, here are the basics of the format that made it a good choice for this particular project. Gear VR has this format set up as four separate audio streams, one for each of the cardinal directions. Really, they’re just stereo streams, but you can obviously drop a binaural encoded file into them. You have separate streams for 0 degrees, 90 degrees, 180 and 270. As the viewer turns within the “space” of the video, the Gear VR crossfades between the binaural streams. You never hear more than two files in the output. If you’re careful with how you construct and monitor your mixes, you can do this with little to no noticeable phase issues as the boundaries are crossed. This was our method for having the device “react” to where the viewer is focusing, giving us volume control (really just mute) in addition to panning.
Since these are binaural encodes, you can build them however you like. This means you could create a mix with height information by utilizing ambisonic plug-ins ahead of the binaural encode. This film took place entirely indoors, and…again…there were some budget and time constraints to consider. We opted to forego the ambisonics front end to reduce complexity. Ultimately, two separate 7.0 mixes were created, one for each hemisphere, and then a combination of mix rotation and channel muting allowed me to create the side mixes (90 and 270 degrees). 7.0 was used, because it provides more discrete channels for the binaural encoder to work with than 5.0. Basically, it gave better spatialization than a lower channel count. I’ll return to all of this shortly with a walkthrough of the mix template used on the project.
Kevin Bolen joined me on the project to help with the editing load and mux the various mix version back into Gear VR compatible formatted video for review. In early tests with the guide tracks, before I had completed constructing the template, we found that having the side mixes at unity with our primary mixes became distracting, especially when there was dialog going in each hemisphere. The solution was to drop the side mixes by 12dB. It gave enough of a dip to keep things from becoming overwhelming, but didn’t overly hurt intelligibility of the various elements. While this worked with the guide tracks, -12dB wound up being too much of a drop with the final mixed versions. -8dB was our final level for the side mixes.
Armed with all of these factors, I set to work in generating a template that would address all of our needs, but also provide some flexibility should we later need to adapt to a different format. Let’s take a look at it now. If you like, you can download a copy of the empty Pro Tools template to explore it on your own. [It’s available here.] The template is divided into four primary sessions. A 7.0 section for Ray, A 7.0 Section for Davies, an additional MX section separate from the Ray/Davies specific music, and a mix rotation and output section. While this template is 7.1 capable, I only left the “.1” routing in there for later flexibility. I did not actually use the LFE channel in this project.
H1/HEM 1 and H2/HEM 2 became the prefix for all pre-dubs and cut tracks for the Ray and Davies oriented mixes respectively. Each hemisphere had four dialog pre-dubs, with sends to two Reverb Auxes.
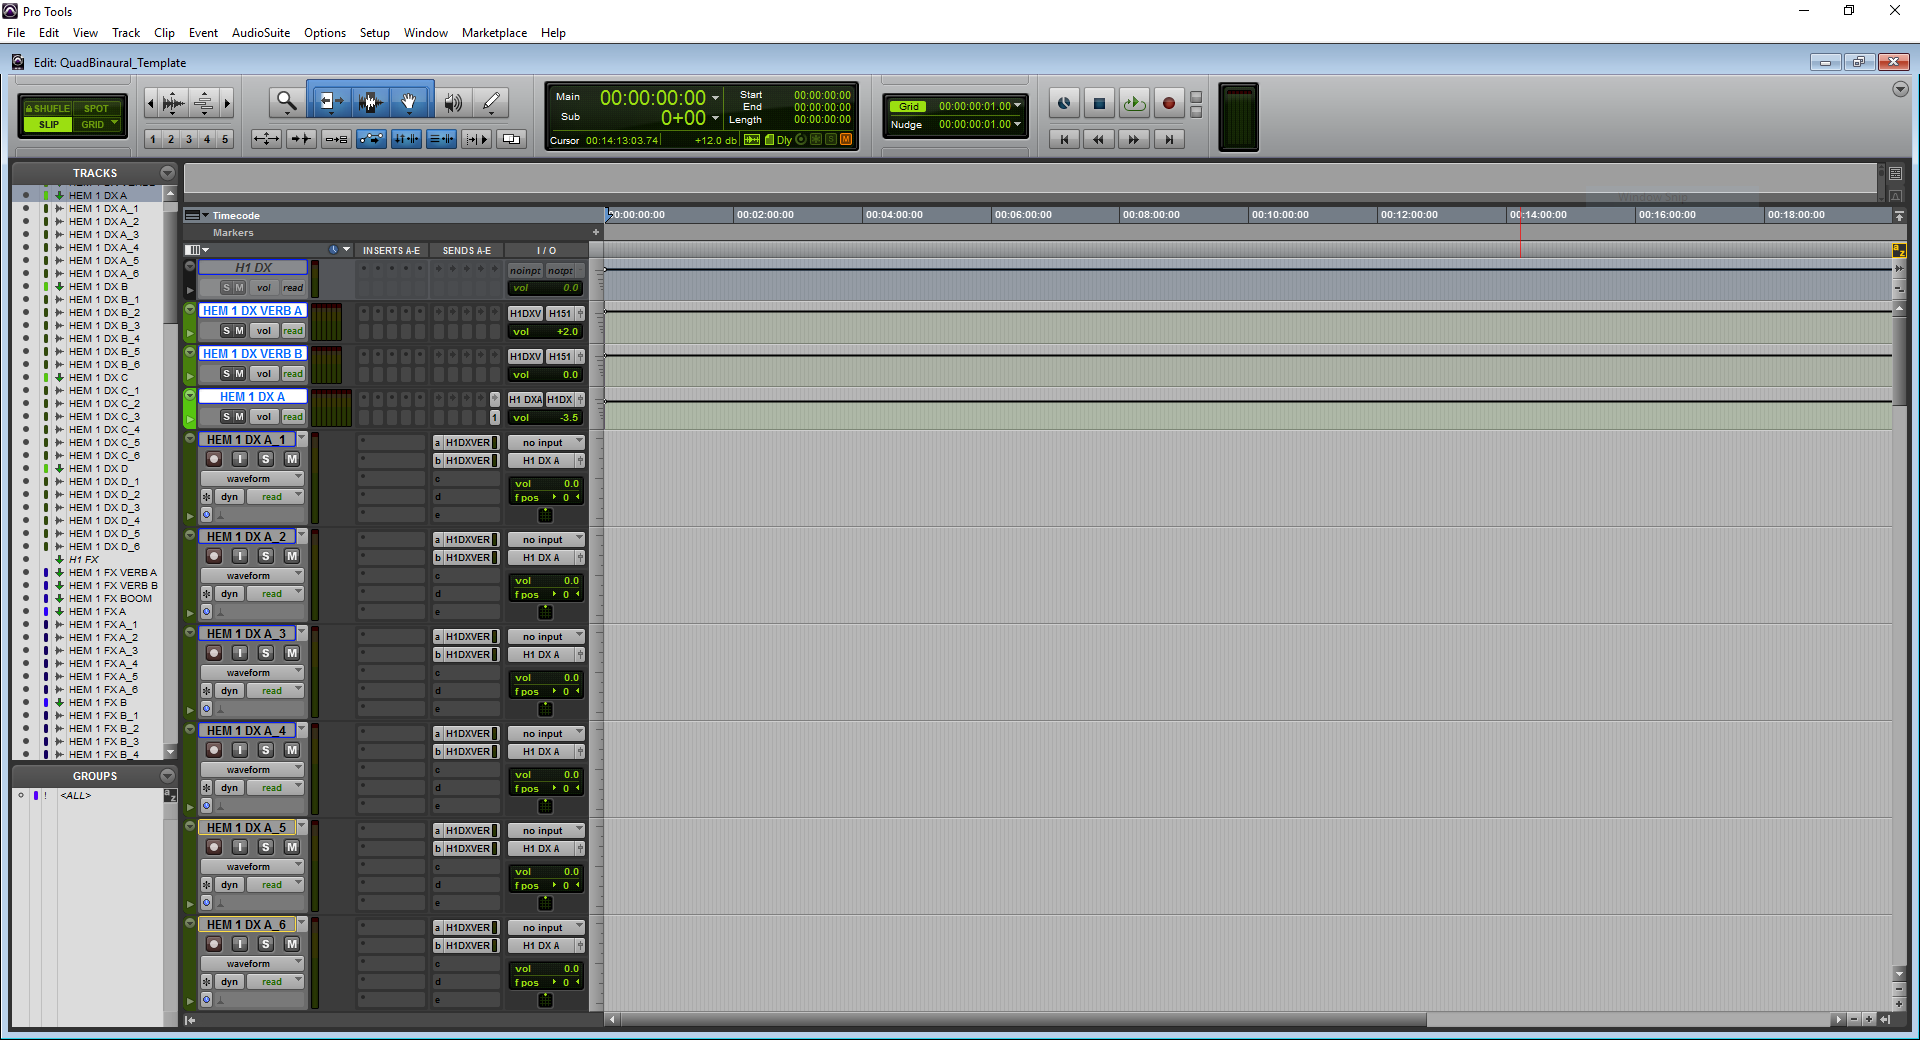
Likewise, each hemisphere had four hard FX pre-dubs with sends feeding to two verbs and a “boom” track should I need to add any low frequency content through a sub-harmonic generating plug-in.
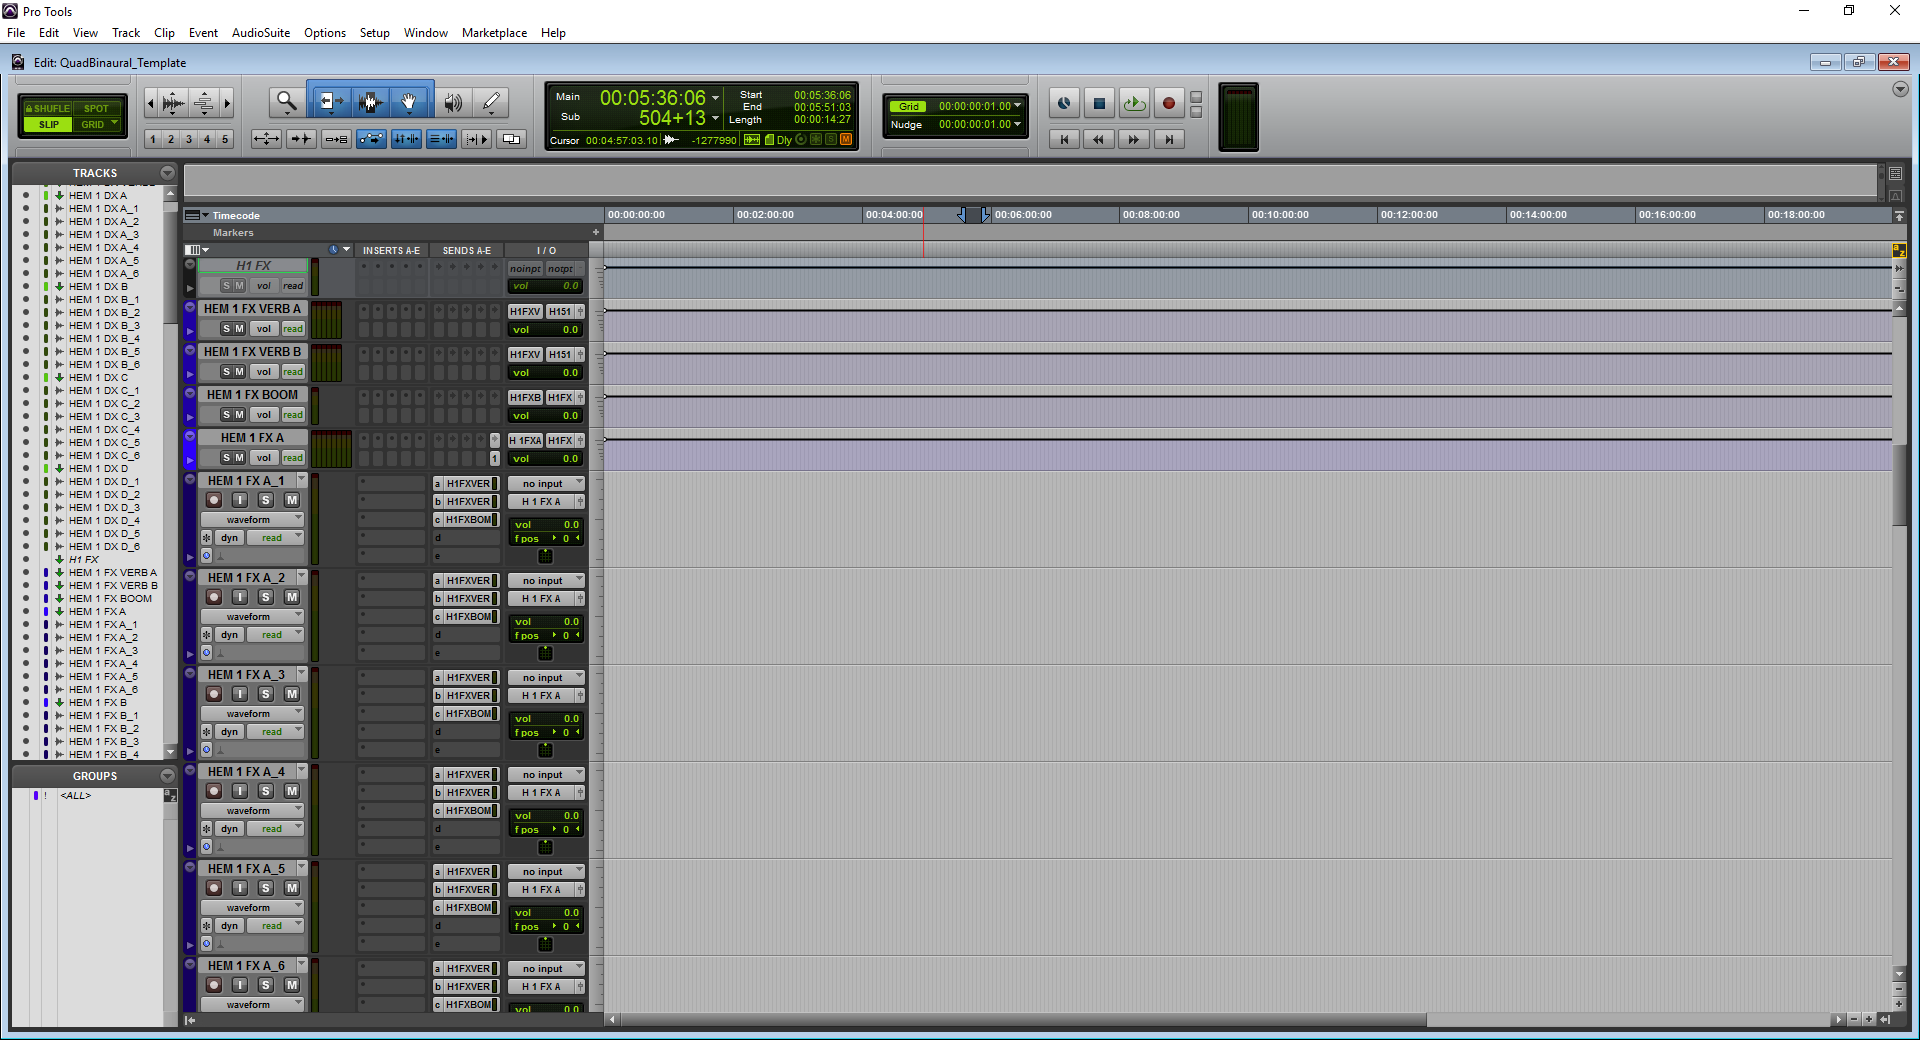
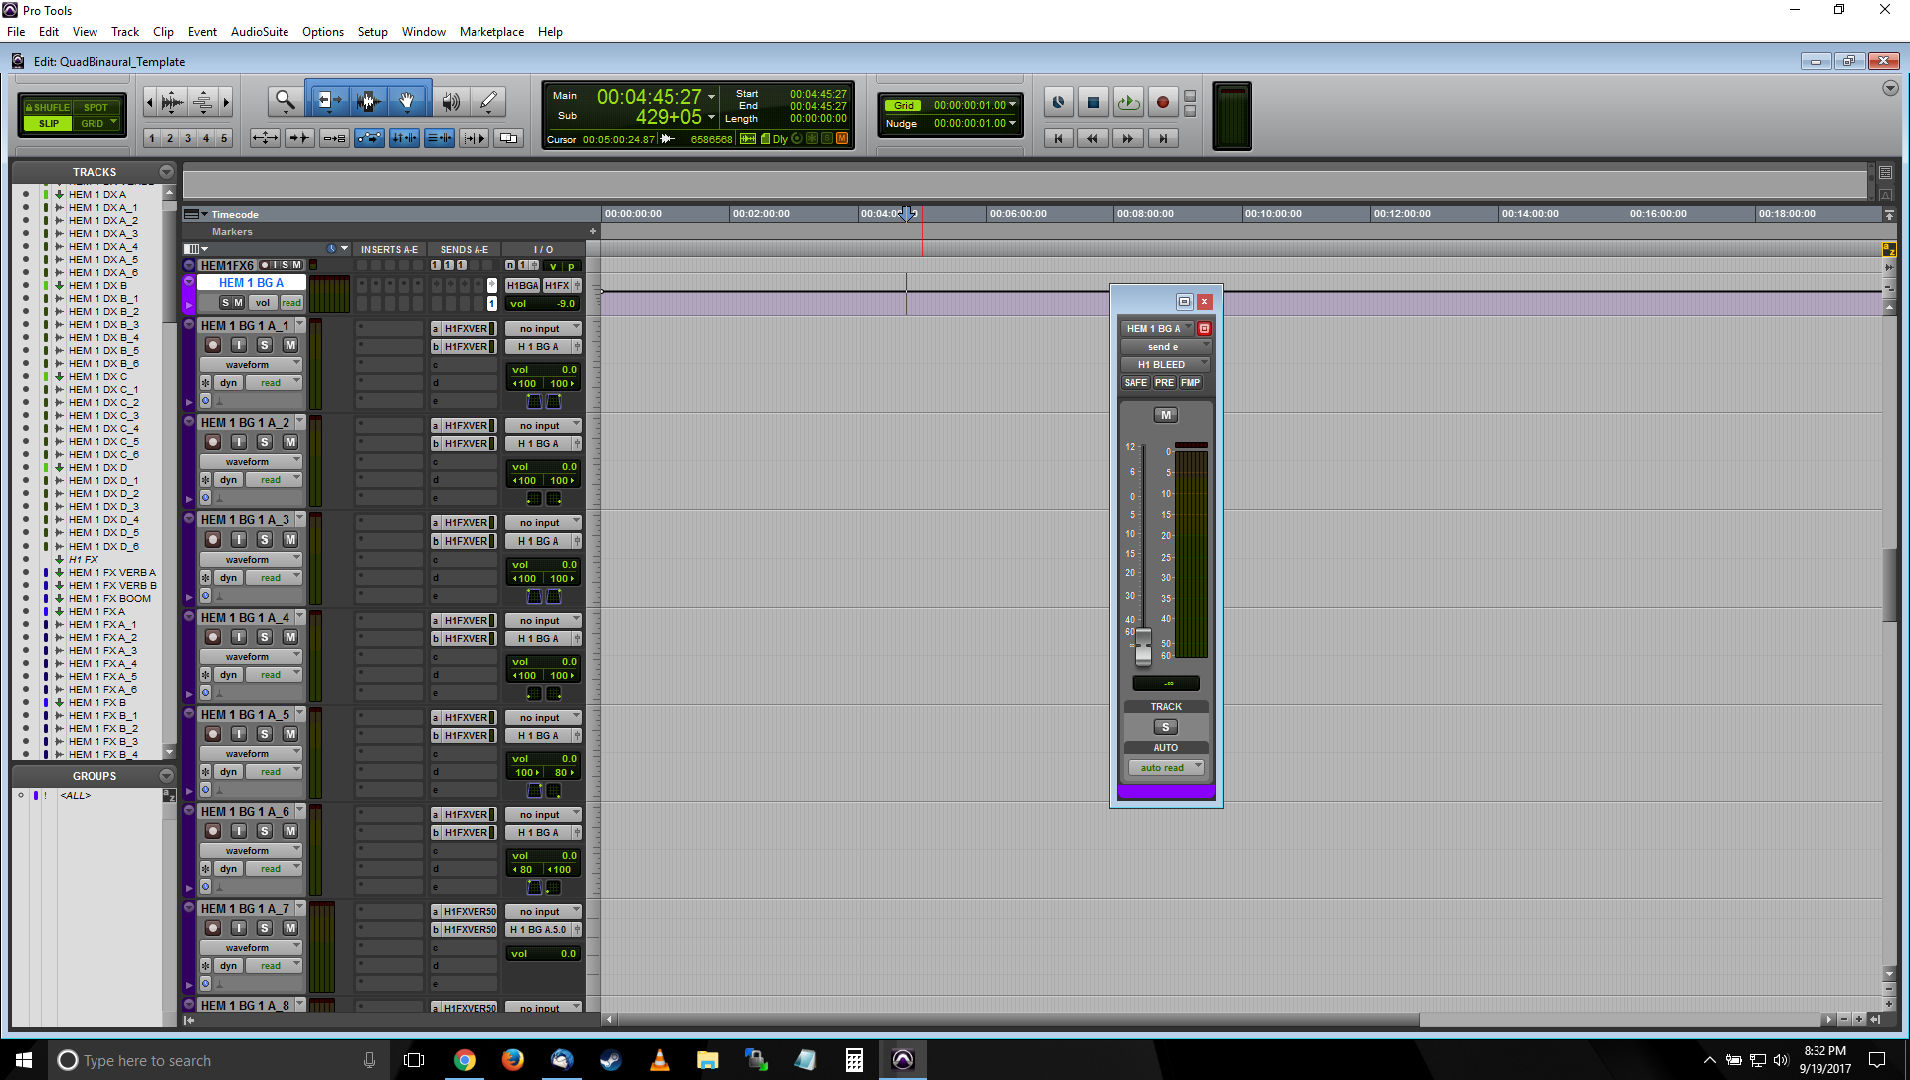
The FX section also had two BG pre-dubs with a combination of stereo and 5.0 tracks…again, sending out to two multi-channel verb auxes. Something you’ll notice here is that for every pre-dub master aux I had one send available going out to a bus labelled “bleed.” We had discussed the possibility of having cues from the opposite hemisphere “bleed” into the other mix as a reminder that activity was happening behind the viewer. Ultimately, we decided not to use it. I saw no reason to remove it from the template though. So this “H1 BLEED” send could be used to route signals to the H2 mix if desired.
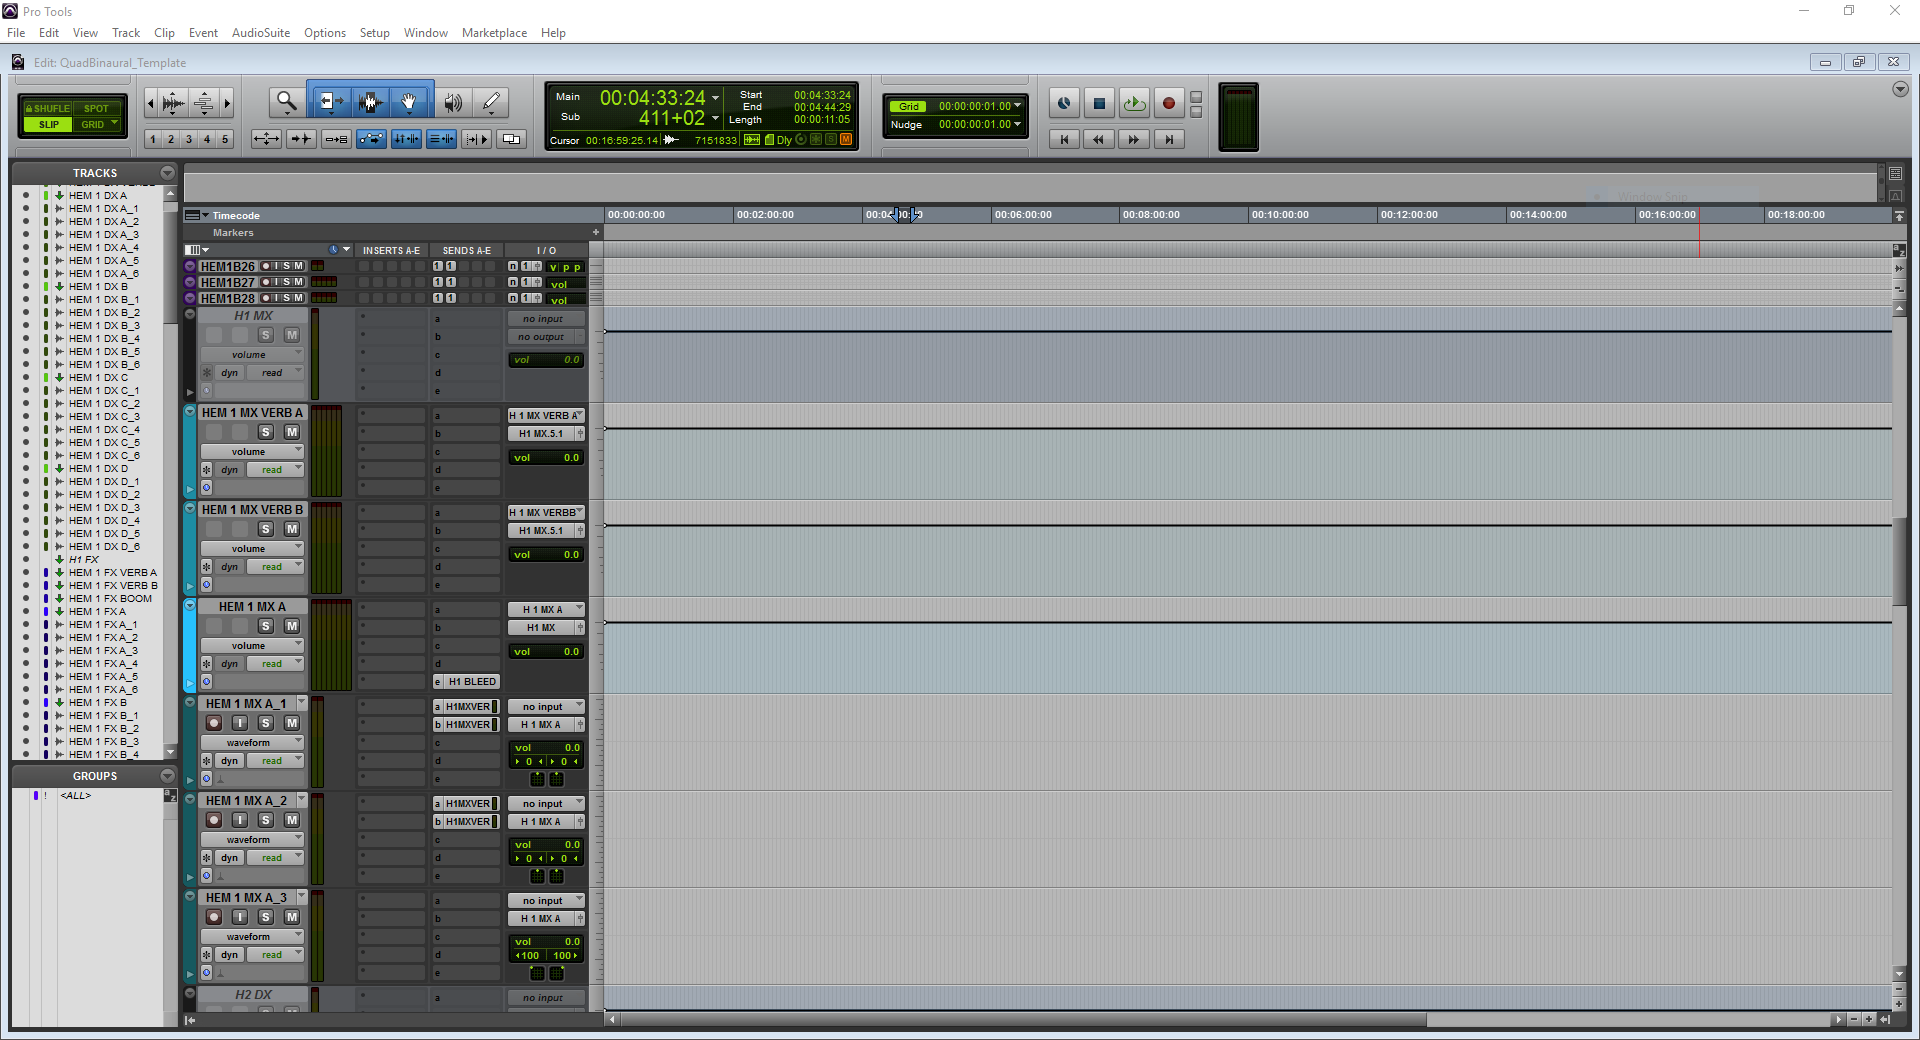
We weren’t going to be dealing with a ton of music in this piece, so a small MX pre-dub sufficed. It consisted of three stereo tracks, and the ever present reverb sends for when cues had to be placed in the space. This happened a number of times with things like a character listening to music off of their phone, or as part of the background ambience in a restaurant.
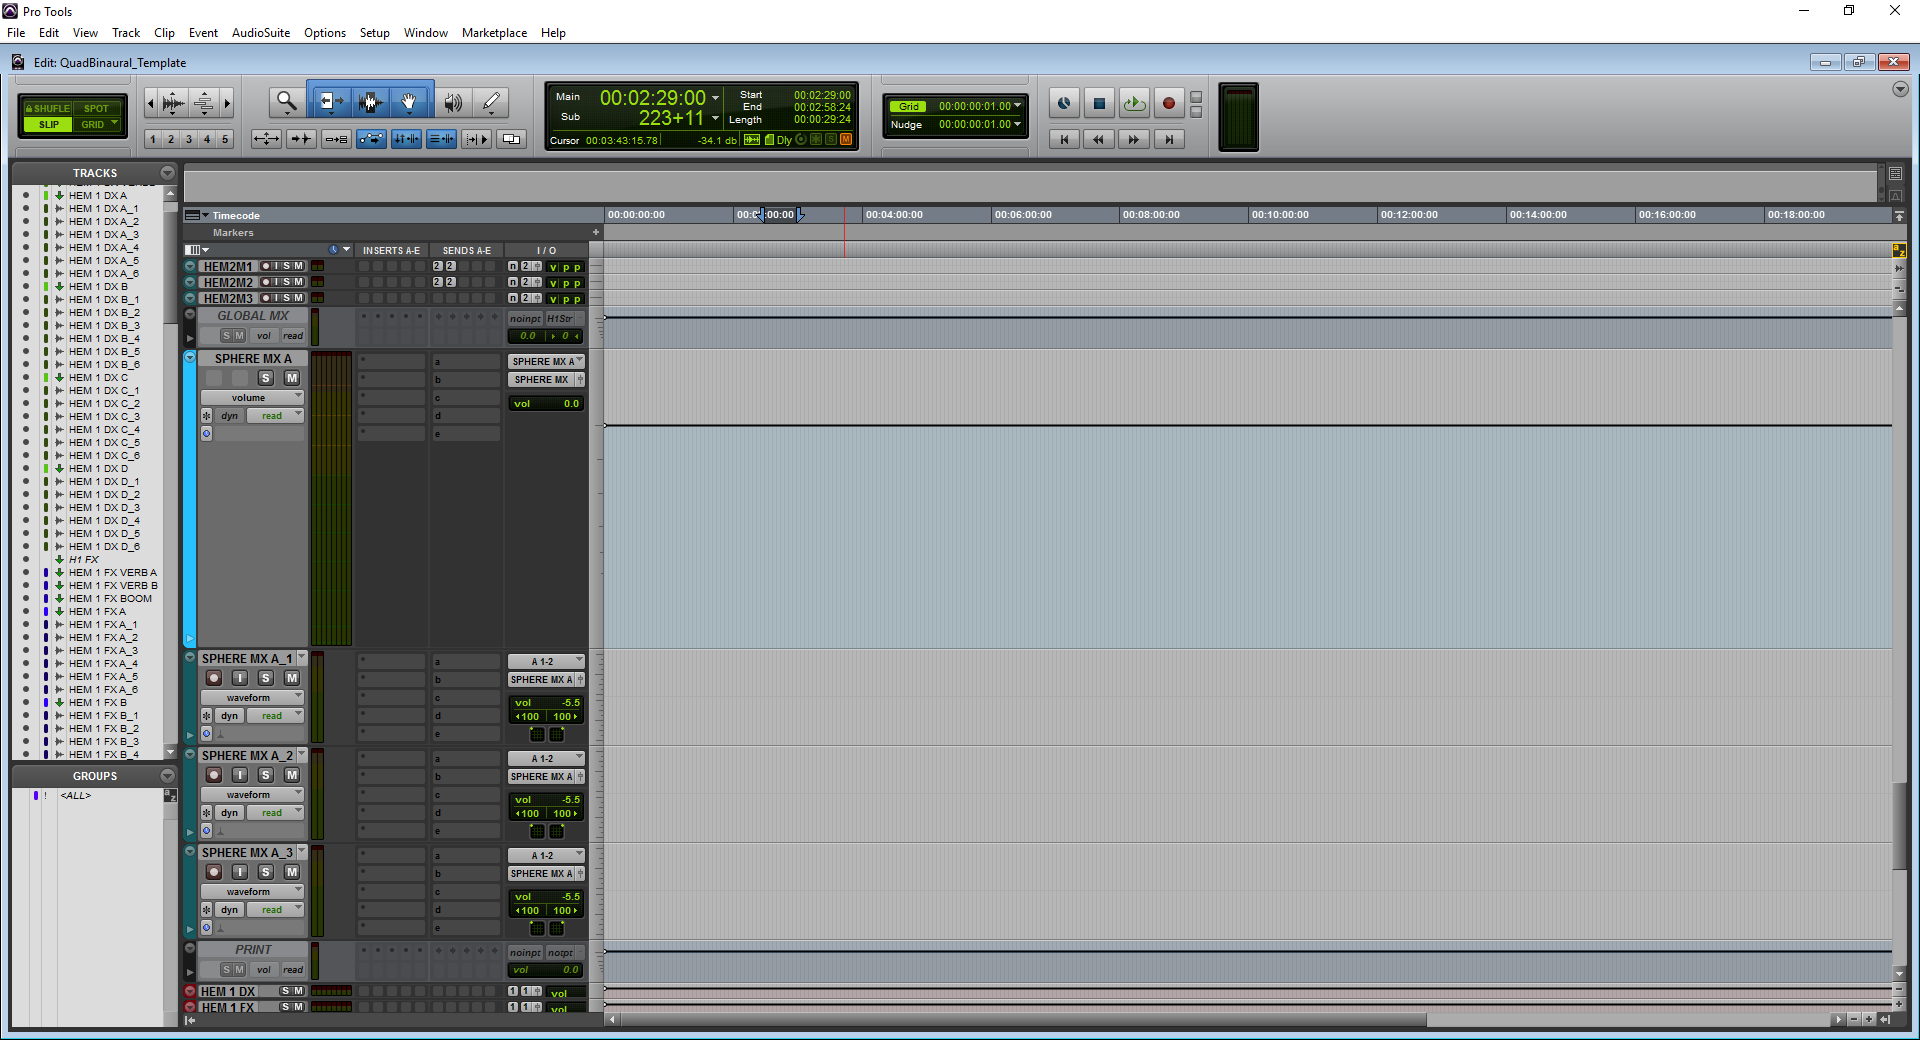
Music is where things start to get a little interesting in the template. Once you get down passed the “H2 MX” section, you encounter the “GLOBAL MX” area. There was score in this piece, and we wanted a way to play it in all mixes so that there would be no “panning” as the viewer’s head turned. The template is designed to allow a piece of music to be layered over top (so to speak) of the mix; regardless of the state of rotation. This is the additional MX section in the template that I previously mentioned.
If you take a look at the master routing section just below the inactive “PRINT” track, you’ll see where things start to come together. Each stem comes in here and goes out to the appropriate rotation control. A quick note, I opted to leave the BG stem as part of the FX stem. I did this to streamline and simplify a session that already had a lot of routing to keep track of. It would be easy to modify this to give yourself a separate BG stem to work with. You’ll notice that “SPHERE MX” (from the global MX section) does not go out to a rotation control. It goes directly to the print bus. This is how I gave myself the ability to have a spatially locked score. No matter which angle of mix I was outputting, the center channel of the score would stay in front of the viewer.
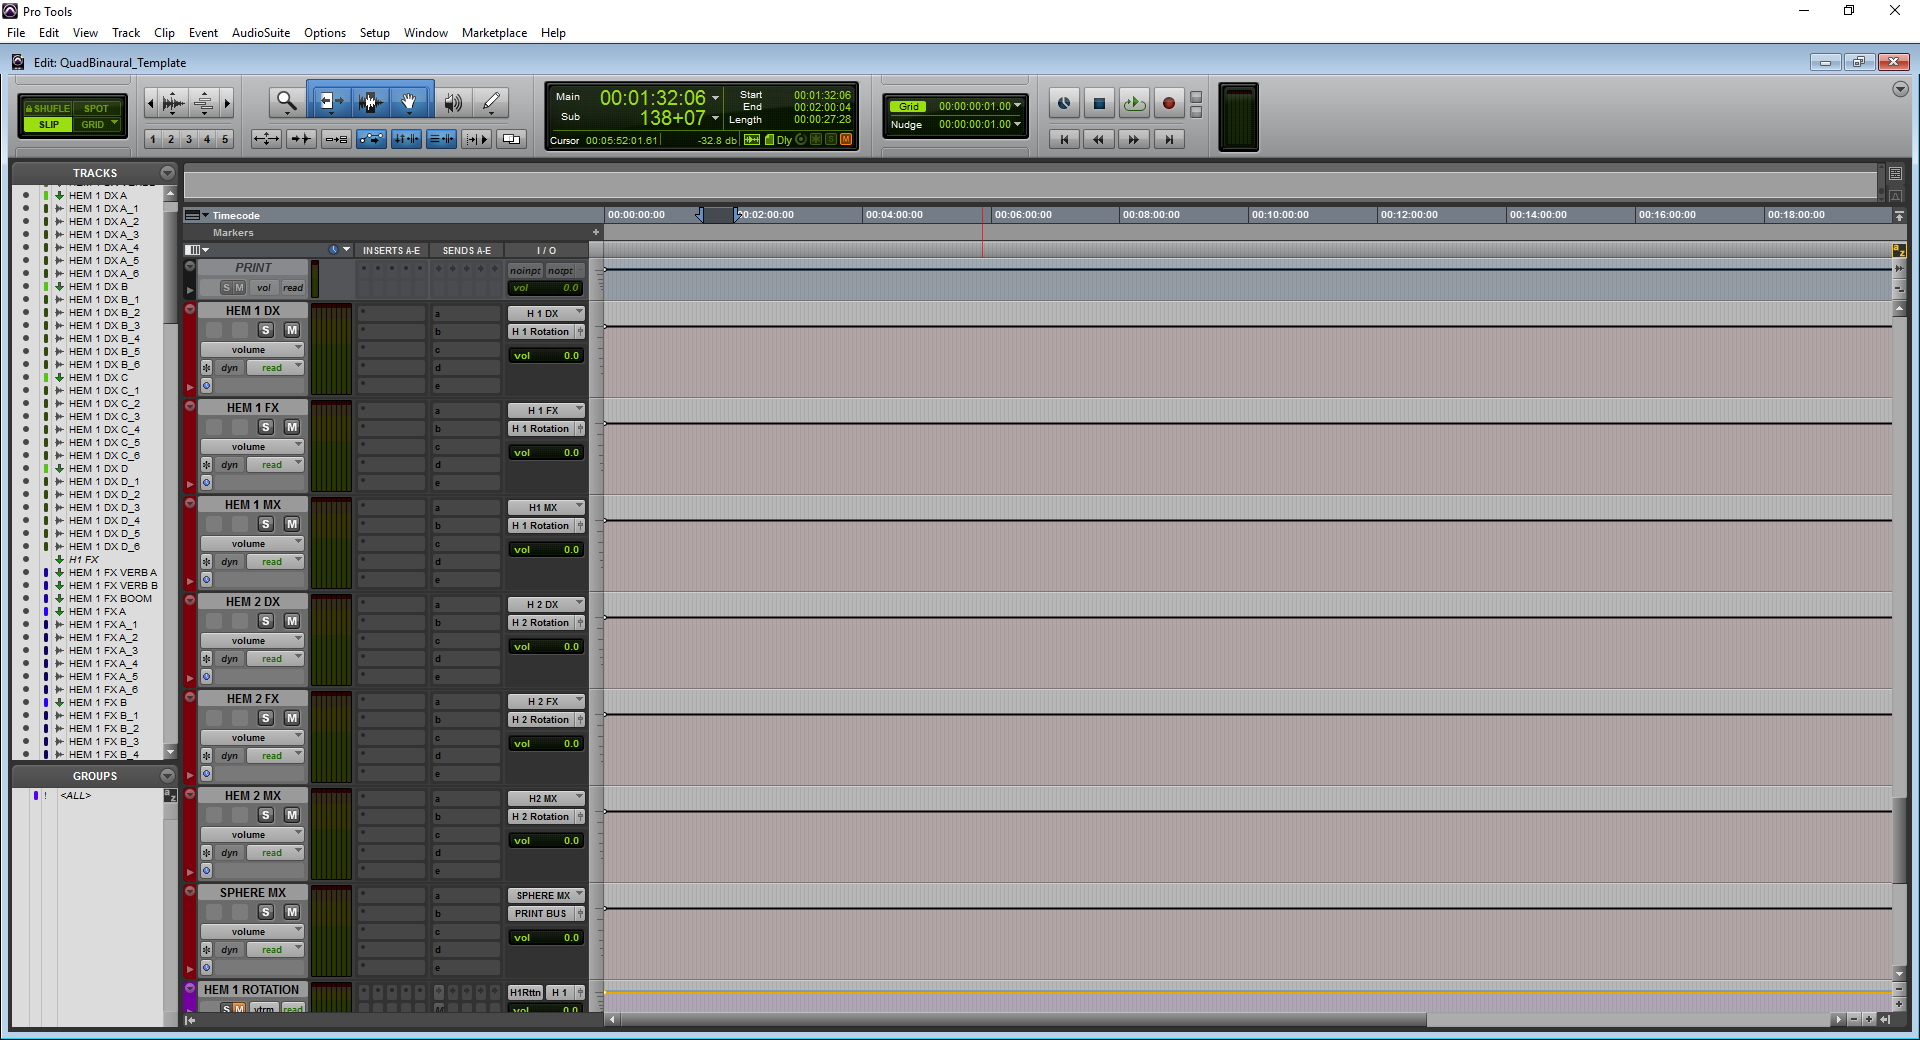
So, I’ll admit that the rotation section isn’t all that fun to look at without the plug-ins going. So here’s a snapshot of it from the final mix.
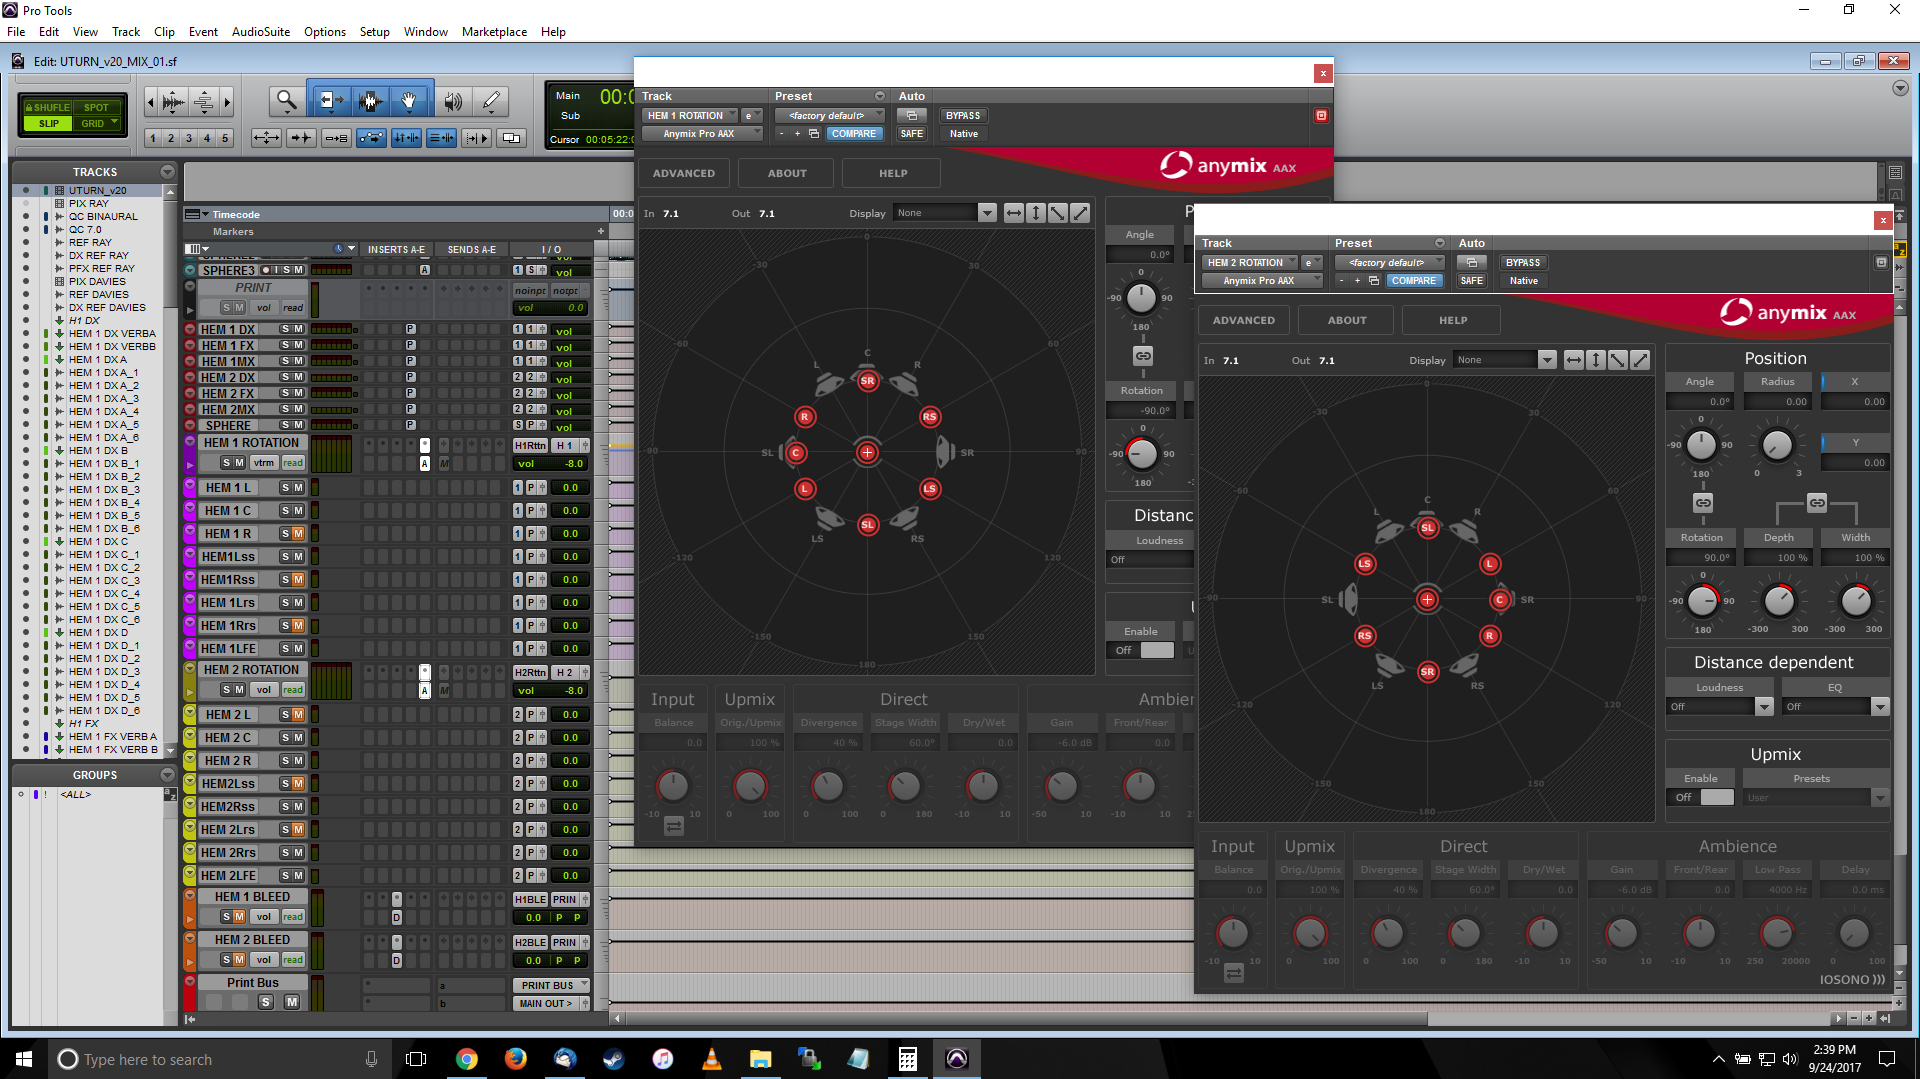
Stems come into the Rotation routing, where I had a mix panner instantiated. I used AnyMix Pro, because Spanner isn’t available on PC (which is what my home system is). So Ray for example, who was initially on the 0 degree plane, would be rotated 90 degrees left or right to output the 90 degree and 270 degree mixes respectively. This is also the track that would receive the 8dB reduction for those side mixes. Davies, who was initially on the 180 degree plane, would be rotated 90 degrees left and right for the 270 and 90 degree mixes respectively. This would then be output to a set of tracks that would let me mute certain channels. I’ll use Ray as an example.
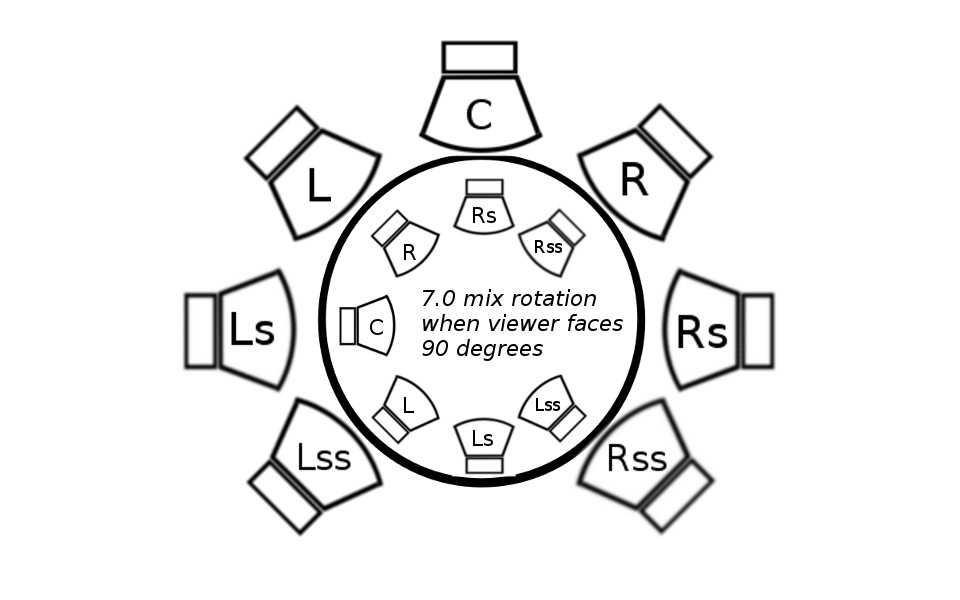
If I was outputting the 90 degree mix, that meant Ray’s mix was rotated 90 degrees to the left. In other words, the center channel of what would be her UNROTATED mix would now be coming out of the left side surround, the right out of the left, etc. To keep things properly separated and divided where the video split between the two sides of the story, I would mute any channels that “crossed” the boundary line. So I would mute the tracks labelled HEM 1 R, HEM 1 Rss and HEM 1 Rrs. These were the channels that would cross into Davies’ territory. I would mute the opposite for Davies (L, Lss and Lrs). When outputting the 270 degree mix, the muted channels would be reversed. All of these channels then routed out to the print bus.
The Print Bus track is where my binaural encoder lived. After testing a few plug-ins, I settled on Waves NX as the encoder for this project. The early reflections parameter did a great job of shoring up the spatial image. At the time, Facebook 360 Audio Tools weren’t yet available for PC; otherwise, I would likely have just used those.
So that’s my session and method for this particular project. I’ve already alluded to the fact that I made certain choices to keep the session from becoming overcomplicated. I could have set things up to output all four mixes at once, but outputting each individually gave me the chance to QC each as they bounced. The session also made it easy for me to output the 7.0 stems, and 7.0 versions of each of the mixes so Kevin and I could later test binaural encodes of the mix using any new tools that might later become available. If you’ve got any questions or suggestions, please don’t hesitate to drop them below.
Oh, and have fun playing with the template if you’ve downloaded it!
As much of an ardent proponent of not pre-rendering spatial information, I also believe that the right solution should be dictated by the project’s creative needs and not the tools. This project is a great use case for quad binaural. Great write up, Shaun!
Thanks, Viktor. And that’s kind of where I was going with this. Needs of the project are always going to dictate the range of approaches. Then it’s simply a matter of selecting the most appropriate from that range.
I’ve found so little written up on binaural audio mixing, This is a total eye opener for me. Completely fascinating, Thank you for sharing all your hard work with us Shaun!
Great job…
But, as you selected the Samsung Gear VR platform with Samsung VR app for playing, I guess you could have obtained signifcantly better results using a Mach1 soundtrack instead of crappy old Quad Binaural…
In Mach1 you have the same capability of keeping the two hemispheres completely separated, if you want, without the complexity of passing thjough 7.0-to-binaural rendering, which invariantly adds colouration and other artifacts.
I’ve heard of Mach1, Angelo, but haven’t played with it yet. Also, it wasn’t available at the time I was working on this particular project. The tools available in this space changes on a monthly basis. ;)