
I remember remarking to an audio plug-in developer at GDC earlier this year that for a plugin to be widely adopted amongst working professionals (especially those in the film post-production community) I felt that before anything else, it had to save the user time. Original ideas, new workflows and cool sounds are all well and good, but if it extends an already complex and tool-saturated workflow, I couldn’t see it being widely adopted.
Enter Dehumaniser II, a plug-in featuring a modular DSP environment designed principally for creature and vocal design that through a well designed interface, generous toolset and controls, mostly succeeds in generating interesting sounds while saving you time (the pros would seem to agree as it’s already been used in numerous films and video games including The Avengers: Age of Ultron, The Jungle Book, Doom, Evolve and Far Cry 4). The degree to which it succeeds in doing all that however (and whether it justifies its considerable price tag which is £449 at the time of writing) depends on the input you are able to provide it with and also your level of tolerance for some niggling inconsistencies and errors in its execution. There is a free demo of Dehumaniser II so you have no excuse not to try it out yourself and see if it’s right for you. Also, students can get a 50% discount on Dehumaniser II.
Origins
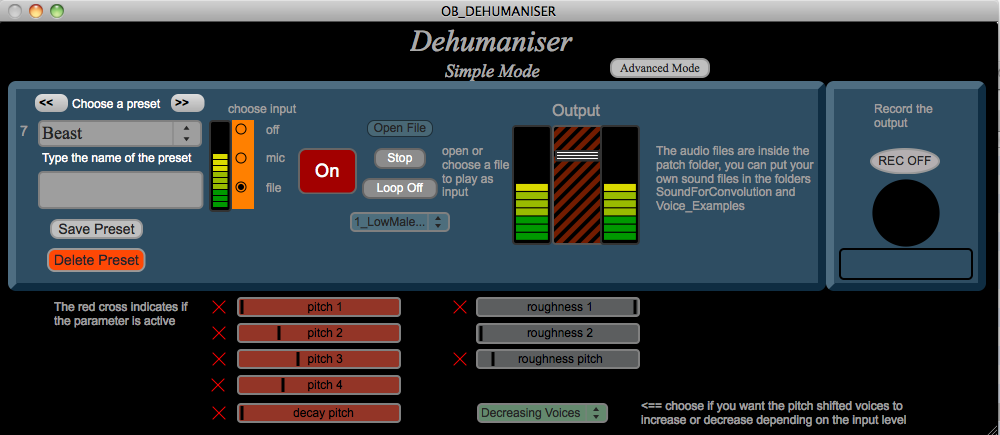
The Dehumaniser line is the brainchild of Orfeas Boteas and originally started as a University project. A few years ago now, I myself was at college in a MaxMSP class when I saw someone on LinkedIn post about the first publicly (and freely) available version of Dehumaniser which was itself built in MaxMSP.
The Interface
Now several years, a company formed and a few commercial releases later, Dehumaniser has been rebuilt from the ground up in C++ as a plugin (formally stand-alone software), and it looks a little different…
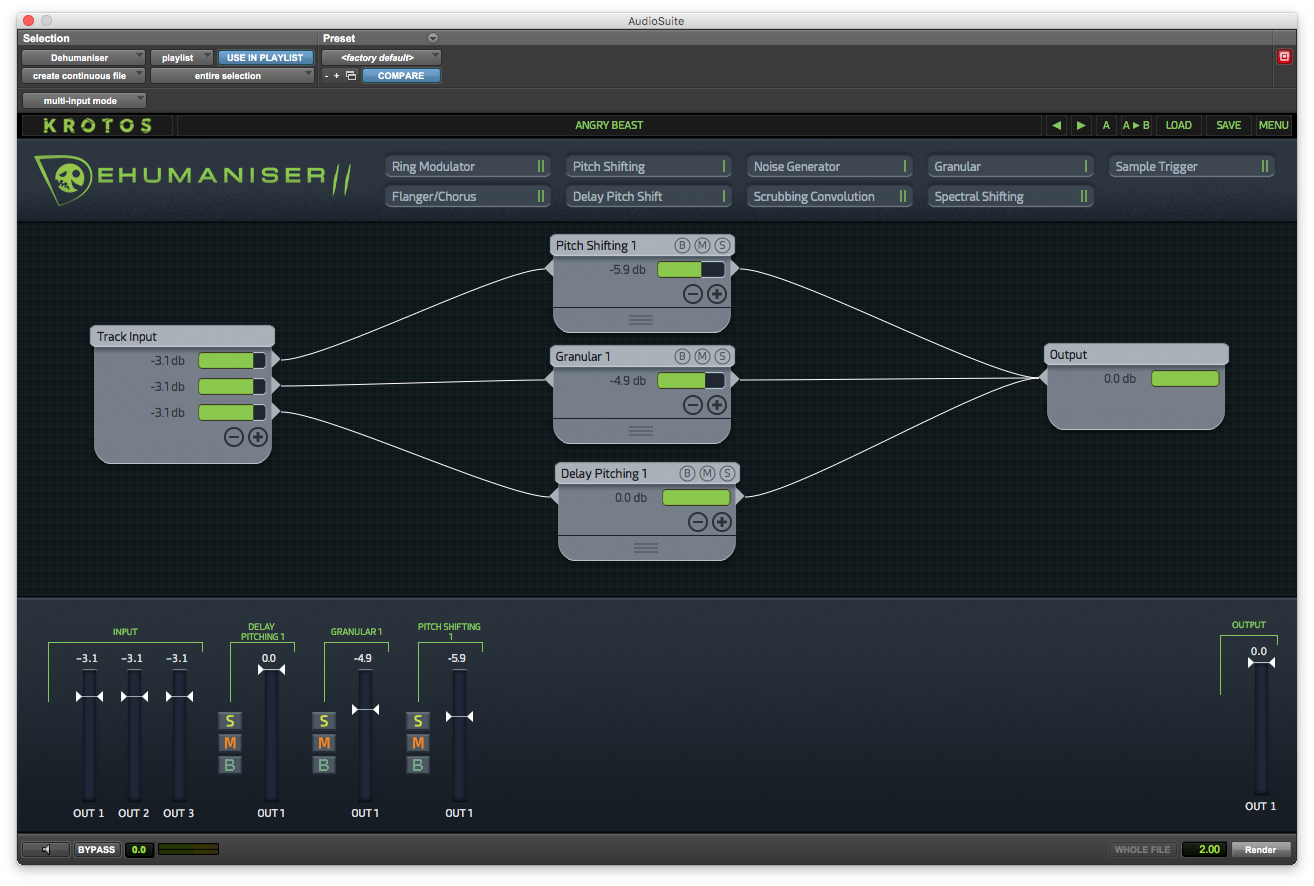
In interviews, Orfeas and his team have spoken of how much time they spent designing the interface and it shows. Personally, I think the time and effort paid off as the GUI is my favorite thing about Dehumaniser II. I find it to be visually clear, intuitive and space-efficient.
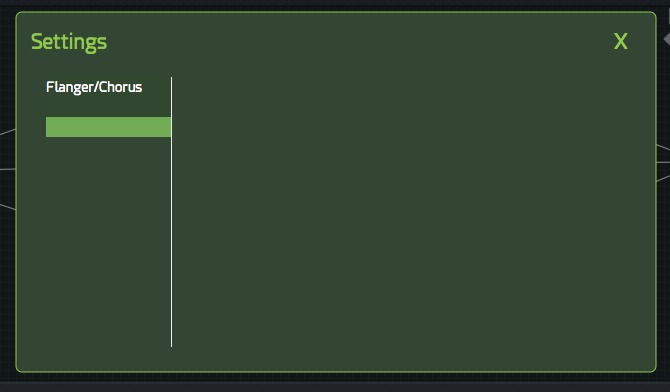
At the top it shows the current preset, A/B and A copy to B functionality (very useful for any iterative design process) and buttons to load and save presets from you own collection and the bundle included with the software. The menu provides quick access to the manual and currently the only setting which allows you to switch between an older version of the Flanger/Chorus node to preserve presets designed before the v1.2 update.

That’s currently the only available setting though I did find a bug whereby I could seemingly select and invisible menu item…
Below the menu bar is another bar that allows you to add Nodes, which you can think of as individual FX processors.

Except for the Noise Generator (of which you can only have one), you can have up to two nodes of each type in an instance. The green vertical lines represent how many more you can add.
Below this is the modular interface (failure to anyone who uses Reaper, MaxMSP or Pure Data) where you can add nodes, make connections by simply dragging, change output levels and change node settings via Drawers to which you can add up to three controls for quick access.

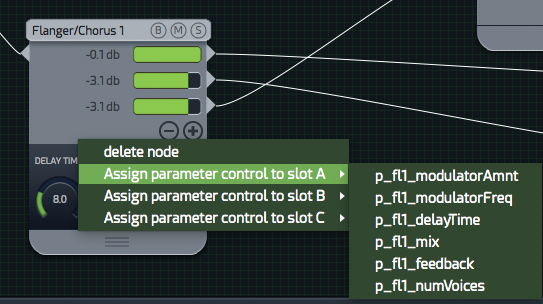
Then you have the bottom panel which either displays the settings of the currently selected node…

Output…

Or the Mixer View which displays input level, final output level, and all individual node output levels as well as solo, mute and bypass controls.

One thing I would note is that the graph behind the latency values on the output panel appears to just be eye-candy as it didn’t appear to change.

Other than that I’m hard pushed to anything about the GUI that I don’t like as it’s so well laid out and intuitive.
Presets
The presets bundled with Dehumaniser II come in four categories: Growls and Roars, Dialogue and Experimental. It’s hard to evaluate them effectively because unlike a synth preset where everything you hear comes from the synth engine, so much of what you get out of Dehumaniser II depends on what you put into it. That being said, there’s a decent variety in there that offer a good starting point if you’re in a hurry or don’t want to start designing from scratch. There were a few presets I came across that I found to be immediately satisfying and effective, but most you’ll have to play with to get something usable. I did encounter one bug where from initializing to selecting a user preset, I’d sometimes still hear the default “Angry Beast” preset.
The Nodes
Dehumaniser II accepts one input which comes up via the Track Input node. While this might be limiting, you can load multiple instances within your DAW and run them in series or parallel if you want more complex FX combinations than a single instance can afford. You could also place an instance on an aux track and send from multiple sources to it.
Your input can be split eight ways, each with an adjustable level (true of all node outputs). Adding and removing outputs is done via the + and – buttons. Currently you can only remove outputs in reverse sequential order which I could see being a little irritating.
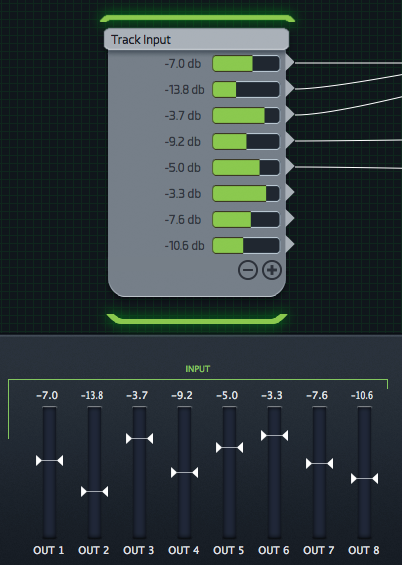
The Output node is the end destination before the signal heads back to your DAW and has an in-built five-band EQ, Limiter, Dry/Wet control, Stereo Spreader and a latency indicator.

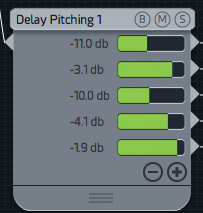
Dehumaniser II has nine processing nodes: Pitch Shifter, Delay Pitch Shifting, Granular, Noise Generator, Scrubbing Convolution, Flanger/Chorus, Ring Modulation, Spectral Shifting and Sample Trigger. As mentioned, you are limited to two instances of each node in an instance (except for the Noise Generator of which you can only have one). Each node can accept multiple inputs and has up to five outputs, each with adjustable gain.
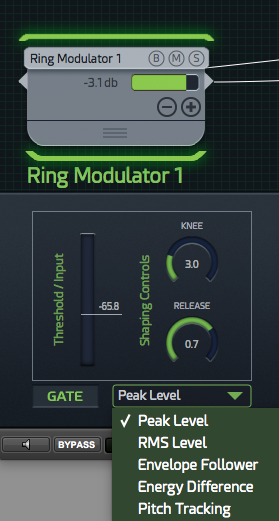
Each of these nodes has an input gate…
A five-band parametric equalizer…
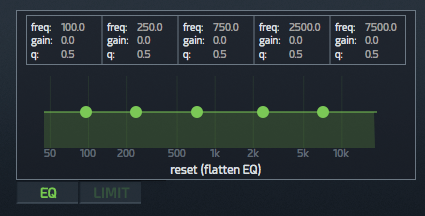
And a limiter…
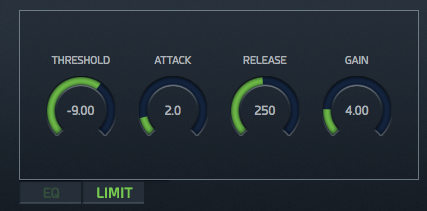
Each node features a Mute, Bypass, and Solo button on the top panel of each node and in the Mixer View.
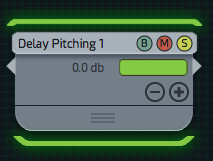
Mute will mute all outputs from the node. Bypass will bypass the node passing the un-processed signal through to the output. Solo will solo the output of the node, allowing you to preview the signal from one particular node in the signal chain. This happens pre-fader so the level doesn’t reflect the number of outputs or their gains. Probably for the best if you have all five outputs maxed out! The Solo function is a good tool to use if you’re wanting to learn how some of the presets are functioning as you can deconstruct them at verious stages to see how the results were achieved.
The Ring Modulator node is fairly typical with controls for depth and rate. It would have been nice to be able to alter the modulation wave shape which is a sine wave.

The Pitch Shifting node has three discreet controls for Octaves, Semitones and Cents. It’s best used for static changes as these controls are all split off from each other and don’t offer fluid movement between values.

I did find a bug where sometimes the effective pitch values when initialized were pitching up or down and weren’t represented in the dials which all read “0”.
The Noise Generator node offers Bandwidth, Center Frequency and Resonance controls.

The Granular node offers decent control over a granular playback effect with Grain Pitch, Grain Pitch Variation, Grain Size, Max Voices, Density and Density Variation controls. I did find some inconsistencies with these which I’ll get to later but it’s a pretty cool effect.

The Sample Trigger node allows you to trigger playback of specific samples, either form the bundled library or from your own collection as part of the instance. You can set it to trigger at a specific amplitude threshold using the gate and set whether the sample plays forwards or backwards though you can’t specify a specific region of the sample to play.
It also offers two pitch shifting options; Varispeed, where pitch and time are affected, or Pitch Shifting where the pitch of the sample is shifted while maintaining the same duration.
This node also has a cool convolution control via a Mix dial where you can adjust whether you hear just the sample, or the sample convolved with the input.
You can also set a Delay which applies to the output of the node. The playhead representing which part of the sample you’re currently hearing wont account for this however.

The Flanger/Chorus node is fairly standard fare combining short and long delays with controls over Modulation Depth, Rate, Mix, Feedback, Modulation Waveshape, Number of Voices and Delay Time.

The Delay Pitching node acts like a typical delay but with successive increases or decreases in pitch on each delay cycle. It can create some pretty interesting textures. It has Pitch controls and also control for the Delay Time and Feedback.

The Scrubbing Convolution node is pretty cool and original. It took me a while to get my head around what it was doing but essentially, the input sound level dictates what gets convolved, and you dictate the section of a sample that gets convolved with the input depending on the amplitude level of the input.
From the manual: “Vertical values correspond to sample position. The low position is the sample’s start, and the high is the end. Horizontal values correspond to the input sound level.”
So for instance, a vertically rising line essentially means that the greater the amplitude, the further the node will scrub through, so you would be convolving higher amplitude material with samples further into the sample file.

It’s a really interesting idea though I feel it might benefit from a bias control or the ability to dictate a specific range, as well as control over the grains.
The Spectral Shifting node is another unique one. It works by pitch shifting specific spectral frequency bands that sit within a specific amplitude range which you dictate.

I feel like it would be nice to have a randomization element and the ability to set more than one range, but I haven’t seen anything else quite like it and it can produce some interesting textures when combined with other effects.
Overall, I find the Spectral Shifting and Scrubbing Convolution to be the most conceptually compelling and original nodes, but you’re probably not going to get what you’re looking for by working with just a single node. The most interesting results come form the combination of various nodes in series and parallel to achieve the effect you’re after.
You of course could request any number of new effects to be added but I do feel like Dehumaniser II is missing a simple delay node just to hold a signal for a specific duration. I could see this being really useful. You can fake it using the Delay Pitching node, but only up to the delay’s maximum 5000 setting which due to what appears to be an error in the code, confusingly isn’t 5000ms (as the manual suggests, which would be 5 seconds) but instead appears to be 500ms (0.5 seconds), so this workaround is pretty limited.
One other addition I think would be helpful is the ability to save individual node settings presets so you could recall settings from one preset into another without having to manually note them down and copy them over.
Automation
Dehumaniser II allows you to automate pretty much any parameter which displays as a dial. This allows for fine tuning an effect through a performance.
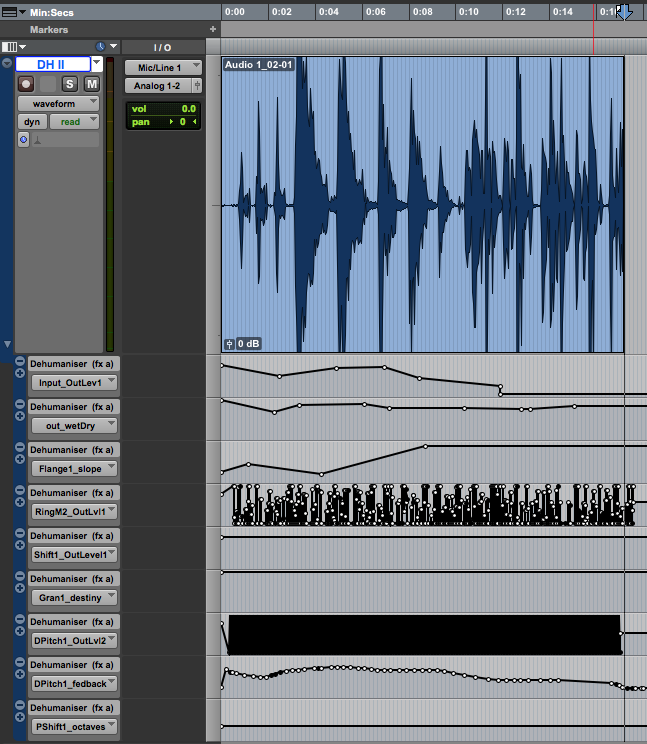
It’s worth noting that some automation parameters have inconsistent names with the GUI. For instance, the Knee and Release of the gate for a given node is referred to in the plugin automation window within Pro Tools as the Slope and Decay respectively.
Issues and Documentation
Through my time exploring Dehumaniser II and its documentation, I found several issues, inconsistencies and errors beyond those mentioned in the review thus far. In general, I found the documentation to be a little lacking and sometimes inconsistent. For instance, some modules have a description for every parameter while others just get an overview sentence for the whole node.
Most of the settings within Dehumaniser II fail indicate what their number values equate to which I found frustraighting. Most of the time you can figure it out, but even when I did, I had issues. As mentioned previously, the Delay Pitch Shift’s Delay Time maximum setting supposedly represents milliseconds but I tested it and it actually is off by a decimal place. If this is indeed an error, it’s fairly substantial as were it to be fixed to accurately extend the rage from 0.5 seconds up to the intended 5 seconds, it could have a big impact on user’s existing patches.
Again with the Delay Pitch Shift, the manual says the feedback range is from 0% to 200%, yet the value only goes from 0 to 100 and doesn’t indicate whether or not this is a % or just an arbitrary value. It’s possible therefore that 50 = 100%, but through testing it I’ve determined that 100 does = 100% and therefore, contrary to the manual, you cannot set a value beyond 100%.
Granular’s Grain Pitch values goes from 0.00 to 5.00 but nowhere does it indicate that 1.00 is equal to the original pitch, I just found that out through testing. This is also inconsistent with the other pitch shifting tools which use Octave, Semitones and Cents to delineate the applied shift. The adjacent Grain Pitch Variation control for instance goes from 0 to 100 which the manual says represents a semitone value. It’s all rather hard to keep track of without any visual indication.
This lack of clarity often extends to the naming of the controls themselves. I’ve already mentioned the inconsistency with the Gate automation parameters. In addition, the Scrubbing Convolution node’s Mix control doesn’t feel all that descriptive of its function. If set to 0, you’ll just hear the result of the convolution process of the input with the sample. Set to 1.00, you’ll just hear the granular scrubbing.
Similarly, Sample Trigger’s Mix control I would have read to mean the mix between the sample and input source or the mix of the pitch shift and dry sample, but it instead is a control to adjust whether you hear just the sample, or the sample convolved with the input (a cool effect to be sure), yet there’s no mention of convolution in the GUI for this node.
Granular’s Density value isn’t specified in the manual and the adjacent setting, Density Variation, appears to be described incorrectly as “The limit of random variation on the “Grain Separation”. The value is given in milliseconds. A random value between zero and the “Grain rate variation”, will randomly be added or subtracted to the value of “Grain Separation”. There is no control called Grain Separation, as such I suspect they mean to say Density and Density Variation.
Final Thoughts
There’s no doubt that Dehumaniser II is a powerful tool and has already proven itself in the real world. However, I find there’s a contradiction in its design. Everything (including the hefty price) seems to suggest this is a sophisticated, precise, professional tool. And yet, I feel that as a “professional” with a grasp of core DSP concepts, settings and values, I’m denied so much information I would consider important if I were looking to execute specific actions.
Due to this, I feel like the design in some way encourages a play-around approach which would be fine were there not already more basic versions of the software available and were it not to represent such a significant investment. I suspect most people looking to spend this much on a plugin might be looking for more informational feedback from the controls Dehumaniser II currently offers.
Dehumaniser II also bears evidence of its continued development which whilst appreciated in the form of added features and stability, I did find some of the issues I came up against made for a beta-like experience.
On the positive side, if you’re looking to create big creepy, scary monstrous voices, tiny goblins or glitchy robotic AI, Dehumaniser II will probably get you most of what you need faster than anything else, and in one package. It’s deceptively deep and would reward experimentation and continued self-education through trial and error.
To circle back to the start of all this, it’s really about what you put in. I do casual voice-acting work on the side and have a background in live theater so I have no inhibitions when it comes to belting out silly sounds. If you’re more introverted and less willing to make a fool of yourself, you might need to rely more heavily on using library content as input or finding a willing volunteer. The potential use of this in a studio context with a professional voice over artist is especially promising. Combined with parameter control via something like TouchOSC I could see this being a hugely powerful tool to get raw performance material that actually tailors itself to the processing which you would otherwise apply after the fact (I could even see it being used dynamically in live theater). And as for the future, there’s talk of integration with WWise and FMOD down the line which are also exciting possibilities to consider.
For those interested in purchasing Dehumaniser II, there’s a 30% off Black Friday Deal that will expire at 11:59pm PST November 30th 2016.
I’m on a budget and I really need to make monster sounds but I can’t spend money. may you suggest me a diy way/alternatives to make it please? thx a lot if possible!
Elder Thing VST on xoxox.net is a compltely different animal (yukyuk) than this but with some adjusting can create beastly sounding roars as well as chirps and more. I see that in the review it’s mentioned clear gui and quick solutions, i’m not sure that Elder Thing qualifies but i get a lot of useful material with it:
http://www.xoxos.net/shop.html#elderthing