
So you’ve just been handed in some video with no sound in it, and you’ve been asked to finish your work later tonight. Yet you don’t know whether you’ll be able to accomplish your task on time or not.
This is a more common situation than you may think.You might have been in the industry for quite some time, and so you’ve developed your own methodology. If you haven’t, or you’d just like to polish your own, then this tutorial will help you speed up the process of moving around Pro Tools.
Spotting on the fly
Sound designers are usually familiar with spotting sessions. They are meant to be sessions where you can spend whole day/s looking for potential moments of sound design glory. That’s cool! However, some of us don’t really have the time for that. Budget constraints, poorly organized projects, or video guys being late (sorry, I had to say it), those are only some real life examples. Instead, you’ll need to be quick and effective.
The main thing here is to identify the important events. Once you make sure your basics are covered, then you may have some time for extra designing. Some advice, start by finding a way of naming things. By naming I mean a proper nomenclature, something that means something to you instantly. I’ll give you an example:
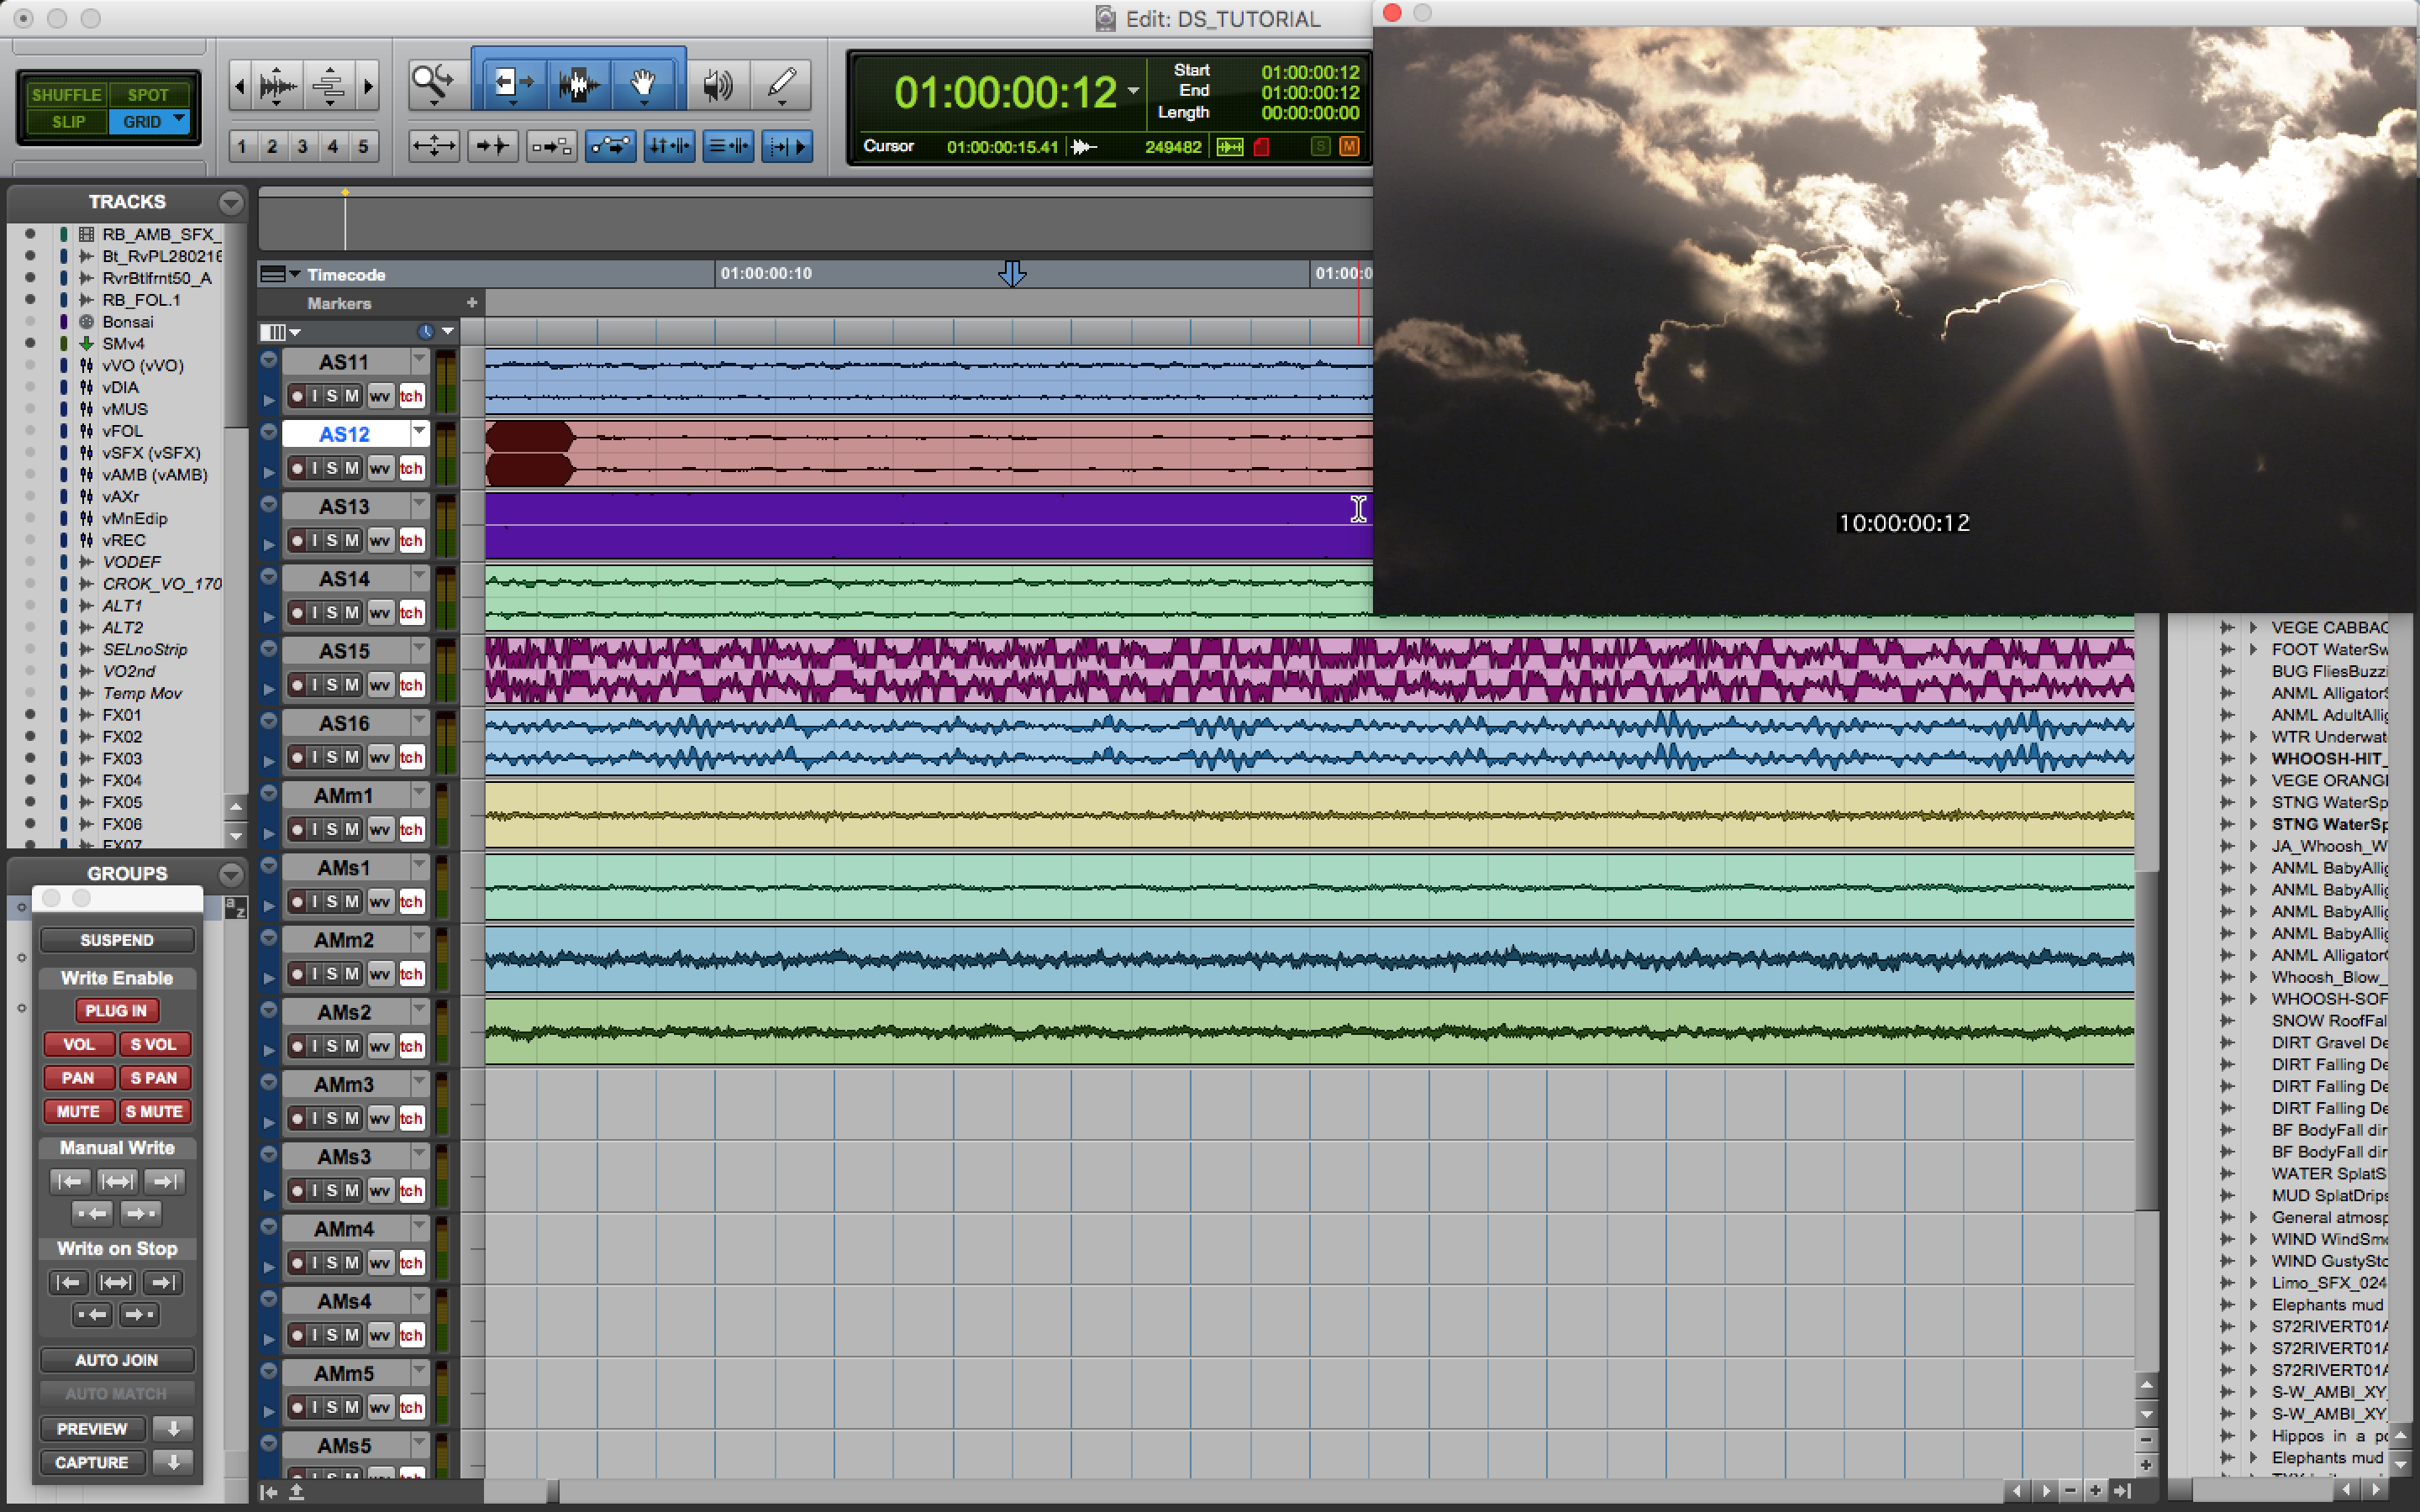
Instead of giving it a generic name such as “sky”, think of it as if it was a sound effect. You need a quick description so that you know what’s there when you come back. Also, place your marker on the FIRST frame of the scene to get faster access to it. It’ll disrupt your viewing, yet you don’t have enough time to do two or more visions!
Names, names, names
We all use things such as AMB for ambiences or FX for sound effects, yet you might try another nomenclature. For instance, using EXT and INT will help you find outdoor and indoor ambiences visually quicker. Also, you may add if it’s night or day as an extra search parameter. Finally, describe any other element that you think is particular to this scene. As for the picture above, the result could be:
EXT SKY WIND DAY
It may seem like a lot of work, but believe me, it’s worth it. Just place a marker at frame one on that scene. This simple step will help you in keeping your session clean and tidy, and you’ll be able to move around nicely. Another example:
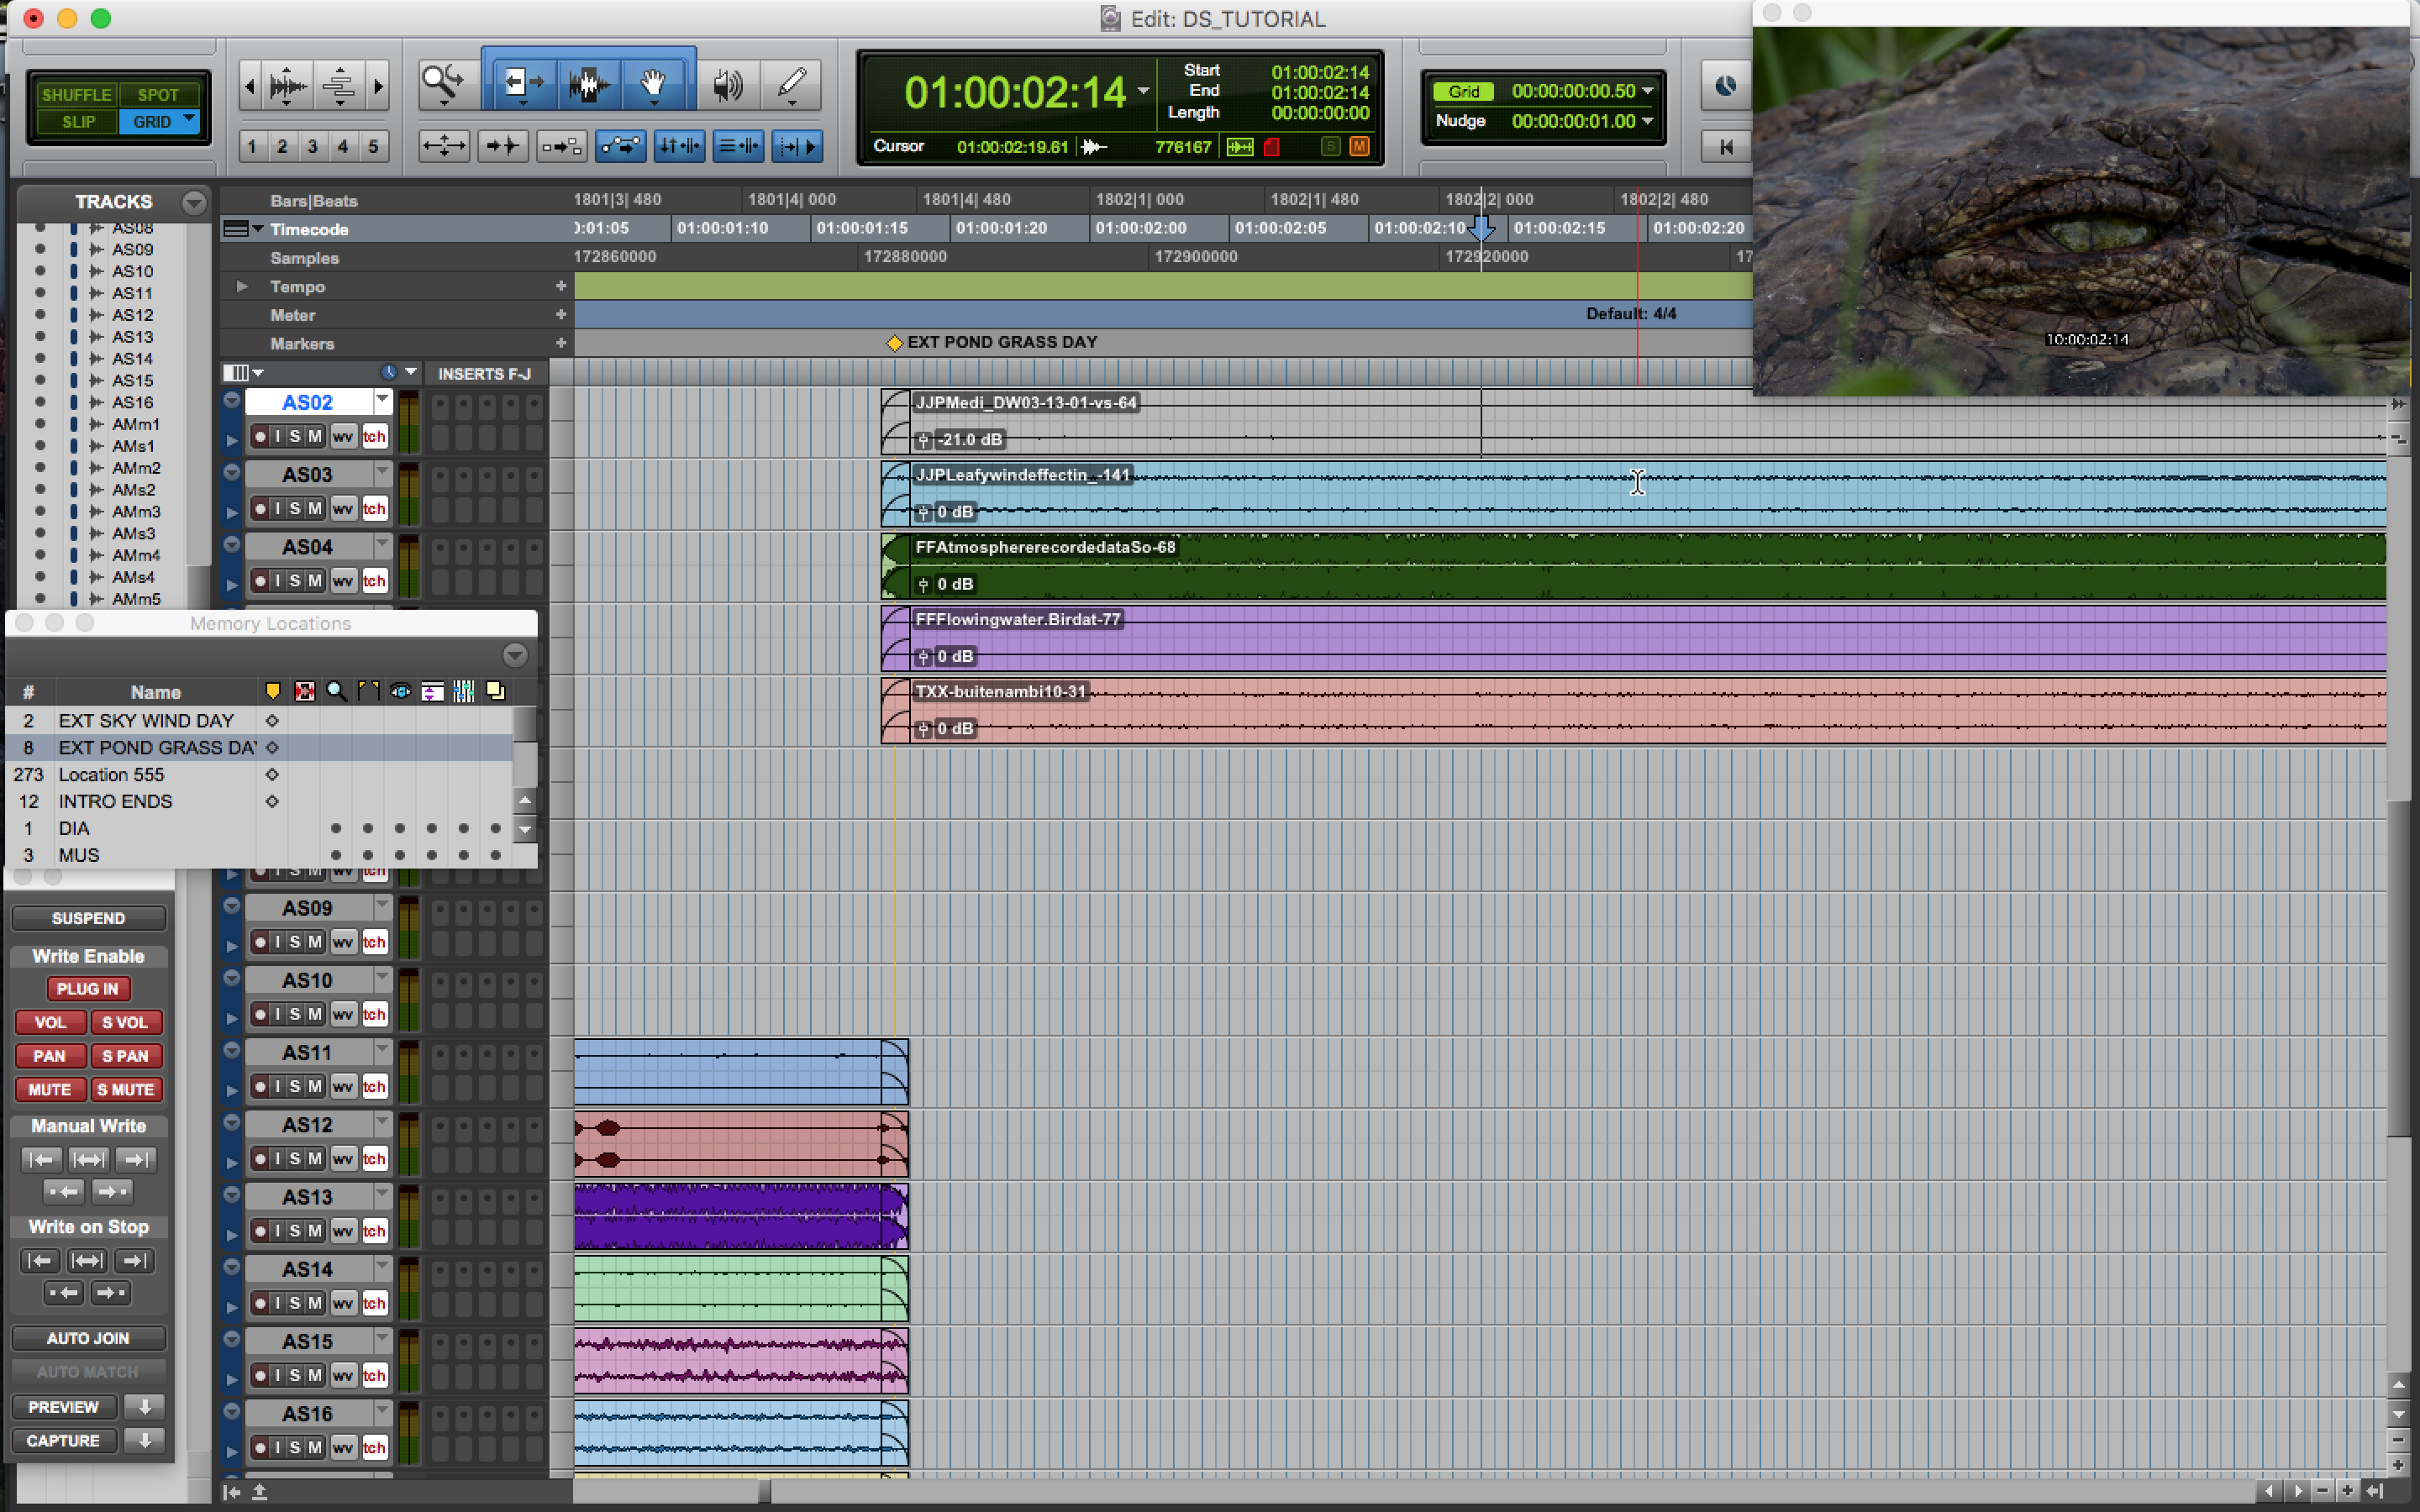
This scene takes place near a pond. There’s a crocodile having a rest on a side in the middle of the day. A nice set of keywords could be as follows:
EXT POND GRASS DAY
You may be asking yourself: “Why do I need this!?” Well if, for whatever reason, you find yourself in the same scenario ahead on your film, then you might want to reuse some of these elements. This way you can locate them in no time. You won’t need to be scrolling around, trying to remember where that scene took place.
What about sound effects? Same criteria would apply. You may label them as “FX” instead, followed by the main character and the action:

Here we have a hippo covered by water and turning his big head around. We might want to highlight this action with our design, in which case we can label it as:
FX HIPPO SPLASH WATER
This will allow us to have this animal and this action better located in the session. Indeed, it seems like an event that can happen again! Our productivity increases by keeping this event at hand. We are leaving as much time as possible for the design itself, rather than equally sharing it with the technicalities of the process.
Finding locations
Your spotting session is done. Now you’ve started building up some scenes. There’s this one where another crocodile is watching a reptile from a similar spot as the one we described above. How to find it? Pro Tools does not include a search bar in the “Memory Locations” window. But don’t panic! There’s a feature in Pro Tools called “Export Session Info as Text”:

If we select “Include Markers”, then we’ll have our session markers exported as a text file. This means we’ll be able to move through our scenes easily by using the search feature inside our text editor:

Using the same crocodile scene example, labelled as “EXT POND GRASS DAY”, we can now find our marker, which is number “8” in the picture. Pro tools allows us to go to markers quickly by typing “.8.”, where ”.” refers to the the dot key sitting in the numeric pad, and “8” is the memory location where we want to go to.
Lightning speed EQing
Once we are able to move around faster, we can focus on the EQ. If you are lucky enough you might have a nice mixing desk sitting in your gorgeous studio, or even a great controller surface such as AVID’s S3 or S6, which allows moving through EQs easily. However, this is not always the case. You may find yourself wasting a lot of time clicking on each track’s EQ, or clicking and de-clicking the “Preview” automation button.
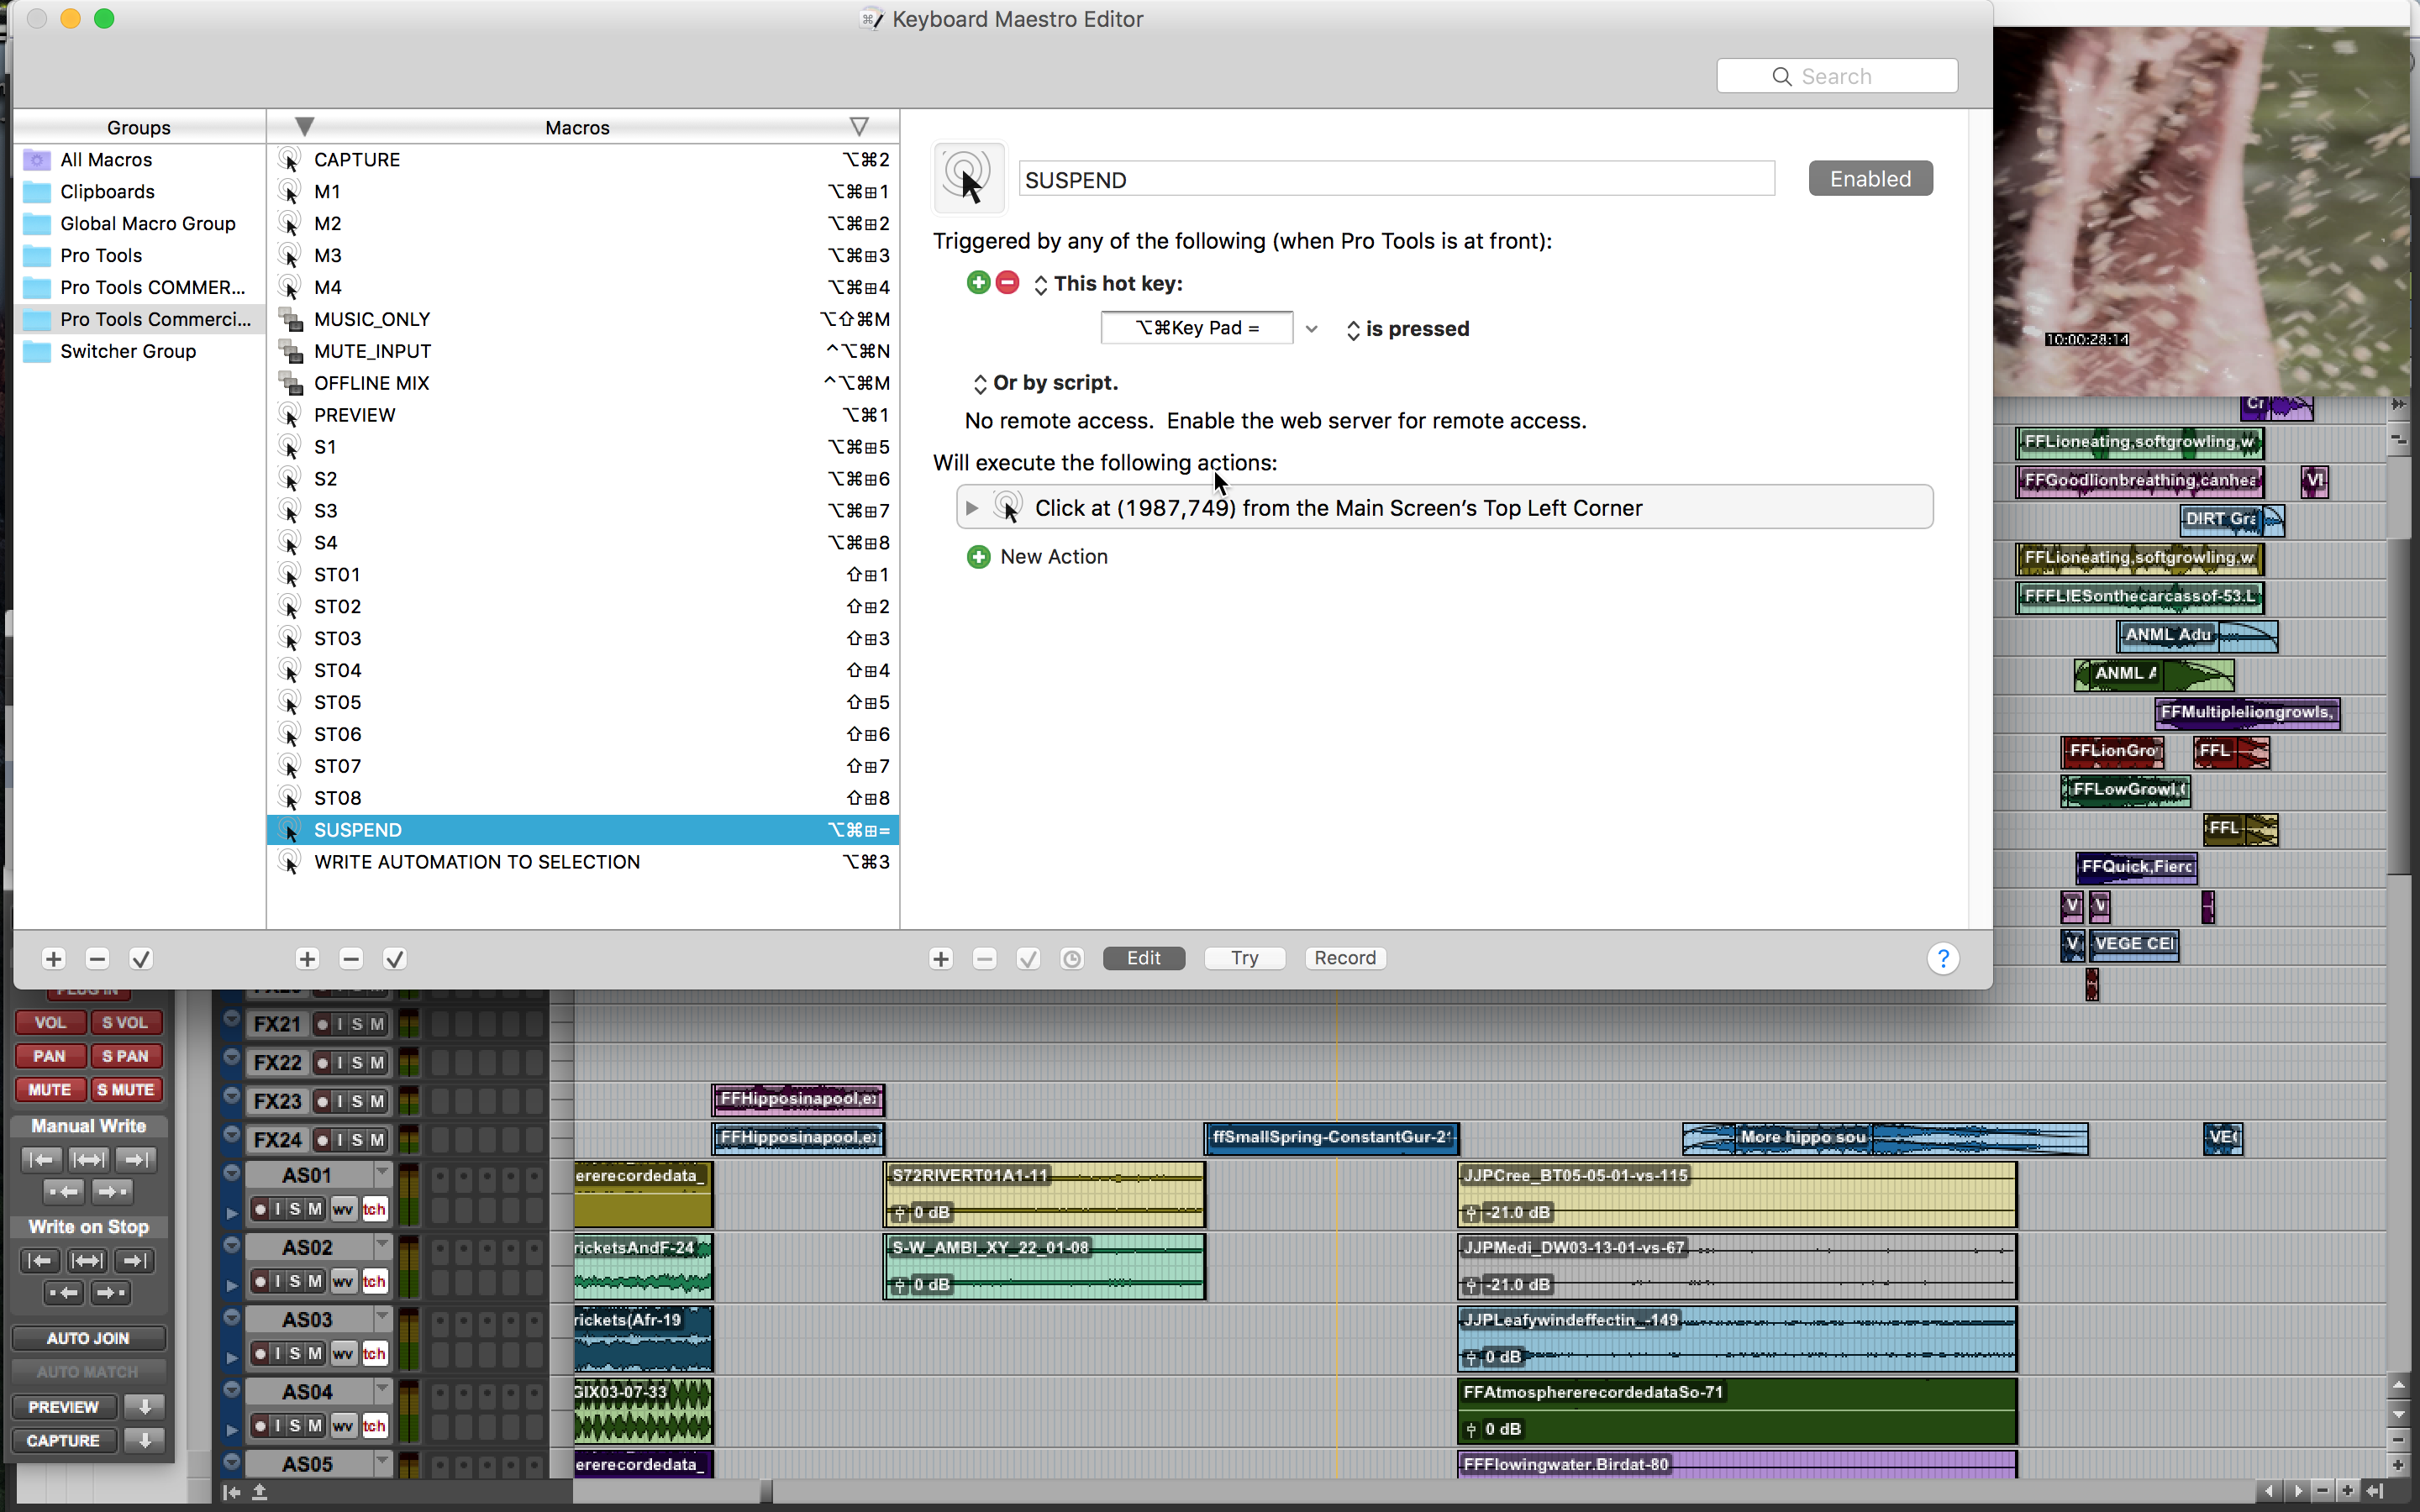
There are 3rd party programs that can do this job for you. You’ve possibly read about a little software called “Quickies”, or “Keyboard Maestro” (my personal favourite!). These are just examples of many. From personal experience, use them. It will definitely help, especially in tight situations.
As an example, I don’t need a dedicated button on my desk to open the SFX02 track’s EQ: just by clicking “SHIFT+2”, it will instantly open. Same applies to things like “Suspend” automation, or “Capture” automation, because they are in constant use while editing and designing.
Versatile workflow
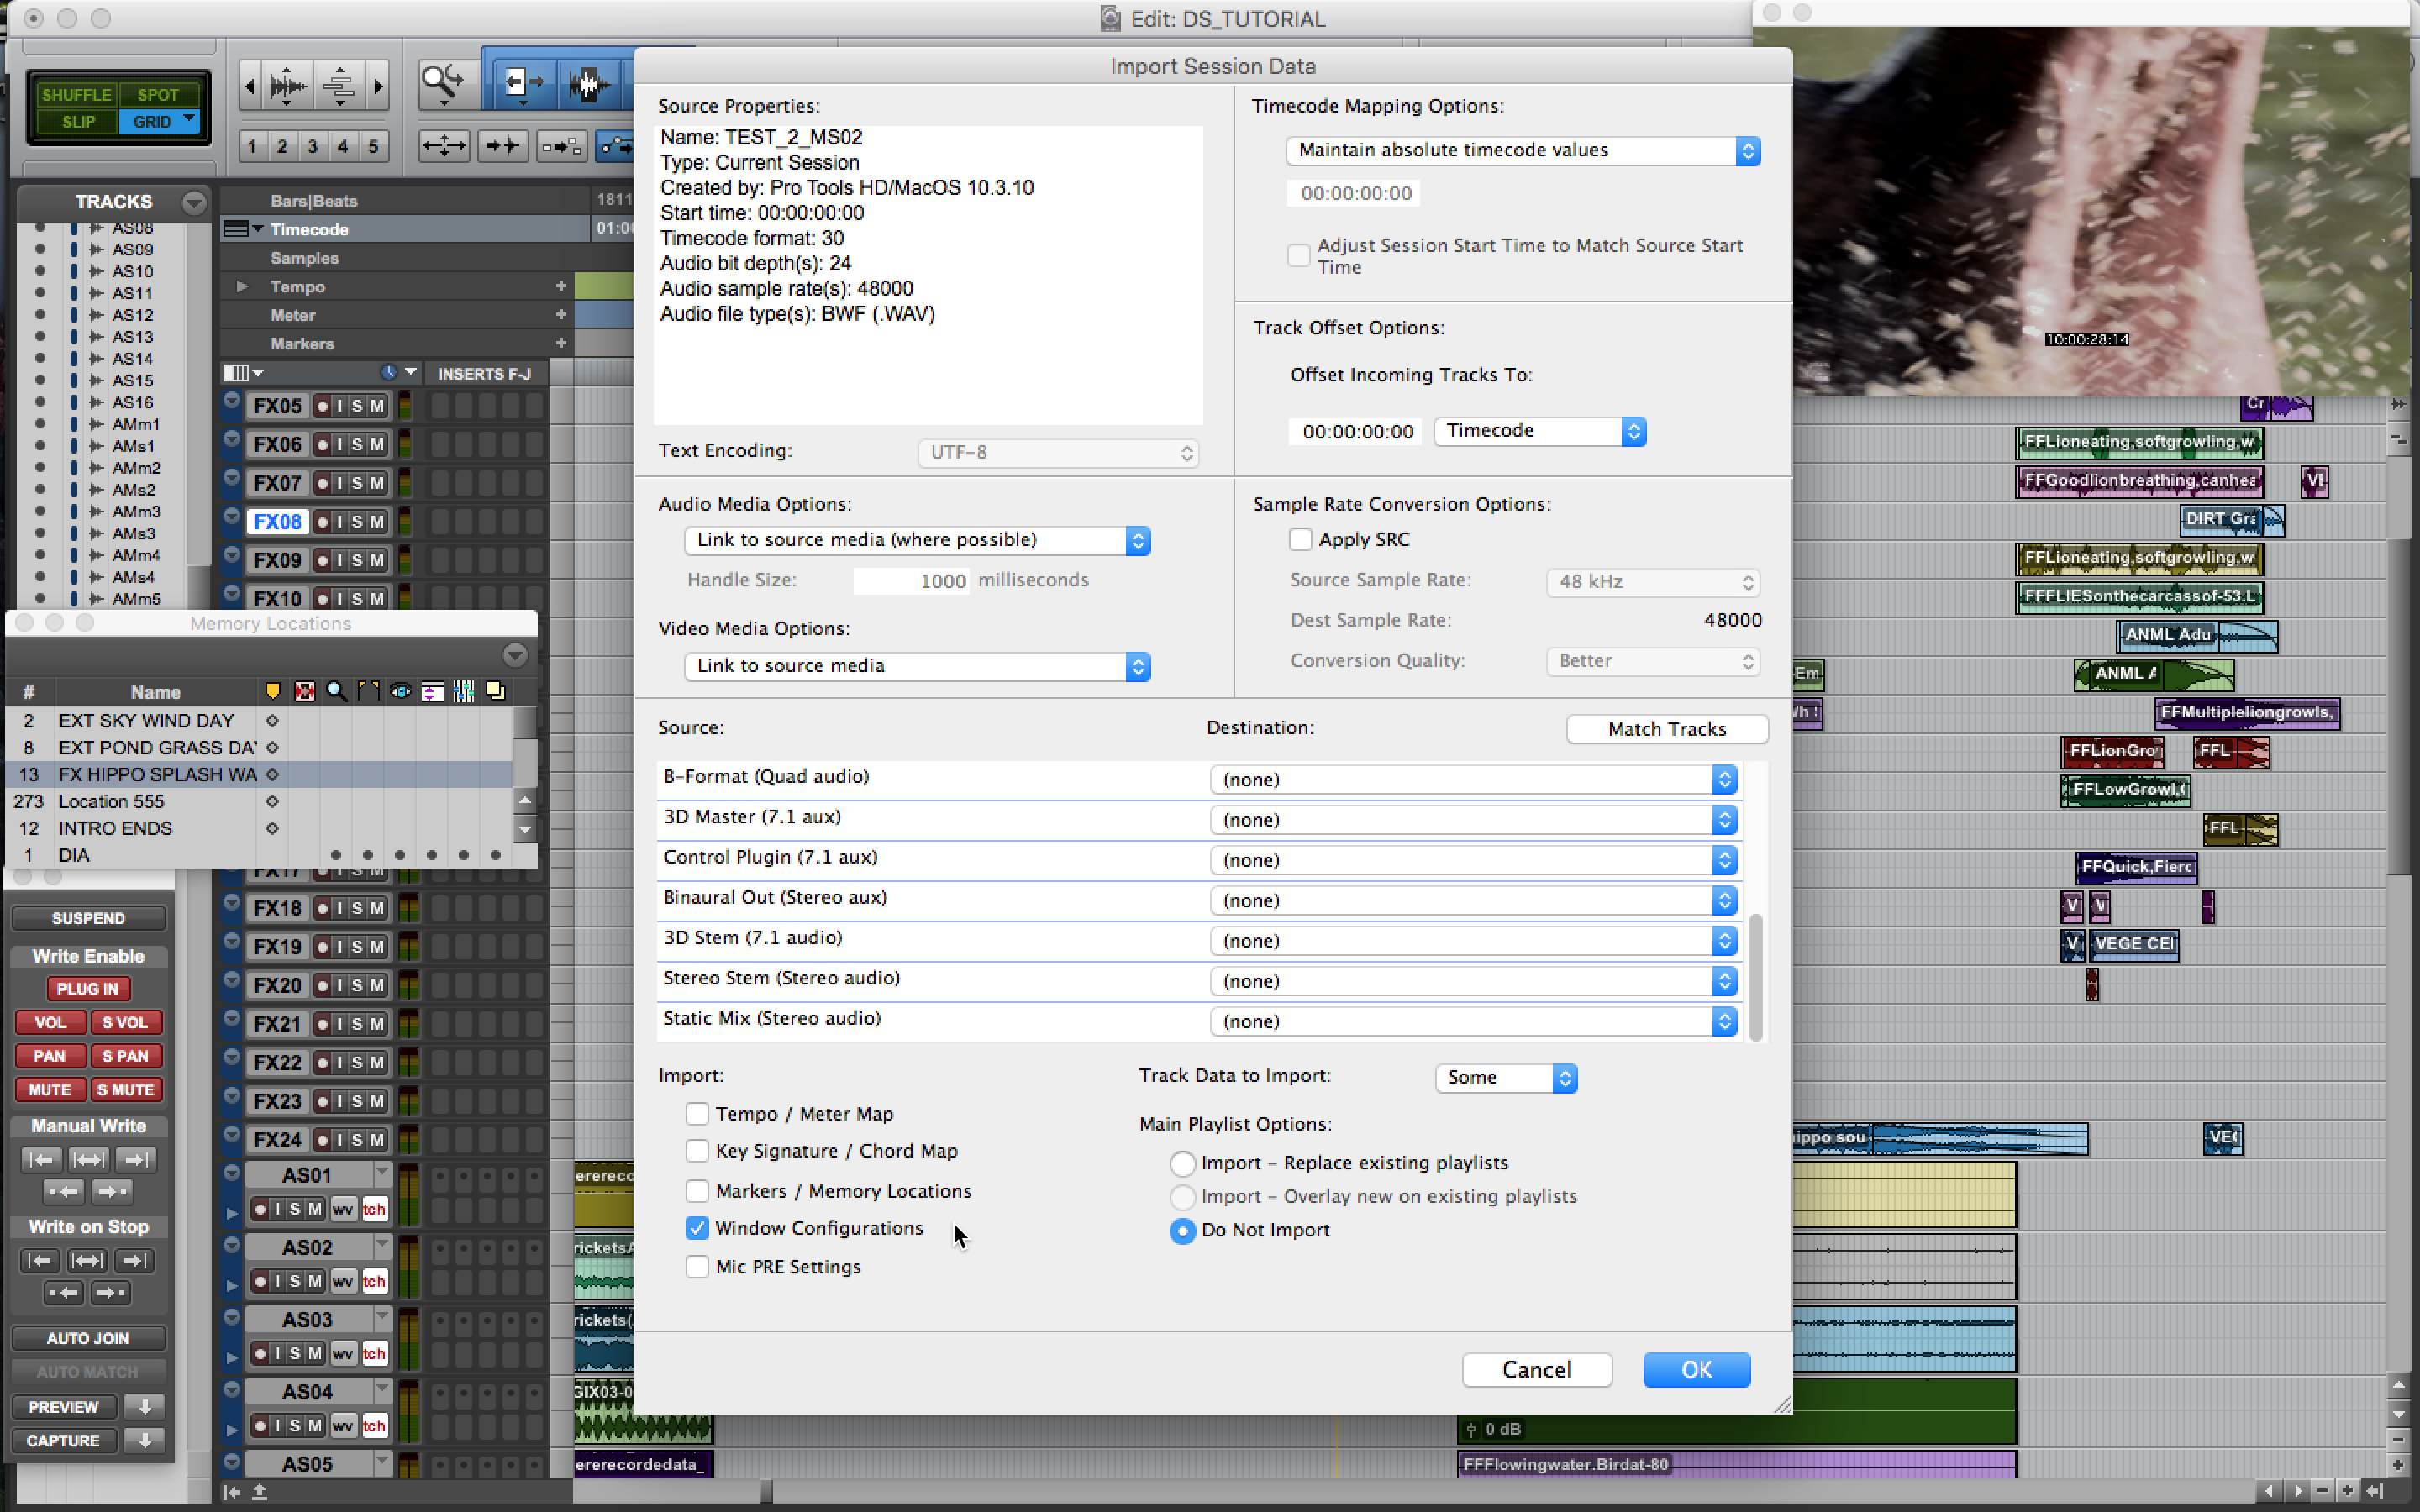
There is a downside to some of these software though: you need the same Window Configuration, as it relies on the position of the windows. Yet this is no big deal. You can save your empty session as a template and there you have it. In the event you’ve been handed in a session by someone else, you may import the Window Configuration only from your session template, located in the “Import Session Data” menu in Pro Tools:
Now you are all set to spend more time on the creative part, which is what we all love. Applying some of these tips will definitely help your workflow, whenever you are pressed for time. Think of it as a double benefit: the next person in the chain will be happy because you produced your quality work on time, plus you’ll find yourself focusing on what seems obviously important: sound design.
nice article!,
Thanks Charles
Great tips! :-)
Glad you found them useful.
This is good stuff, and I can apply a lot of this in the DAW I use as well. Thanks for sharing!
Great information, thanks for sharing. My team started using Keyboard Maestro about 8 months ago, and it has offered us a lot of accelerated operations.
Oops, I didn’t mean that as a reply. It was just supposed to be a comment.
Indeed! it is a great little software. It does the job and it is very stable,
You can indeed.
For the “Finding Locations” section: In Pro Tools, open the “Memory Locations” window under the “Window” menu. You can easily move between locations in this window. When you save a new memory location, you can customize things like selection, zoom settings, configurations ext. So when you click on a memory location in the “Memory Locations” window, those settings are restored.
Hi Dusty, thanks for pointing that out. It is nice to use that feature too, although I use it mostly when I have small sessions. Yet there are sessions where I have, literally, hundreds of markers (Pro Tools 10 allows up to 1000 if I’m not mistaken), and scrolling through them would be a bit of a slowdown in my workflow speed.
This is not the Fastest Workflow for Spotting SFX and Sound Design Work….Cockos Reaper is the best DAW for spotting Sound effects & Sound Design work…Loving Reaper from the day i learnt whatt Reaper can do..,We can make Reaper to do anything,it is fully Customizable…..I also have used Protools for past 5 years i know what it can do and what it cannot do…
Great article Marco! Thanks for sharing. Exporting the Marker info as a text file makes perfect sense – I can’t wait to fit it into my workflow!
Great first article Marco!!!
Great article Marco, I am also a heavy user of Keyboard Maestro. How did you implement the shortcut for “to open the SFX02 track’s EQ: just by clicking “SHIFT+2”, it will instantly open.” Is your mixer always in the same position?
The current version of KM allows for searching an image on the screen so you are not relied on the position of the plugin anymore. Very useful.
Stefan
Good article for the beginners as well! Thanks a lot.