Charles Maynes’ post earlier this month reminded me of an idea I had but never bothered to actually test out…using dynamics processors as envelope generators.
If you’ve ever listened to me rant at all in the last two and a half years I’ve been active in this online community, you’ve probably at some point heard me say, “Compressors don’t make things louder, make up gain does!” I stand by that comment…so much so that I tend to repeat it every couple of months. Technically, I just did it again. Compressors and gates, in and of themselves, don’t make signals louder, they do just the opposite. If you’re using a compressor (and disregarding make-up gain for the moment) it makes a signal softer when it exceeds a given threshold. Gates, for the most part, completely mute signals unless they exceed a given threshold. So, why not use those behaviors creatively?
Let’s start out with a simple example. Let’s turn a compressor into an LFO controlled amplitude modulator.
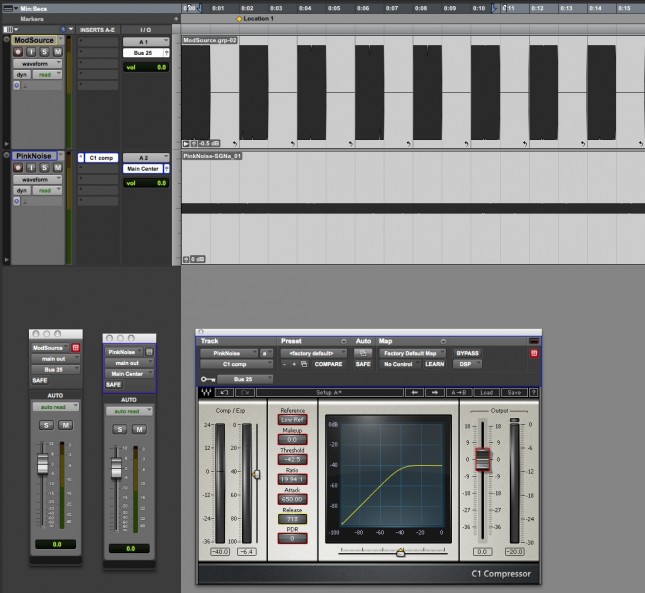
The first thing I did was generate a 1/2 second long segment of pink noise audio, using the Signal Generator plug-in, at full code. I selected that, with an additional 1/2 second of silence, and created a clip/region-group that was a full second (half full-code, half silent). I put that aside for later and created another, 2 second long, clip/region-group with with even length noise and silence components (1 second of pink noise at full code, 1 second of silence). I decided I didn’t want to see the clipping indicators on the tracks light up, so I dropped the clip gain of both region groups by 0.5 dB. [That 0.5 dB has no actual purpose other than to keep red lights from going off…that’s it! It’s not actually going to affect my audio or affect clipping further down the audio chain.] I used the trimmer tool in “loop mode” to drag out that 2 second long clip, making it repeat for about 30 seconds, and then created another track with an equivalent length of pink noise at a more reasonable volume.

I routed the full-code/silence loop to an internal bus, put a compressor on the sustained pink noise channel, and set the key input of the compressor to that the loop’s bus feed. A high compression ratio combined with a little adjustment of a few parameters (attack and release times, threshold), and that compressor was acting like the amplitude modulator I wanted. Have a listen.
[soundcloud]https://soundcloud.com/designingsound-org/pinknoise-lfo[/soundcloud]
I probably could have gotten it to behave a little smoother, but I was mostly concerned with testing out how well it would work. The nice thing is that it isn’t necessary for it to be configured like a typical wave controlled oscillator; it doesn’t have to follow the traditional sine, square, triangle or saw pattern. By adjusting the attack and release times, or by changing the way your loop is constructed, you can change the nature of the oscillation pattern in very complex ways! One note to keep in mind…the bundled compressor with Pro Tools (Compressor 3) doesn’t give you a very wide range of attack and release times. That’s why you see the Waves C1 compressor in the image above.
So, what about generating an envelope?
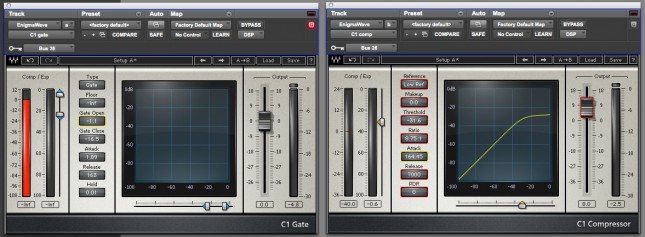
Well, it’s really the same basic principle as above…a short full code impulse feeding a side chain. Only this time we’re going to use two dynamics processors; a compressor and a gate.
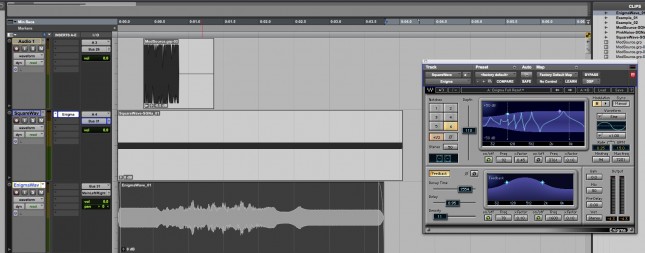
First things first. I didn’t feel like using pink noise again. It worked great for the LFO demonstration, but designing a sound that might actually be useful is more fun. This time, I generated a short square wave signal…once again with the Signal Generator plug-in. I then used Enigma to give it a little character and a bit of a frequency trajectory. I built a setting that generated the kind of sound that I wanted, set the file to play in a loop, and paused Enigma at the top of its modulation cycle (once I knew where it was). [This is exactly the method I described earlier this week.] I turned off loop-playback, routed the output of Enigma to another track, hit record, started the modulation, and then paused Enigma again once it was in its “trough.”
Here’s what it sounded like after the Enigma pass.
[soundcloud]https://soundcloud.com/designingsound-org/enigmawave[/soundcloud]
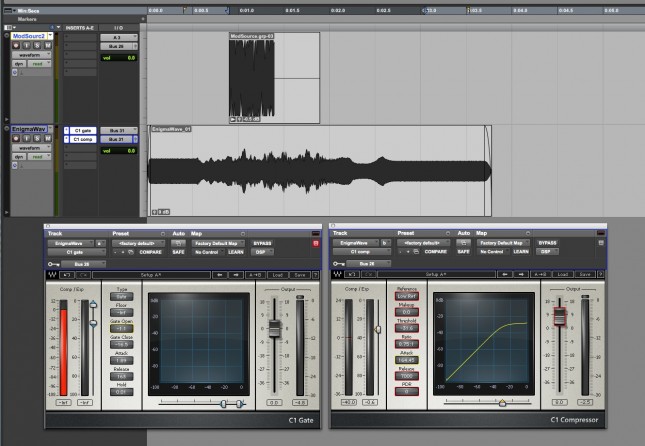
Then I set up a gate followed by a compressor, with both keyed to the 1/2 second of pink noise I built way back in the beginning, and placed that side-chain source about where I wanted my final sound to start.
The attack times of the gate and compressor controlled the “attack” and “decay” times of the final sound. The gate did not begin to release until after the 1/2 second of pink noise ended; the length of the pink noise effectively defining the “sustain” of the new sound. The release time for the gate was the release time of the overall sound, while the release time for the compressor was set so that it would remain active (attenuating the signal) until after the gate had fully closed again…keeping the sustain and decay somewhat consistent. With these two processes, you can create your own custom ADSR envelope for whatever sound you’re building. Here’s what this one sounded like.
[soundcloud]https://soundcloud.com/designingsound-org/scifi-pulse[/soundcloud]
Remember that just because people use a specific type of plug-in for one task, it doesn’t necessarily mean that’s all it can do. If you take the time to understand a plug-in’s core functionality, you can probably find some creative new ways to apply it.

