Today’s sound world is dominated by the digital audio workstation, and within that domain, the plugin is king. Modern workstations and DSP offer an unmatched level of power and flexibility compared to what was available using physical audio processing hardware. However, a quick look at the burgeoning modular scene shows that there is a renewed interest in hardware for sonic creation and manipulation. Having recently built a small Eurorack system myself, I’ve started to explore ways in which hardware can be incorporated into a primarily in-the-box setup, discovering interesting workflows and countless pitfalls along the way.
Why Use Hardware?
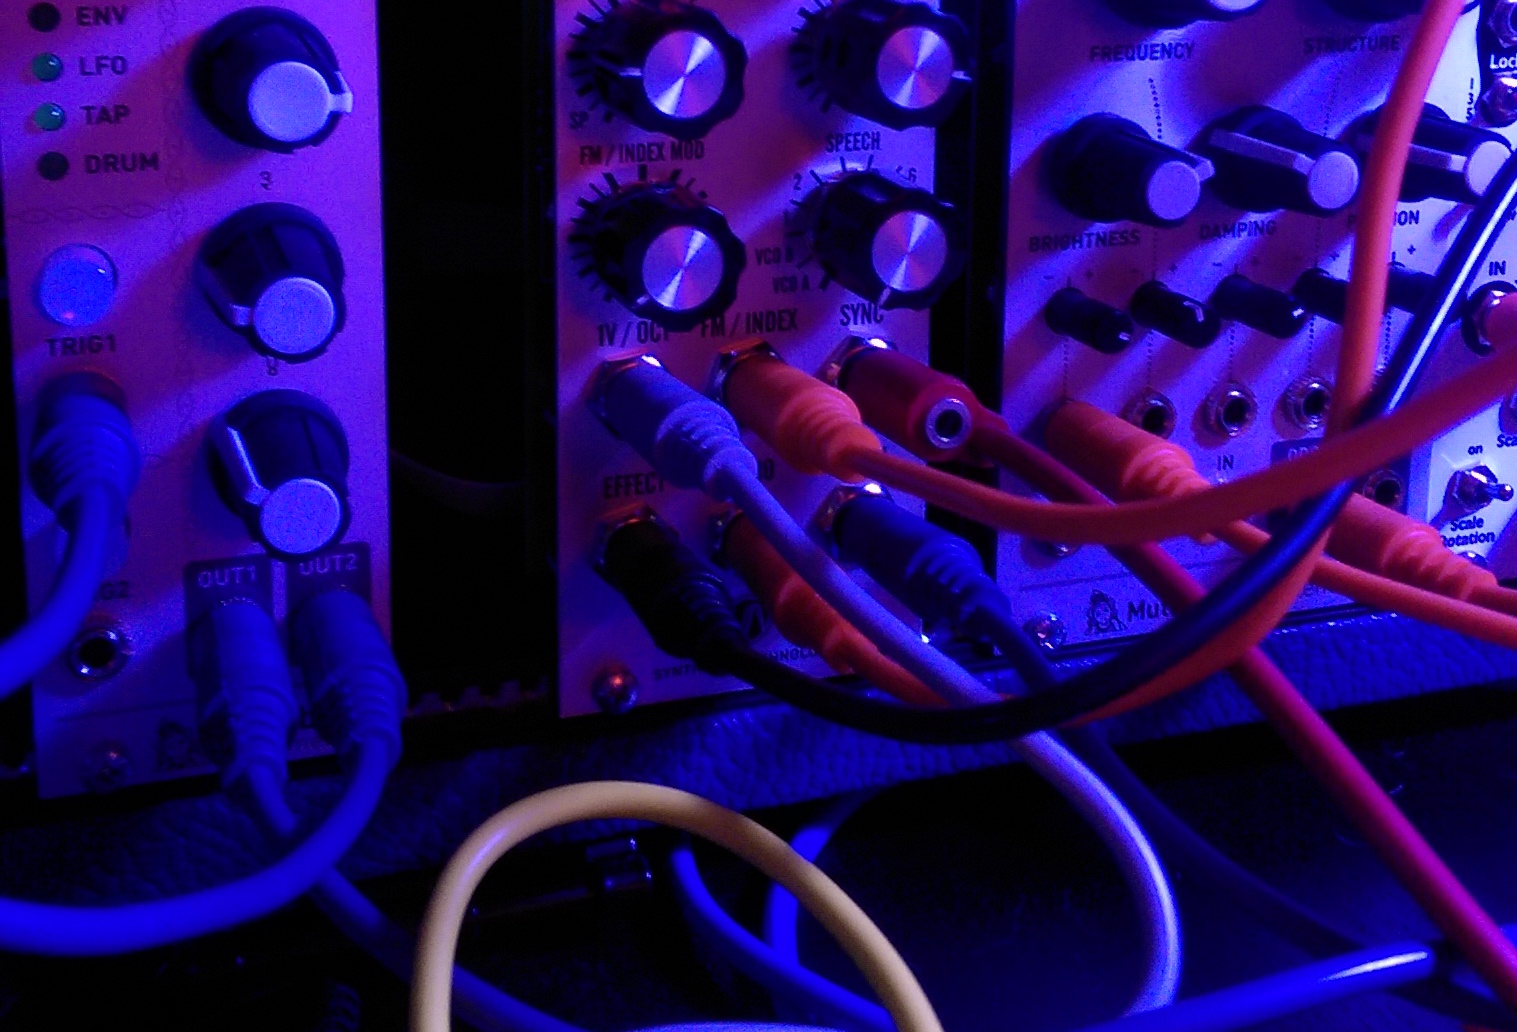
Part of what draws me to hardware, especially Eurorack modular, is the unique sonic palate it offers, and while there are many plugins that can do a lot of the same kinds of processing, having the ability to simply reach out and tweak a knob or re-patch the signal instantly lets you work quickly. While there are countless hardware emulations in plugin formats, many with a sonic quality nearly indistinguishable from the hardware counterpart, at the end of the day it is still often a mouse-driven interface. In some cases, the recreation of hardware can be limited in such a way that it becomes hard to use as you’d like; for example, while convolution reverb plugins like Altiverb and Space may come with impulse responses of classic reverbs, those IRs inherently have the settings of a patch baked-in, meaning that certain parameters cannot be changed.
There is one major issue with using external processing hardware; recalling settings is not a quick and easy process, and sometimes can’t be achieved at all, thanks to the quirky nature of analog circuitry. Some hardware can be controlled/recalled via your DAW, either by way of MIDI control/SysEx dumps or controller plugins, but that isn’t the norm.
Setup
Before patching the hardware into your interface, you need to determine what the correct operating levels are. Professional audio equipment will typically operate at +4dBu line-level, while some hardware may run at -10dBV (a great overview of what this all means can be found here). Modular operates a much higher levels, measured in Voltage peak-to-peak (notated as Vpp); at nominal level, a +4dBu audio signal would be roughly 3.472 Vpp, while Eurorack gear can be as hot as 10 Vpp or more. With +4dBu/-10dBV gear, it can be as simple as flipping a switch on your interface, while modular gear will typically require additional hardware to boost the incoming signal to the hotter modular levels and attenuate the output to be more audio interface-friendly.
After determining the correct gain staging, you can connect your hardware and route it within your DAW. There are essentially two ways of working with external hardware: as an insert or a send/return.
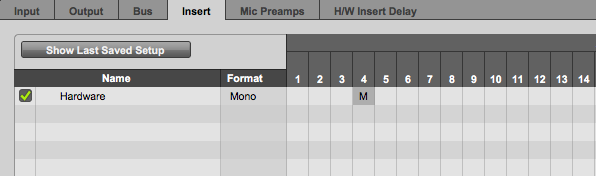
Using hardware as an insert, at least in Pro Tools, is nearly identical to working with a plugin as an insert, minus the automation and GUI. To set up a hardware insert, go to the I/O Setup window, click the “Insert” tab, and create a new insert path with the hardware’s inputs and outputs selected. Note that Pro Tools expects the inputs and outputs are matched for Hardware Inserts, meaning that if your hardware is plugged into Input 1, the output should be Output 1. The system should automatically compensate for delays, but you can manually adjust the delay in the “HW Insert Delay” pane if the automatic compensation isn’t working.
Once you’ve set up the routing, simply go to a track’s Inserts, select the “i/o” submenu, and click the newly created hardware insert. This method is ideal for using dynamics processors or denoisers, but there are some limitations: You cannot bypass the hardware insert, and you are limited to using that insert on one single channel unless you use it on an Aux bus.
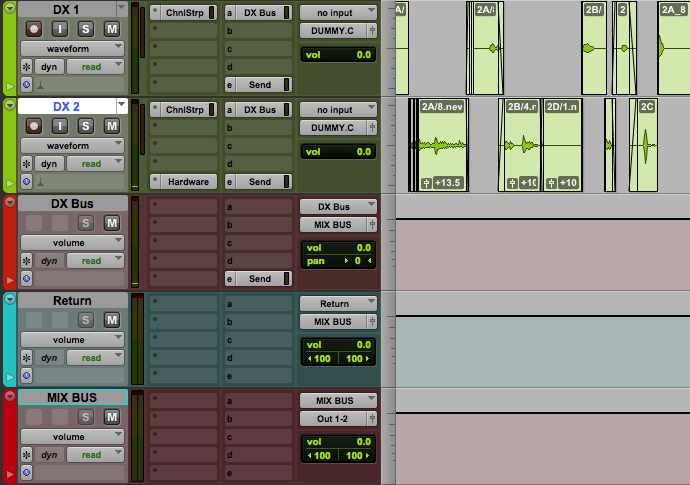
Using the hardware in a send/return setup gives you more flexibility and works the exact same way it would with an internal bus path. Instead of a new insert, you create a new send on a track or group of tracks, routed to the interface output going to the hardware. Then create an Aux track with the input set to your interface’s input from the hardware out. You can alternatively create an audio track to record the return from the hardware, depending on your preferred workflow.
Working with Hardware
There are essentially two ways of working with hardware; you can either keep the hardware processing running live at all times, or you can record the processed audio on a clip-by-clip or track-by-track basis. There are strengths and weaknesses to both, and you may find yourself using a hybrid of the two approaches.
Keeping the hardware live in your signal chain is the simpler of the two options, allowing you to make immediate adjustments to the processing as you would with any plugin. However, with most hardware these changes are not recalled with the session, and they cannot be automated over time. If any changes are made, they will have to be manually recalled when reopening the session, and with quirky old analog gear (or modular setups in general), there’s no guarantee that you’ll ever be able to full reproduce the settings if you have to recall an older session. Live hardware in the signal chain also makes session exchange between users and systems nearly impossible; everything will have to be nearly identical for a session with live hardware patching to work correctly between multiple setups.
Printing the results of hardware processes fixes nearly all of the session exchange and recall issues, but loses the flexibility of making quick changes to processed audio. This requires a bit of extra setup, using sends to route audio from a track with an insert to a record track or simply setting the return of your hardware to the input of an audio record track.
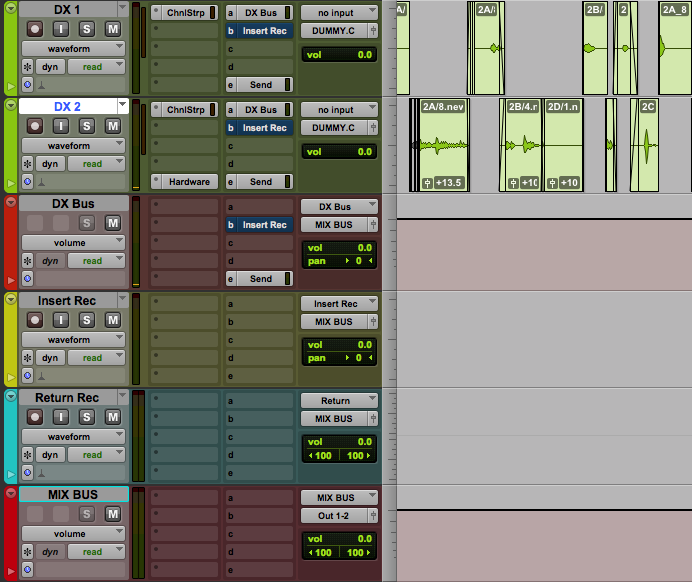
If you’re not careful, it’s possible to have both the live audio going through the insert AND the printed processed audio playing at the same time. To mitigate this, you can use re-assigns to switch the track outputs between the main bus and the hardware record tracks. Alternatively, you can create dedicated tracks that have outputs routed directly to the hardware sends, moving the audio to be processed into those tracks and only having the recorded return audible.

Both workflows require that any changes to hardware settings be documented should you ever need to go back in and alter the processing later. Keeping a notebook of parameters or using the classic “Polaroid” (or the more modern “Cell phone camera”) method are the best ways to keep track of various settings. There are some exceptions to this; as mentioned before, there are some hardware units that can be automated and recalled by use of MIDI or special control plugins. Specialized software can be used to control devices without MIDI parameters, as well; Expert Sleepers Silent Way and MOTU Volta are two packages that can generate control voltages inside your DAW, and using an audio interface with DC-coupled outputs, can bring a certain level of control to your analog hardware.
Adding audio hardware to a DAW setup isn’t something that everyone needs or even wants; to many, the move to digital is a simplifying of the setups and processes by which we work. However, if you’re looking for something a bit more “outside the box”, hardware offers an interesting and (in the case of the ever-growing world of modular) experimental approach to creating brand new sounds.